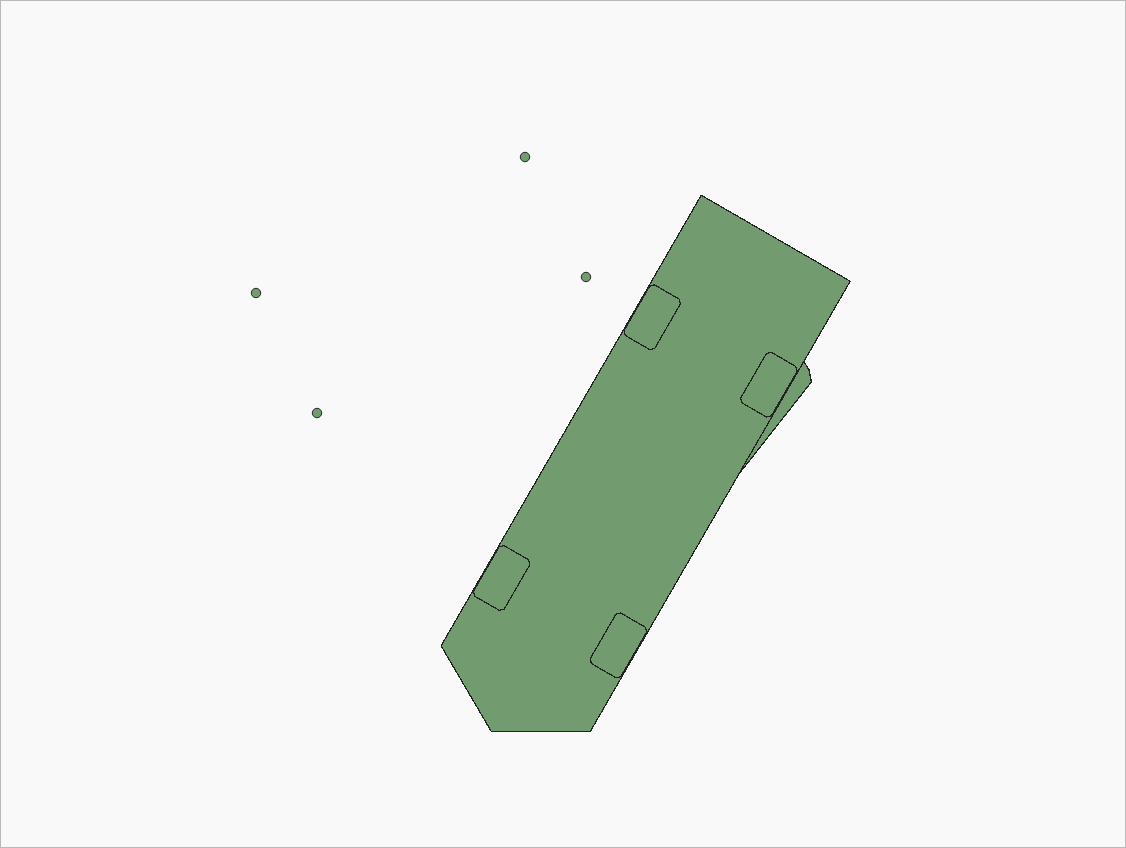
Before developing my code, I digitized your points and polygon from your image projected with EPSG:32612. However, there is some distortion because I didn't use exact proportions from your image (I estimated it with the naked eye so, there will be some slightly discrepancies in final result). Initial layers can be observed in following image:
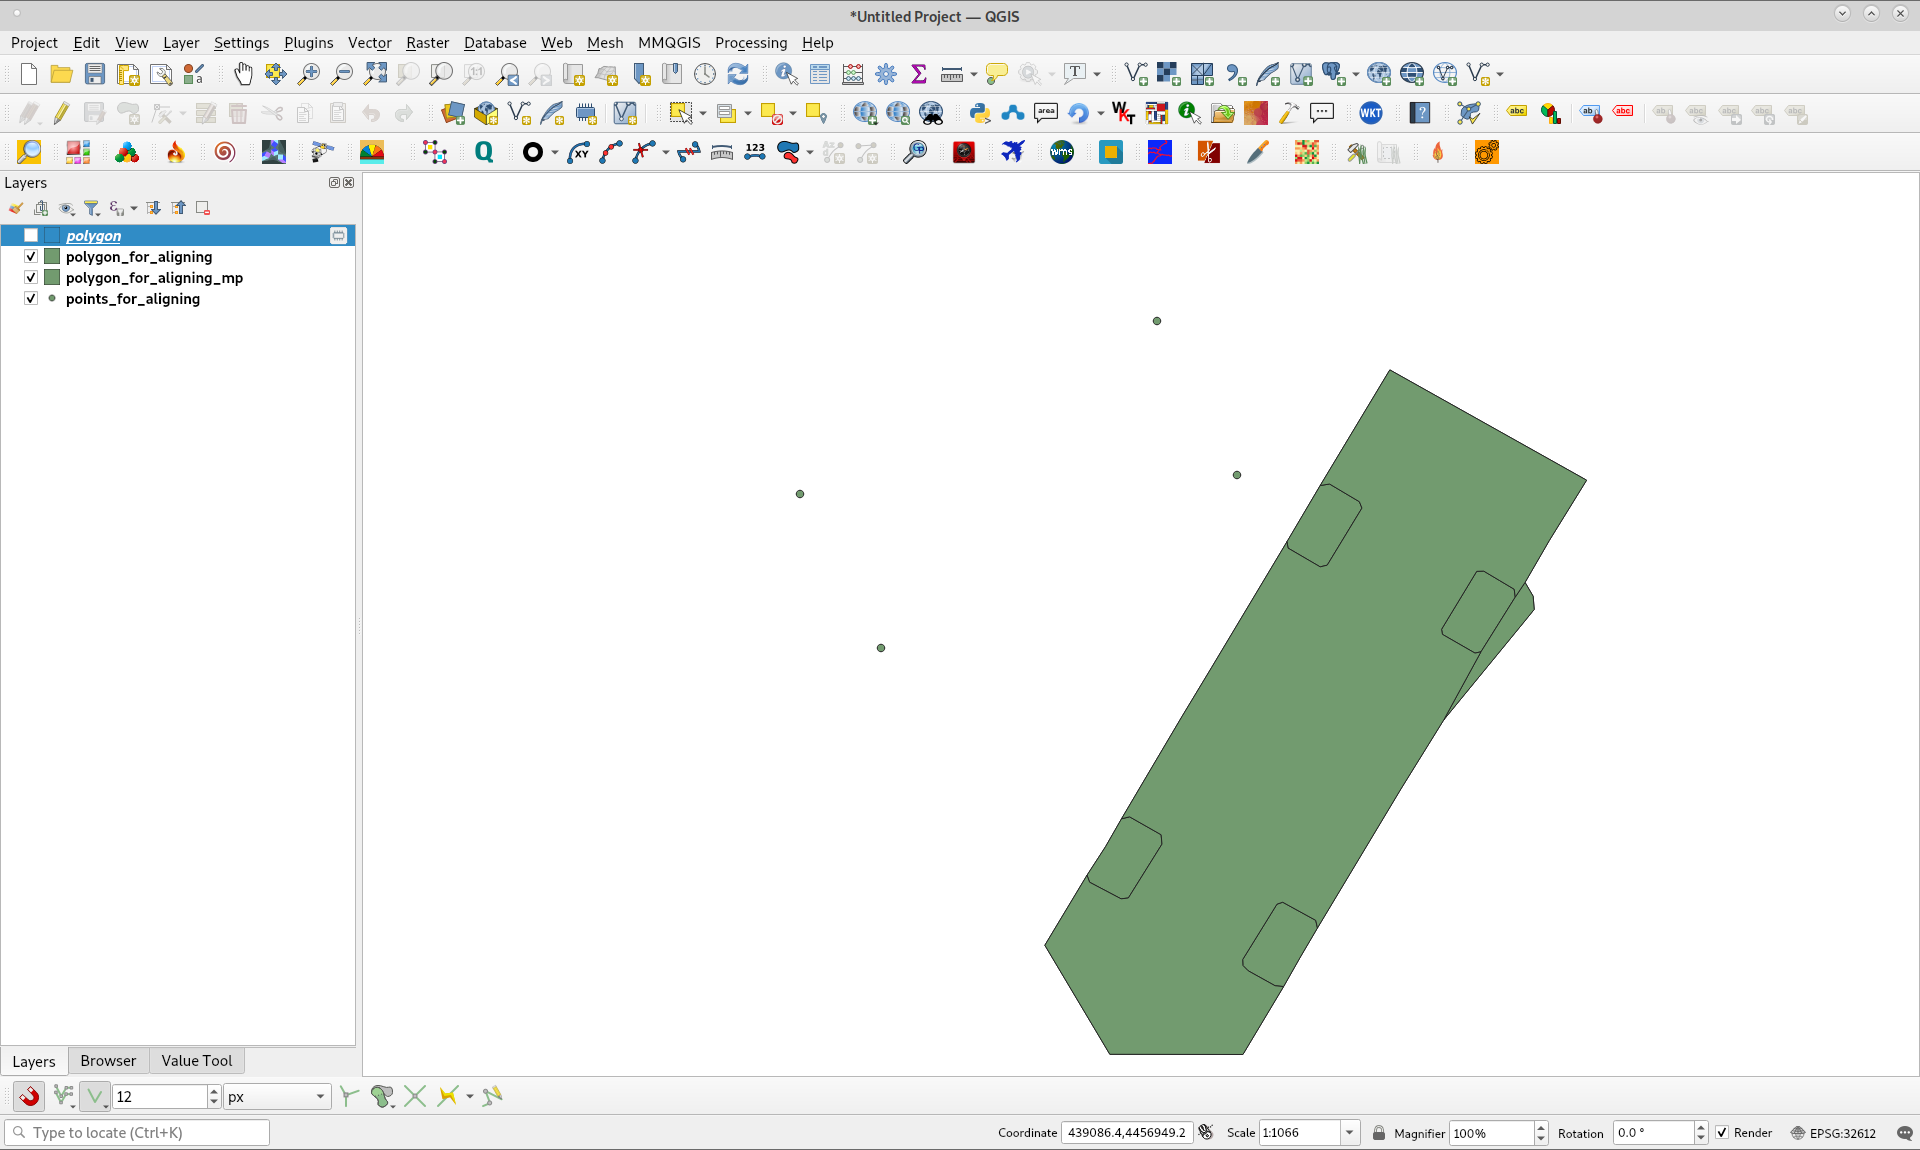
You pointed out a Multipart polygon geometry but, I also used a singlepart polygon geometry for better estimating centroids of mini polygons (in my case, features 0, 1, 3, 4). However, rotated and translated geometry was Multipart polygon. Rotation angle corresponds to the same for producing a minimum bounding box (angles variable produce two values: adequate value is positive angle; angles[0]). For translation (offset calculation), initial point corresponds to centroid of four mini polygons and final point is centroid of four target points.
Complete code looks as follows:
import numpy as np

registry = QgsProject.instance()

points = registry.mapLayersByName('points_for_aligning')
polygon = registry.mapLayersByName('polygon_for_aligning_mp')
polygon_sp = registry.mapLayersByName('polygon_for_aligning')

feat_pol_sp = [ feat for feat in polygon_sp[0].getFeatures() ]

centroids_mini_pol = [ feat_pol_sp[0].geometry().centroid(),
                       feat_pol_sp[1].geometry().centroid(),
                       feat_pol_sp[3].geometry().centroid(),
                       feat_pol_sp[4].geometry().centroid()]

points_geom = [ feat.geometry().asPoint() for feat in points[0].getFeatures() ]
angles = [ 90 - points_geom[i].azimuth(points_geom[i+1]) for i in range(len(points_geom)-2) ]

feat_polygon = [ feat for feat in polygon[0].getFeatures() ]

xf = [ point.x() for point in points_geom ]
yf = [ point.y() for point in points_geom ]

xi = [ point.asPoint().x() for point in centroids_mini_pol ]
yi = [ point.asPoint().y() for point in centroids_mini_pol ]

points_centroid = QgsPointXY(np.mean(xf), np.mean(yf))
points_centroid_mp = QgsPointXY(np.mean(xi), np.mean(yi))

geom = feat_polygon[0].geometry()

xoff = points_centroid.x() - points_centroid_mp.x()
yoff = points_centroid.y() - points_centroid_mp.y()

geom.rotate(angles[0], QgsPointXY(np.mean(xi), np.mean(yi)))

geom.translate(xoff, yoff, 0, 0)

epsg = points[0].crs().postgisSrid()

uri = "Polygon?crs=epsg:" + str(epsg) + "&field=id:integer""&index=yes"

mem_layer = QgsVectorLayer(uri,
                           'polygon',
                           'memory')

prov = mem_layer.dataProvider()

feats = [ QgsFeature() for i in range(len(feat_polygon)) ]

for i, feat in enumerate(feats):
    feat.setAttributes([i])
    feat.setGeometry(QgsGeometry.fromWkt(geom.asWkt()))

prov.addFeatures(feats)

registry.addMapLayer(mem_layer)
After running it in Python console of QGIS 3.18, I got following result. Slightly observed discrepancies were product of bad proportioned image used for digitizing my vector layers.
Editing Note:
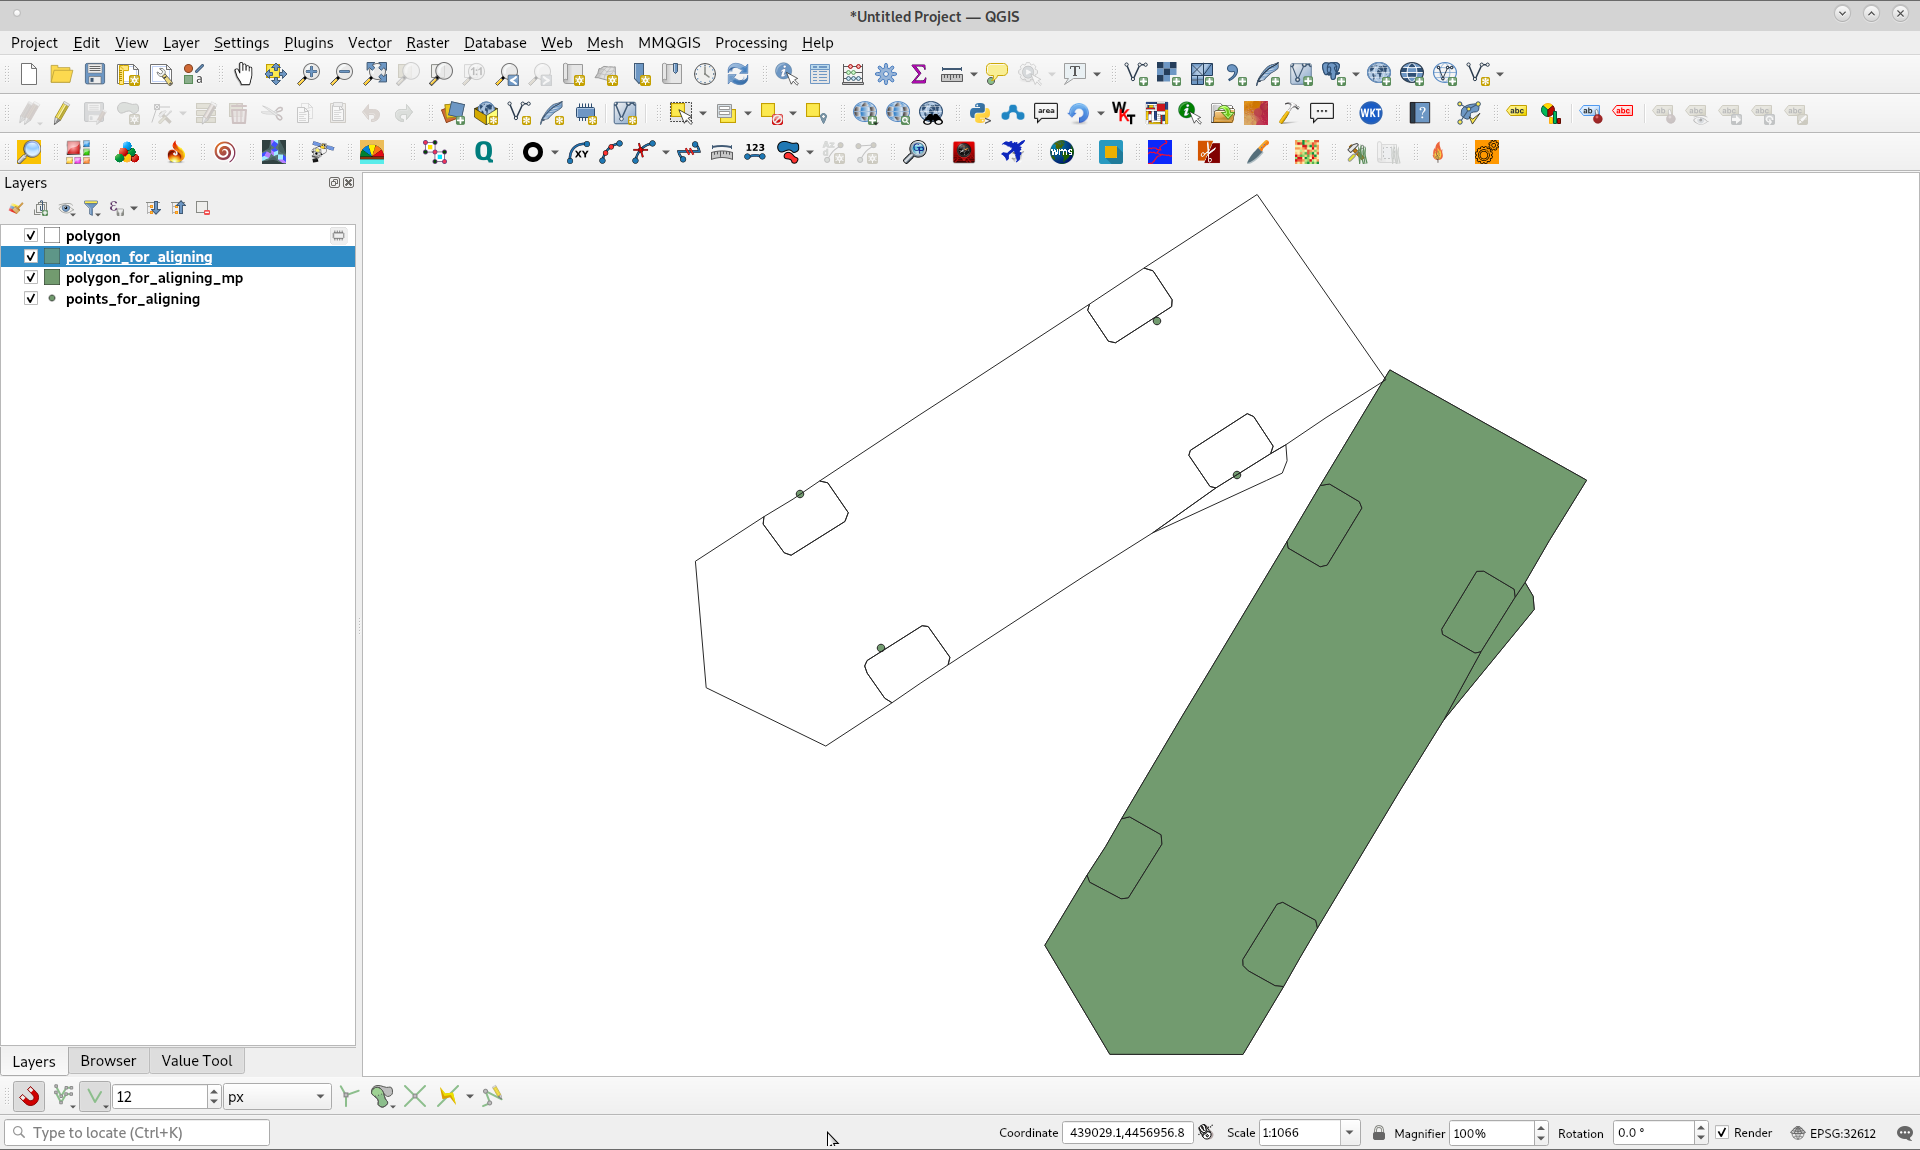
Rotation angle is related to the difference between points azimuths and centroids of mini polygons. I digitized vector layers again from source image, with its correct proportion, and result was similar to above image with azimuths only based in target points. However, when in the code was used angles2[0] - angles[1] instead angles[0] as rotation angle, result was as expected (following image).
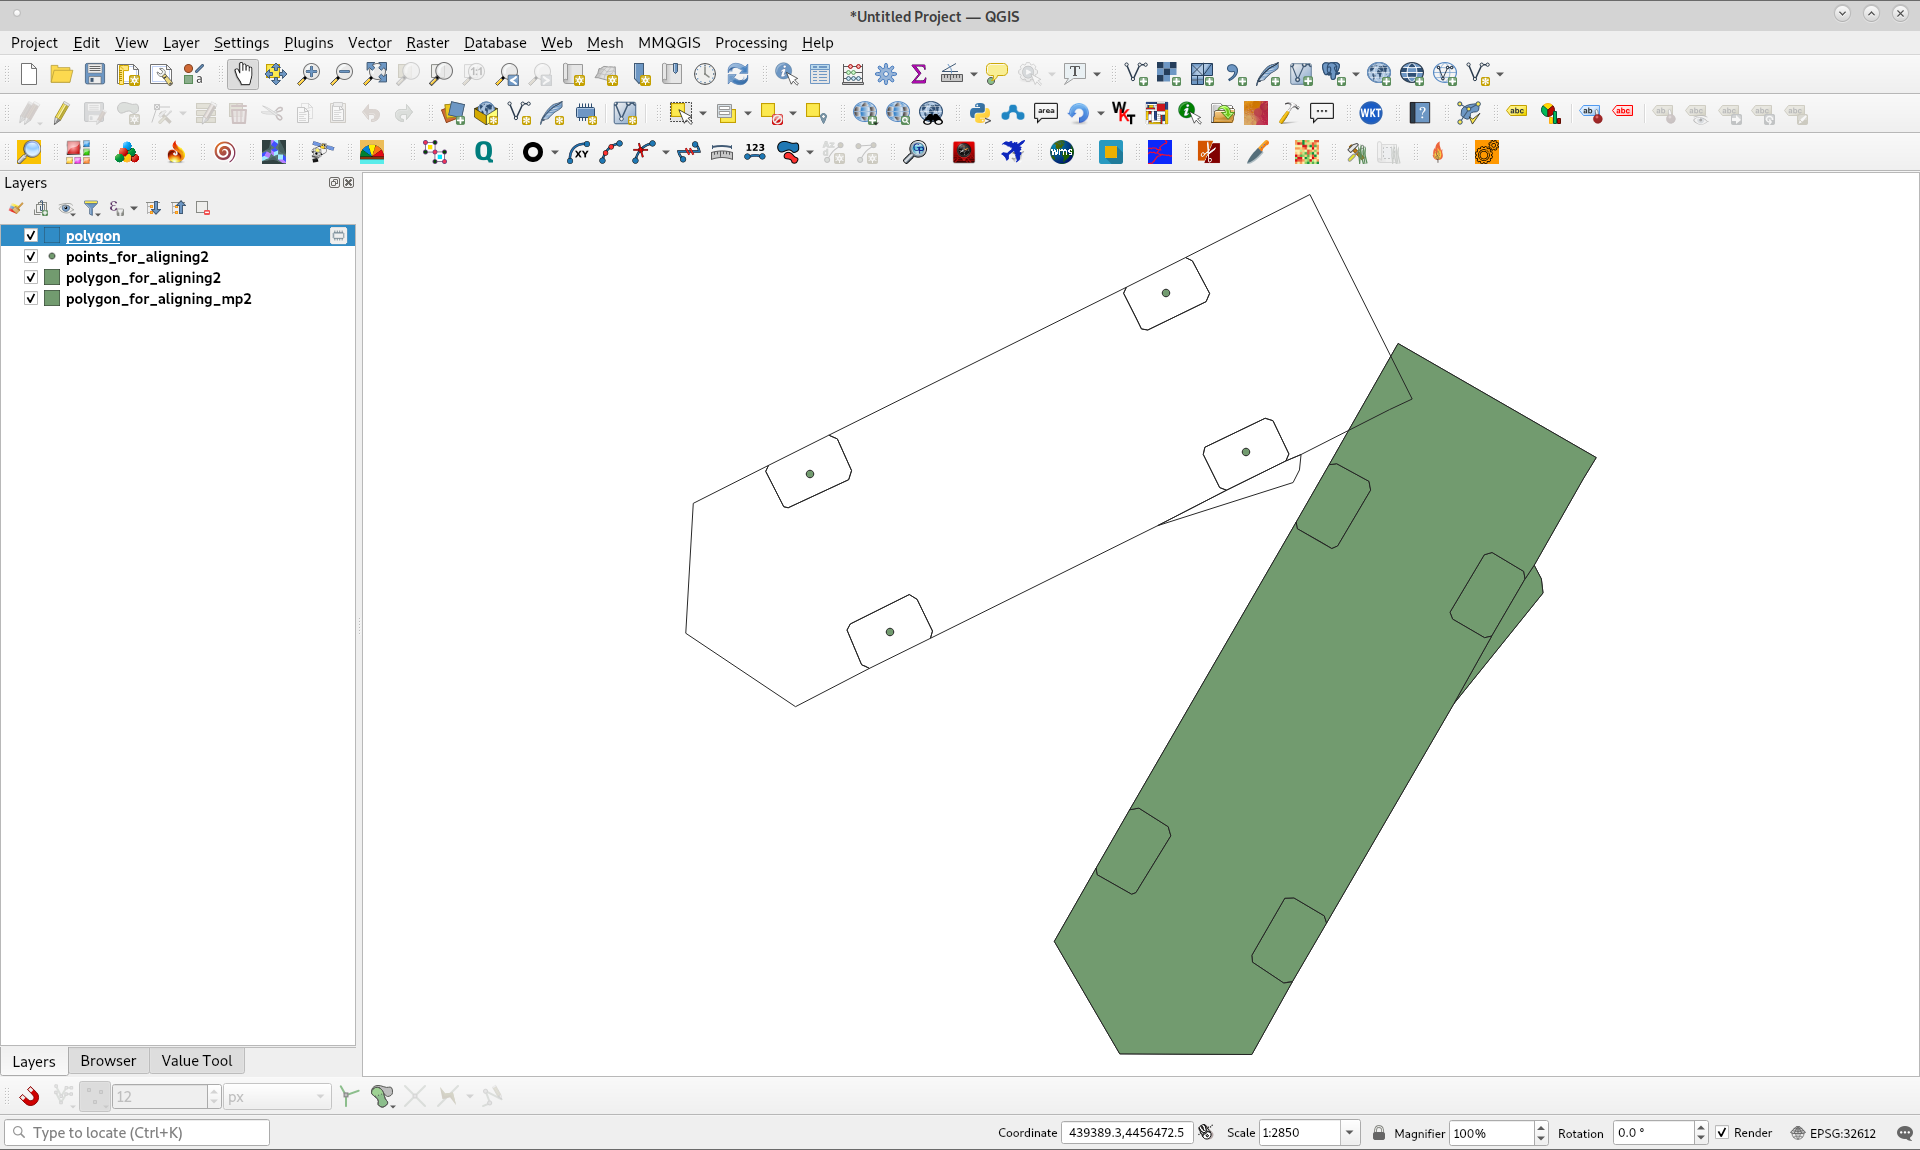
Geometrically, it can be interpreted as follows:
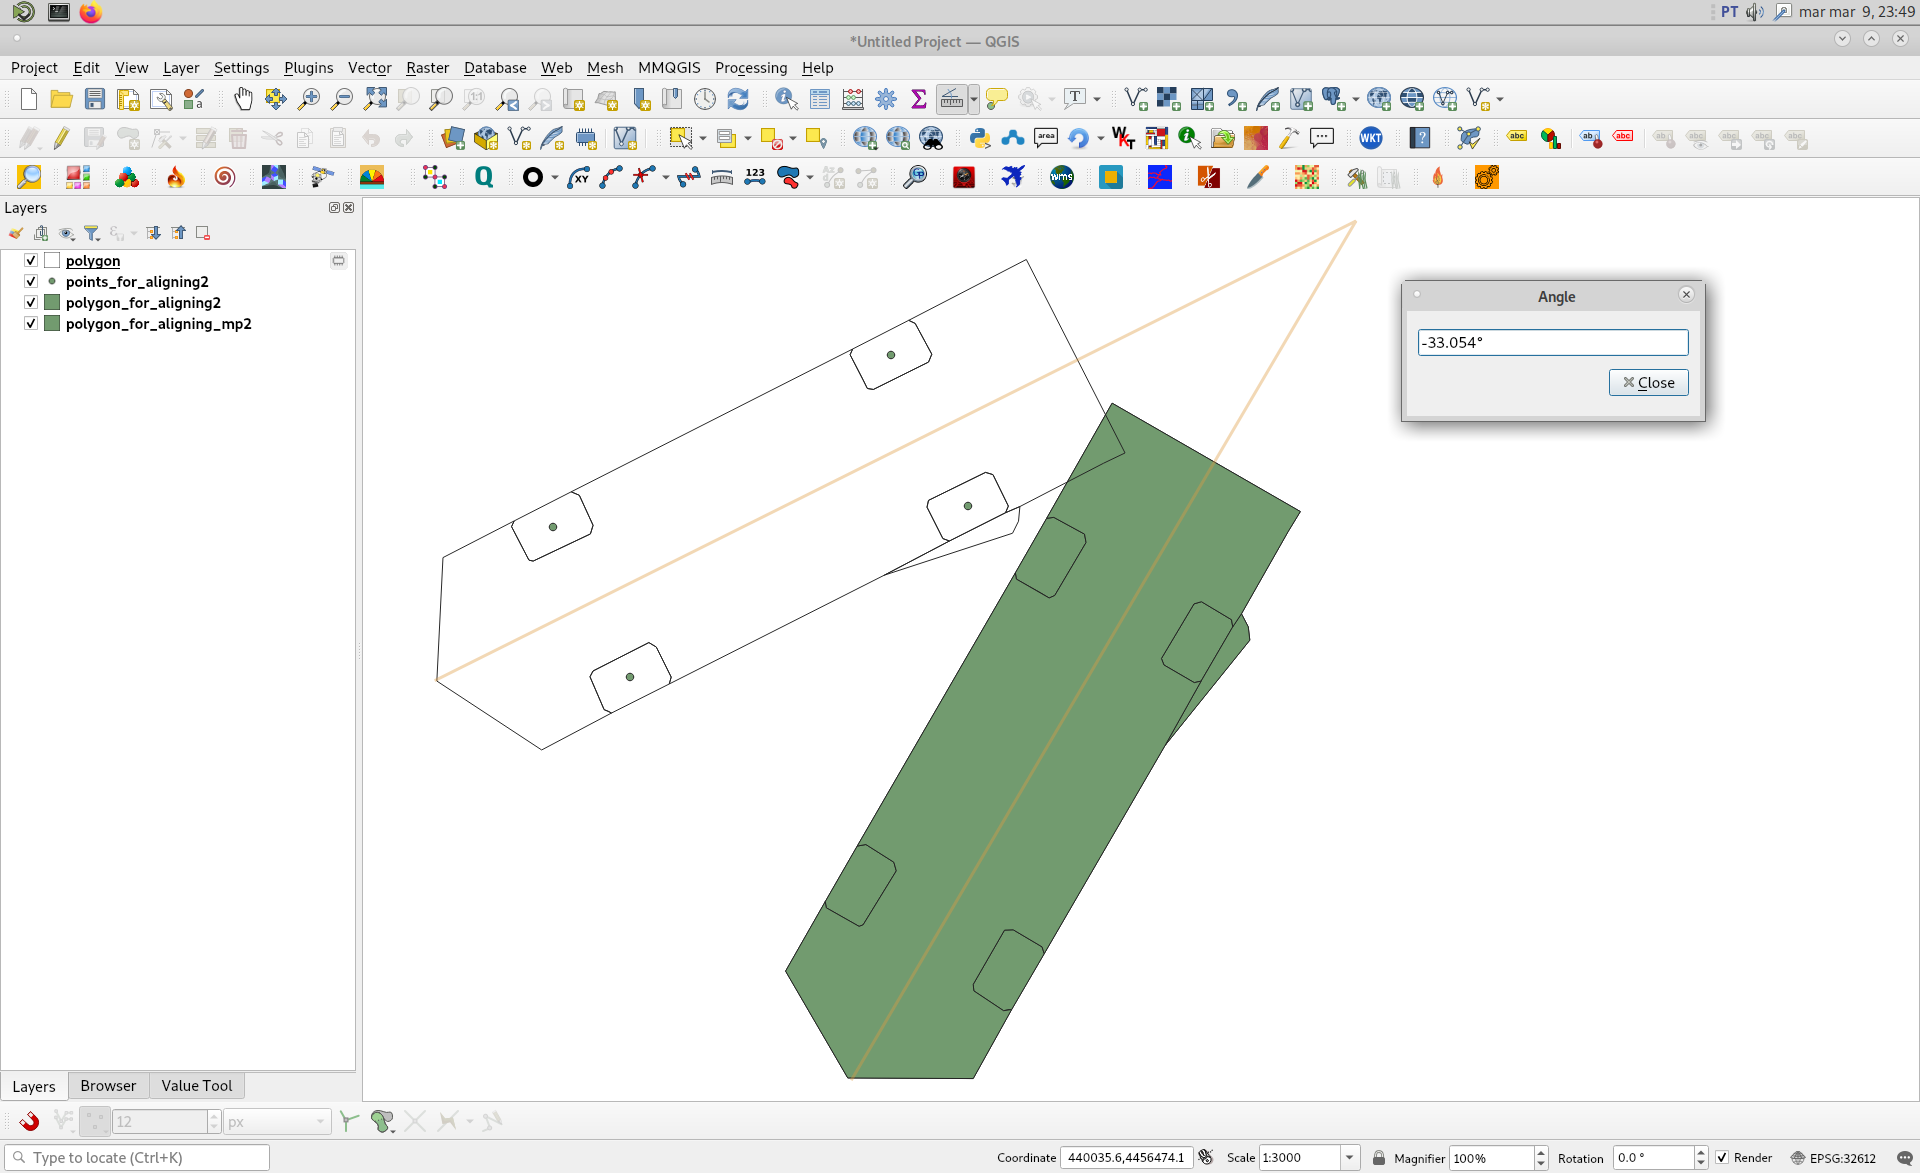
So, complete modified code looks now as follows:
import numpy as np

registry = QgsProject.instance()

points = registry.mapLayersByName('points_for_aligning2')
polygon = registry.mapLayersByName('polygon_for_aligning_mp2')
polygon_sp = registry.mapLayersByName('polygon_for_aligning2')

feat_pol_sp = [ feat for feat in polygon_sp[0].getFeatures() ]

centroids_mini_pol = [ feat_pol_sp[0].geometry().centroid(),
                       feat_pol_sp[1].geometry().centroid(),
                       feat_pol_sp[3].geometry().centroid(),
                       feat_pol_sp[4].geometry().centroid()]

centroids_mini_pol_pt = [ pt.asPoint() for pt in centroids_mini_pol ]

points_geom = [ feat.geometry().asPoint() for feat in points[0].getFeatures() ]
angles = [ 90 - points_geom[i].azimuth(points_geom[i+1]) for i in range(len(points_geom)-2) ]
angles2 = [ 90 - centroids_mini_pol_pt[i].azimuth(centroids_mini_pol_pt[i+1]) for i in range(len(centroids_mini_pol_pt)-2) ]

feat_polygon = [ feat for feat in polygon[0].getFeatures() ]

xf = [ point.x() for point in points_geom ]
yf = [ point.y() for point in points_geom ]

xi = [ point.asPoint().x() for point in centroids_mini_pol ]
yi = [ point.asPoint().y() for point in centroids_mini_pol ]

points_centroid = QgsPointXY(np.mean(xf), np.mean(yf))
points_centroid_mp = QgsPointXY(np.mean(xi), np.mean(yi))

geom = feat_polygon[0].geometry()

xoff = points_centroid.x() - points_centroid_mp.x()
yoff = points_centroid.y() - points_centroid_mp.y()

geom.rotate(angles2[0] - angles[1], QgsPointXY(np.mean(xi), np.mean(yi)))

geom.translate(xoff, yoff, 0, 0)

epsg = points[0].crs().postgisSrid()

uri = "Polygon?crs=epsg:" + str(epsg) + "&field=id:integer""&index=yes"

mem_layer = QgsVectorLayer(uri,
                           'polygon',
                           'memory')

prov = mem_layer.dataProvider()

feats = [ QgsFeature() for i in range(len(feat_polygon)) ]

for i, feat in enumerate(feats):
    feat.setAttributes([i])
    feat.setGeometry(QgsGeometry.fromWkt(geom.asWkt()))

prov.addFeatures(feats)

registry.addMapLayer(mem_layer)

