6

I have a layer with railway lines, downloaded from OpenStreetMap. Every single track is represented separately, so at trainstations, you have several parallel lines, as well as sidelines that lead to depots. Sometimes, lines are broken (it's OSM!). I want to reduce all these lines to one single, simple line.

An idea is to create buffers around the railway lines and to dissolve them to a single polygon (and maybe apply a negative buffer to reduce its width and generalize the geometry)?

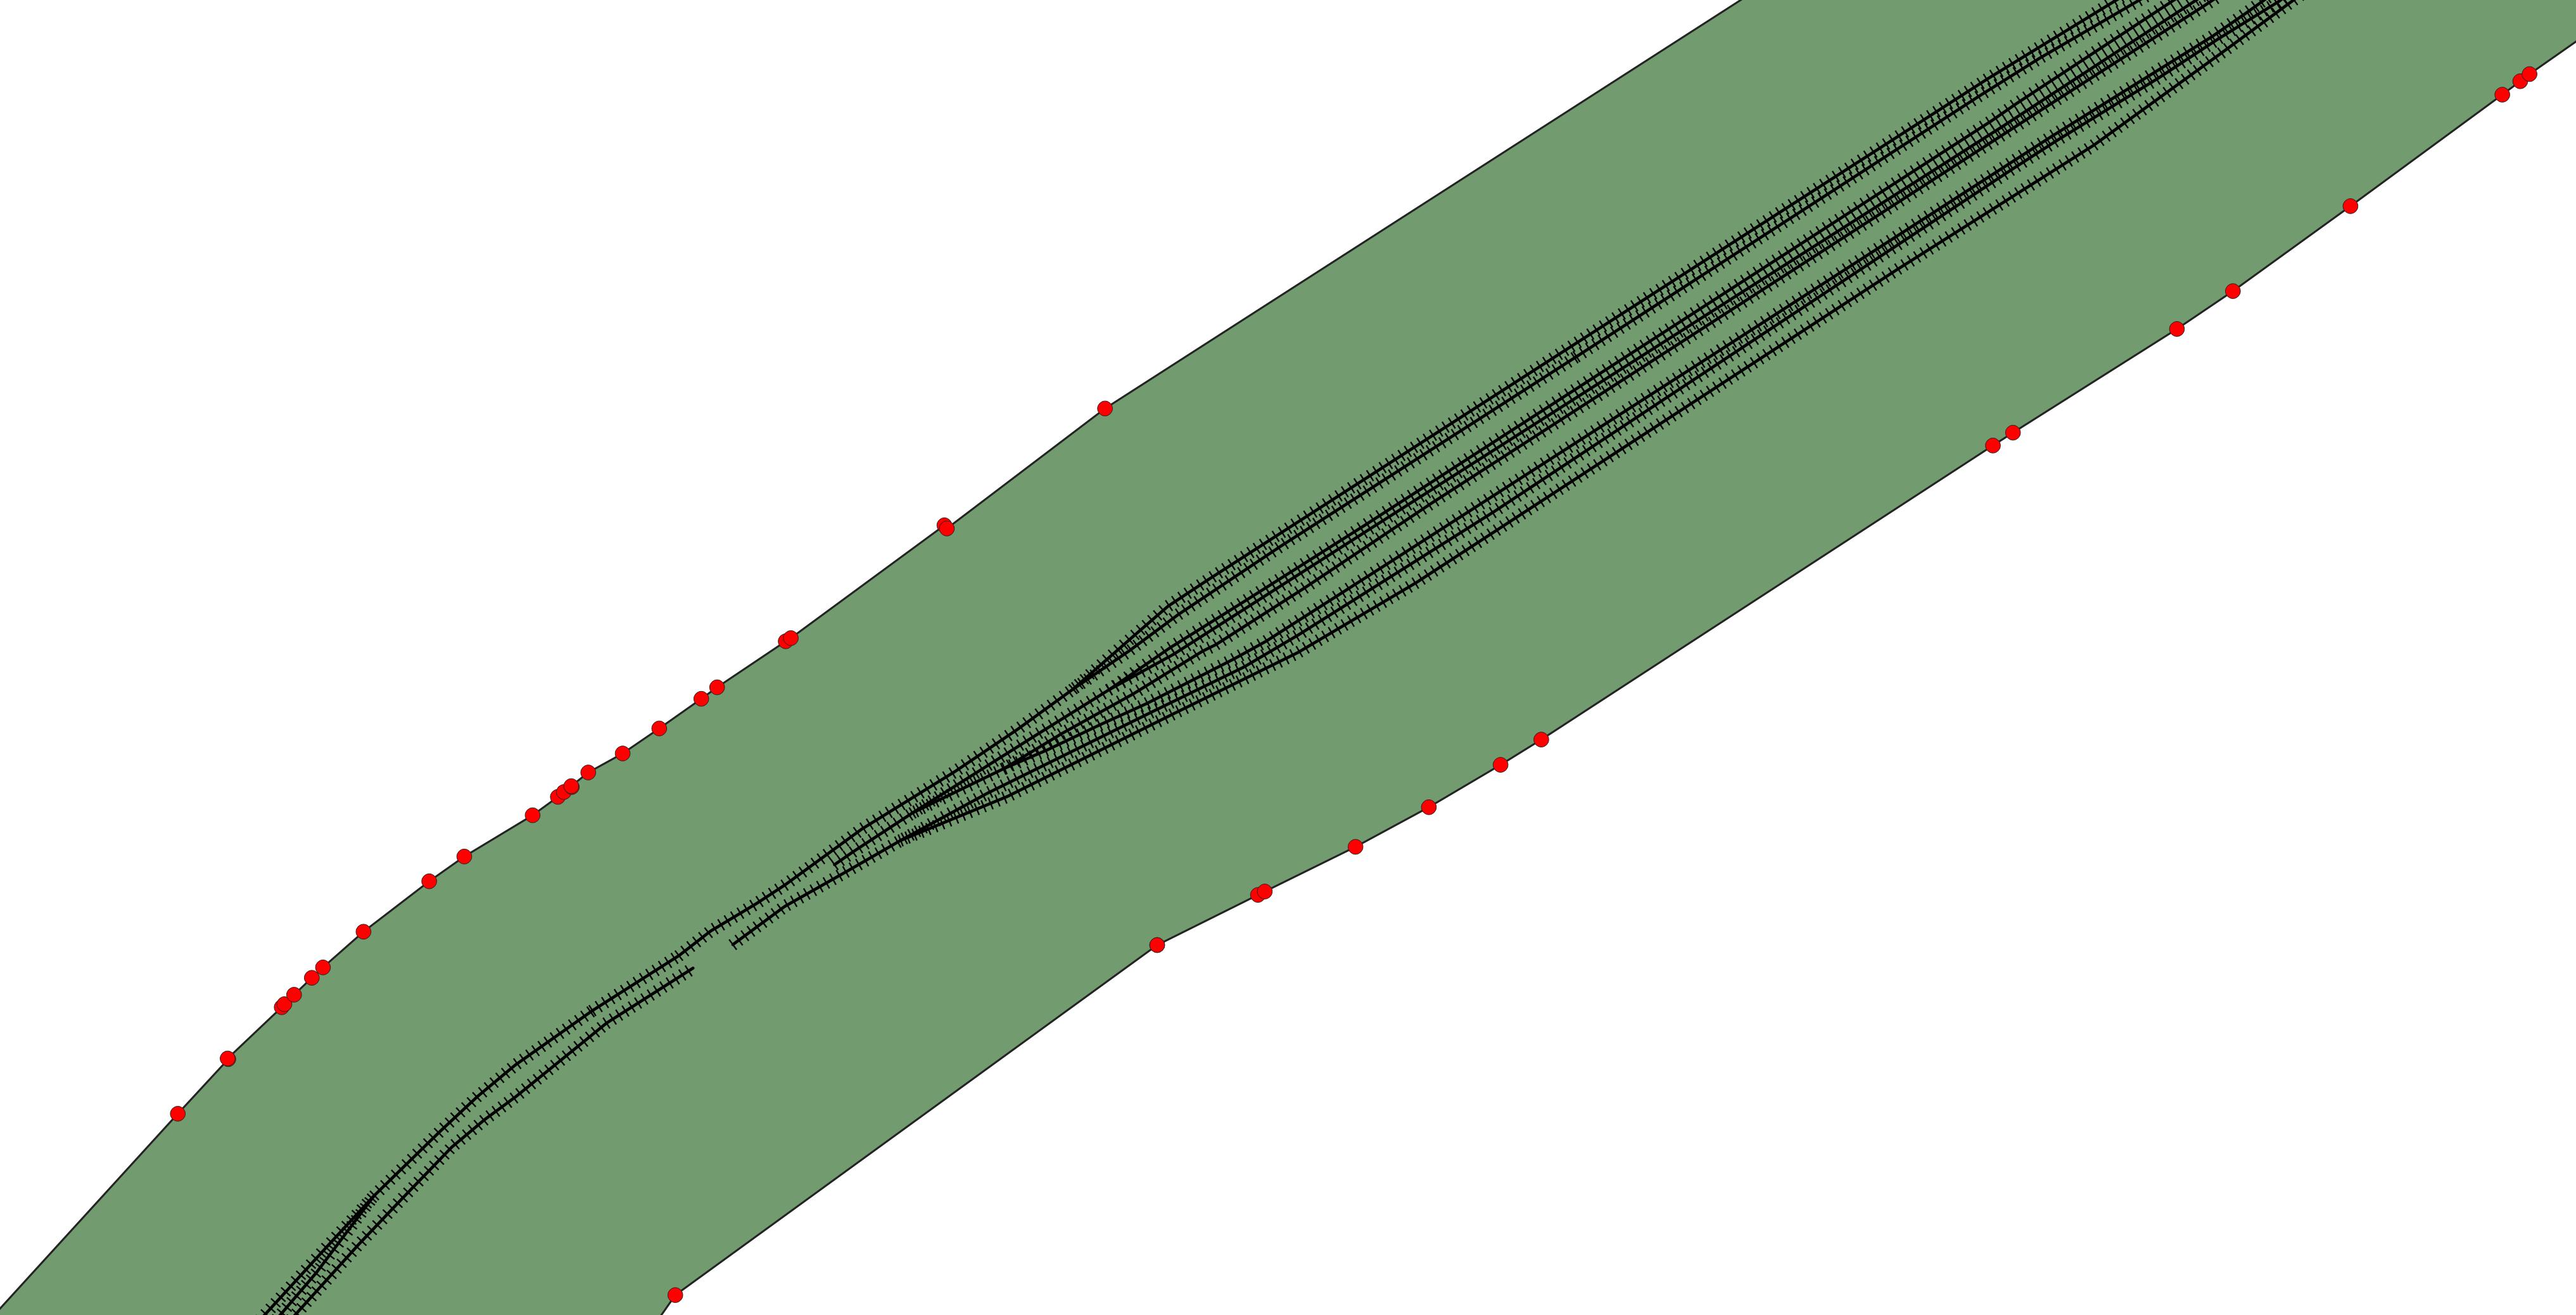
Railway lines, Buffer and vertices of the buffer

If I could create a medial axis from this polygon,, it would represent quite well the simplified railway line I want to create.

However, how to create such a medial axis in QGIS?

There is a solution in PostGIS: https://postgis.net/docs/ST_ApproximateMedialAxis.html

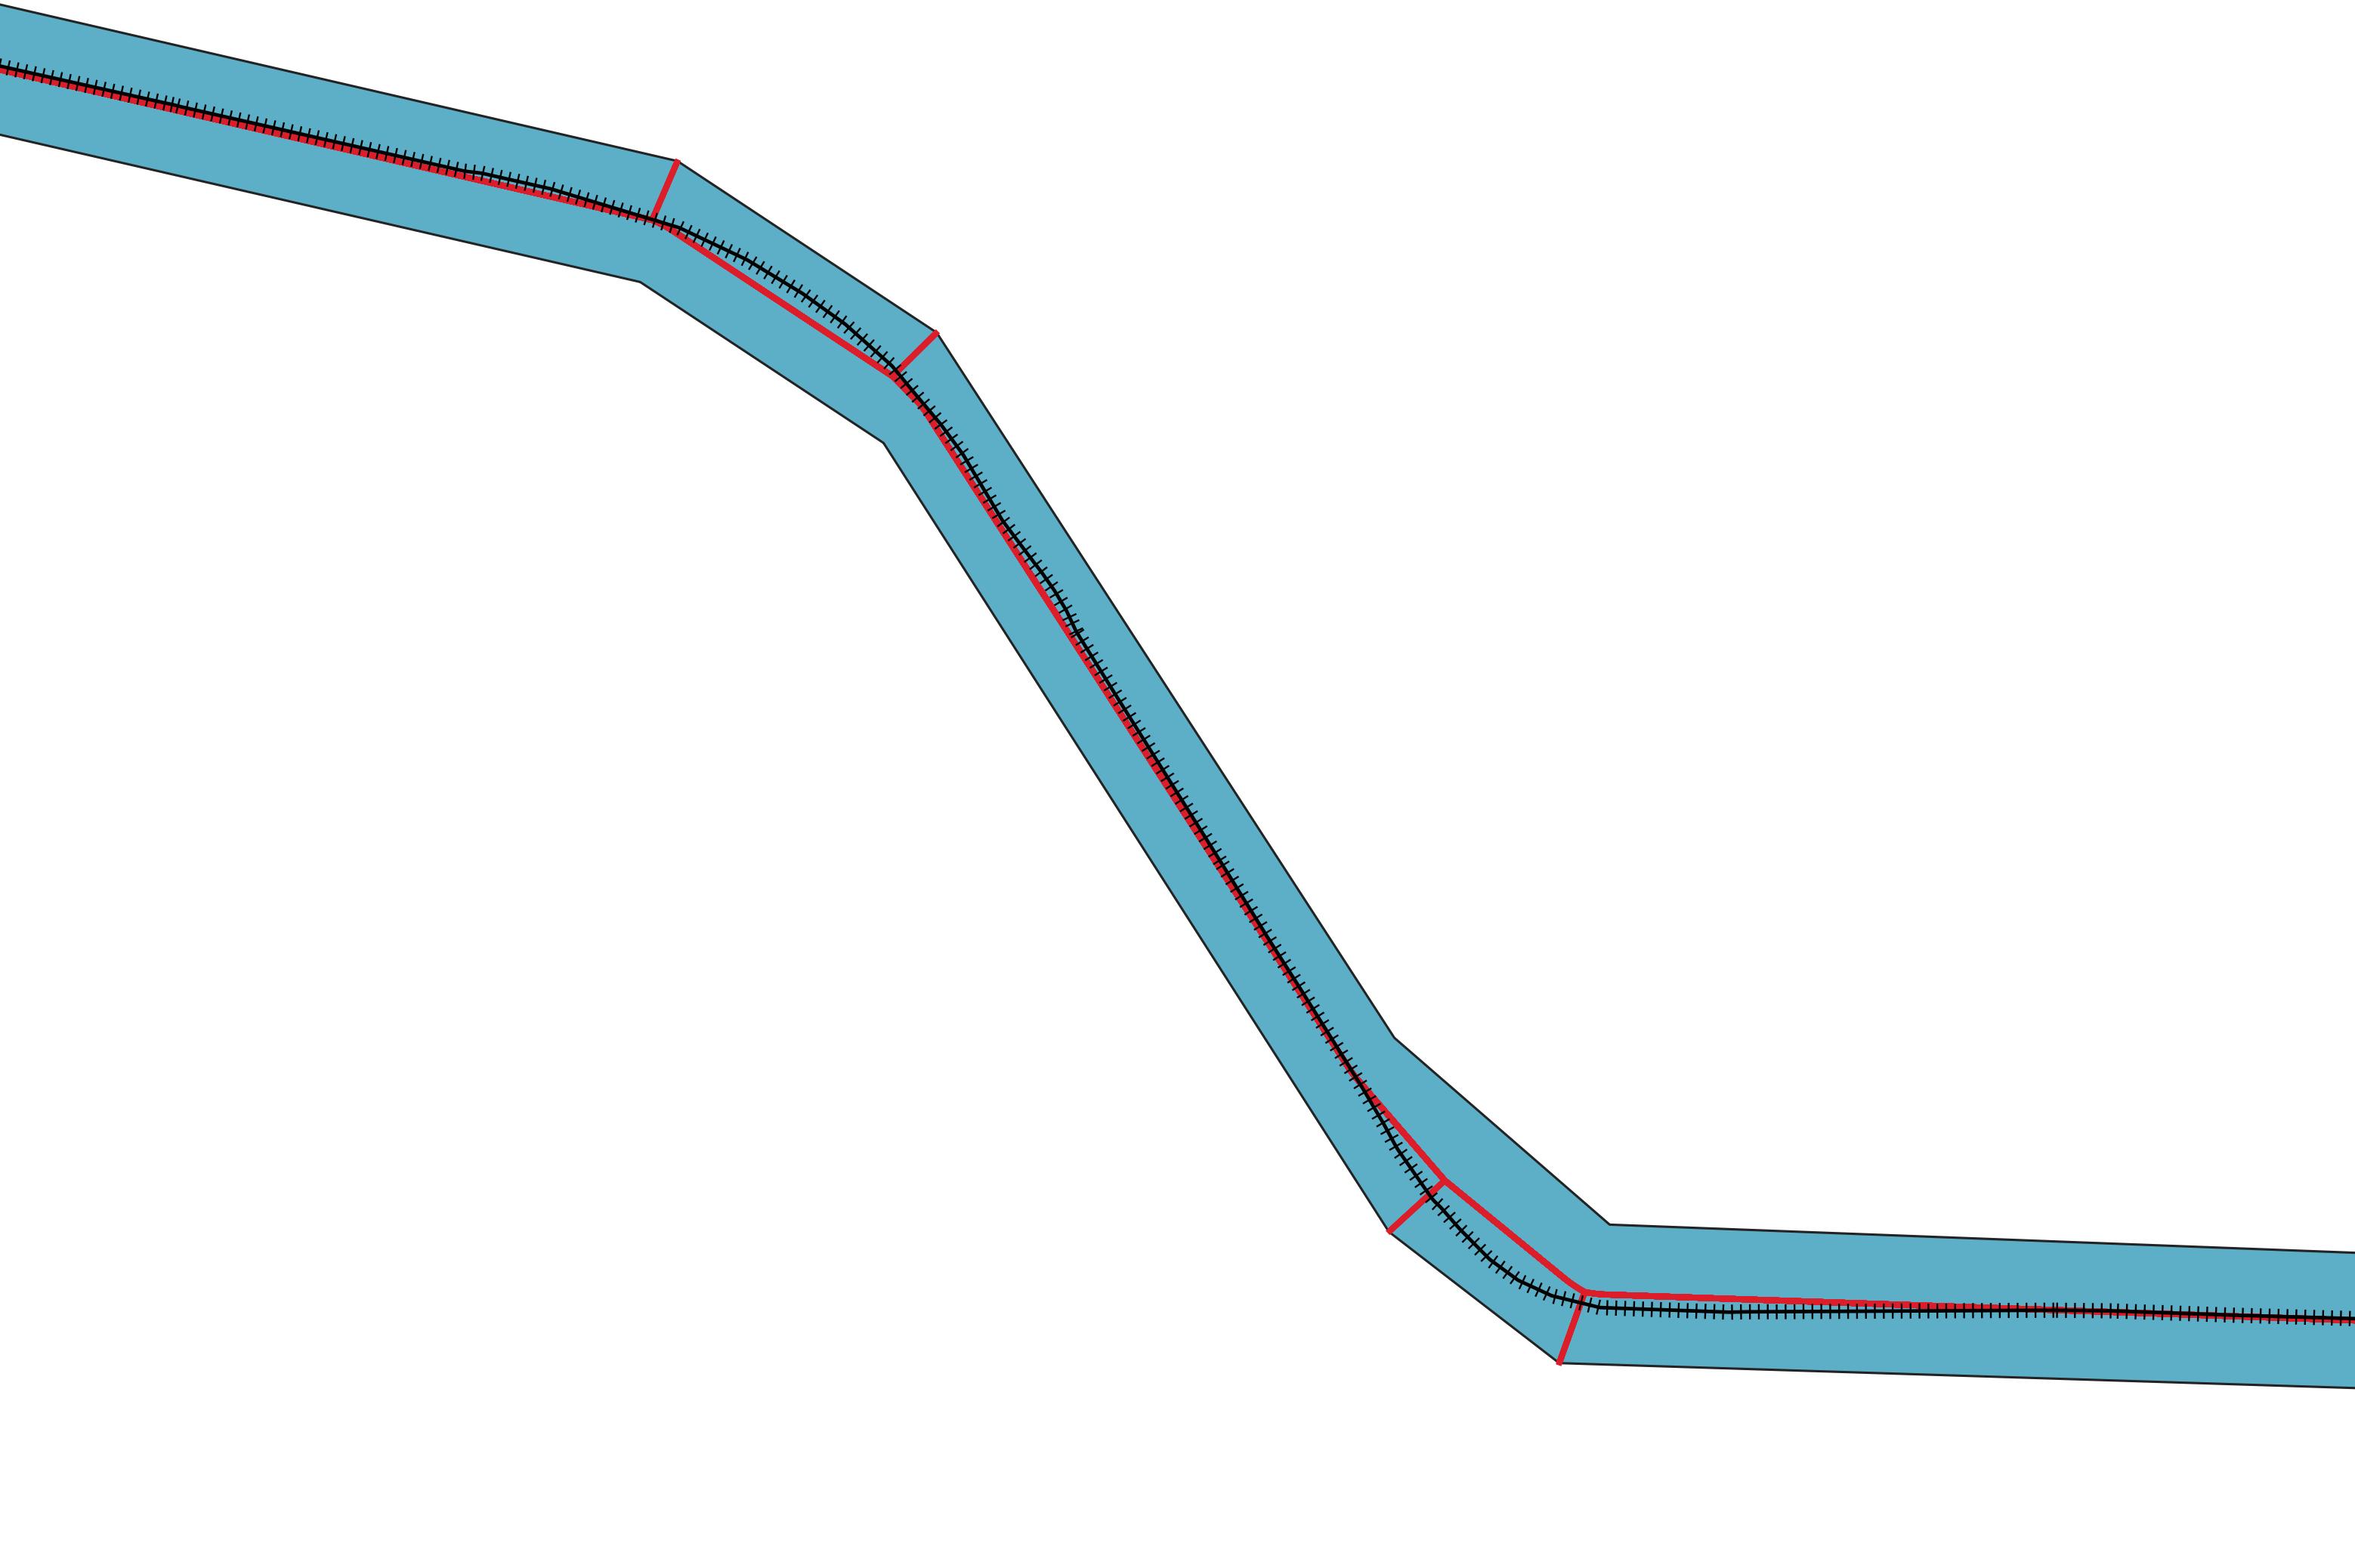
But unfortunately, I have no experience with postgis, so I'm looking for a solution inside QGIS. A possible solution seems to be the HCMGIS-plugin that has a function "Create Skeleton/Medial Axis". The result represents quite well the railway-track (see screenshot, red line), but with one major problem: it creates a skeleton with small side-lines connecting to the vertices of the simplified buffer.

Original railway line, simplified buffer and skeleton in red

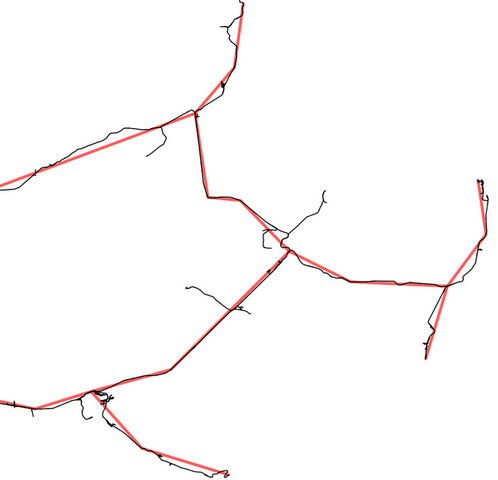
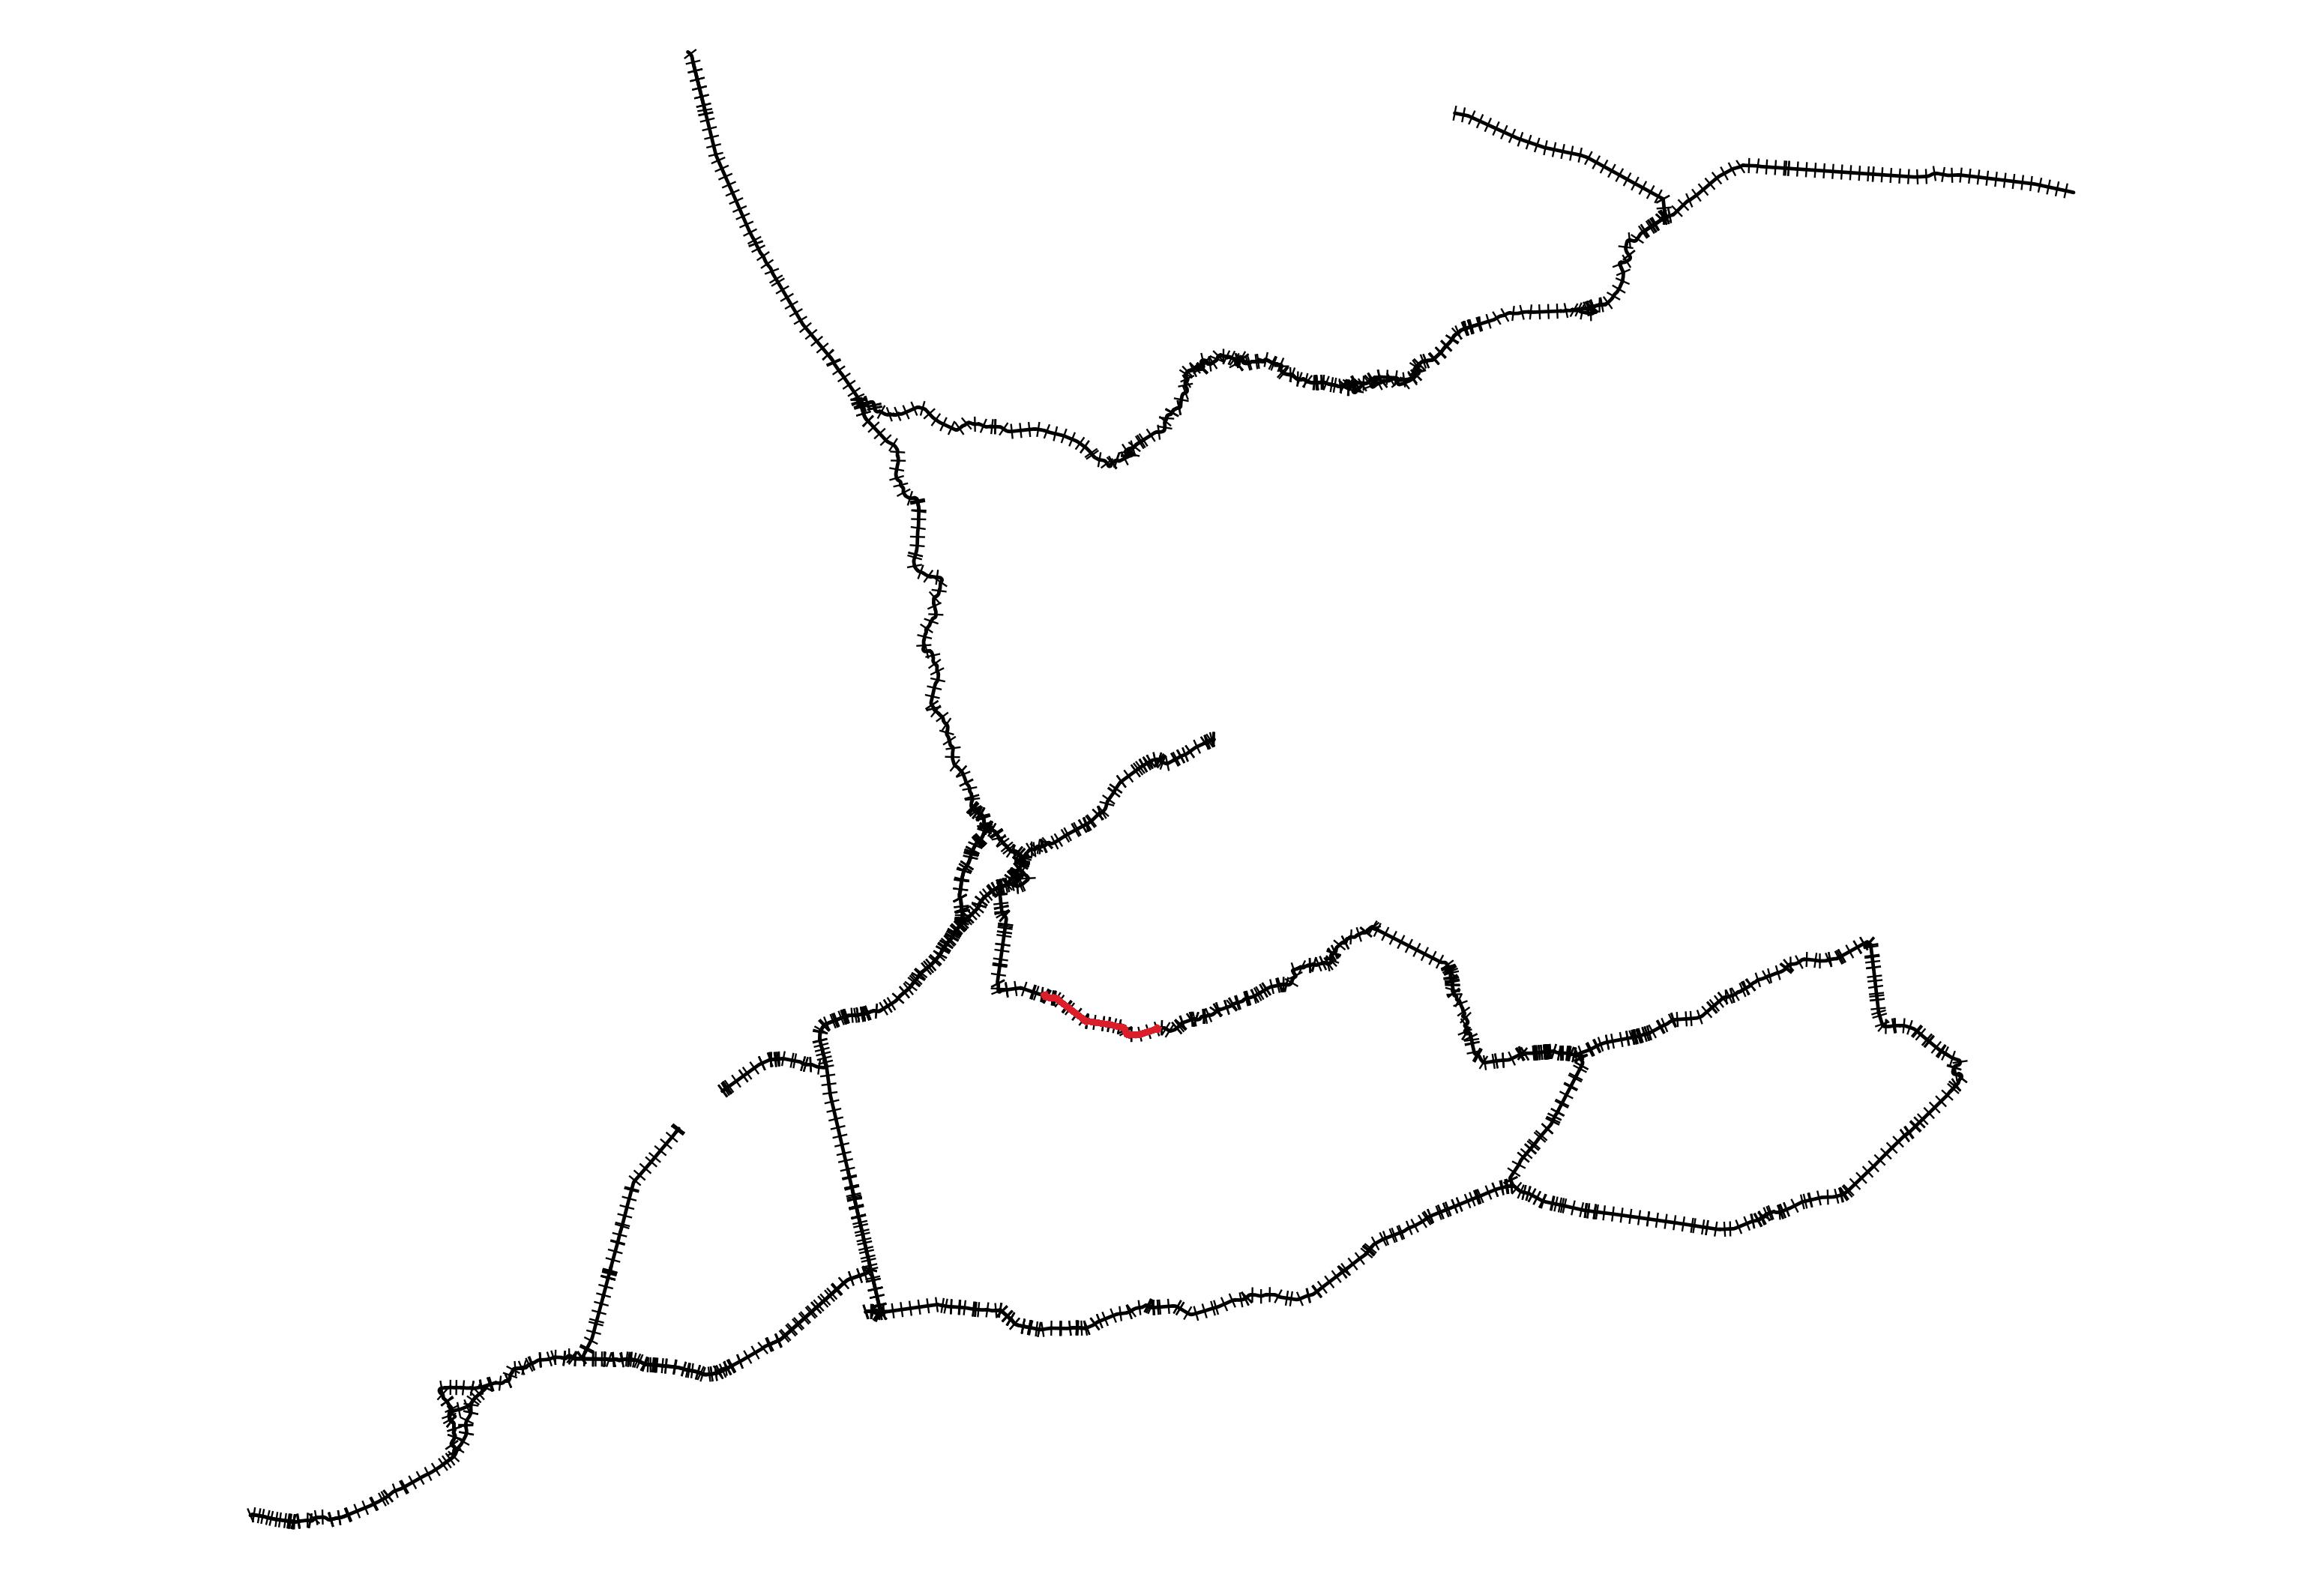
Second problem: algorith takes quite long for a larger selection - I was able to test it only with a small selection as the calculation for the whole railway-network did not stop even after half an hour. I'm not sure if it works well for the whole network (see screenshot 3 with the red part representing the selection used for testing). enter image description here
Any idea for alternative solutions?


@Cyril's suggestion of using the midline of the skeltonize method would be perfect for me, but unfortunately, the resulting layer consists of only one object - so the short lines are not separated from the long one.

Maybe there is also a completely different method for solving my problem?

Update: see PostGIS-syntax: export query-result to QGIS / Shapefile

4
  • If you're happy with the midline of the skeletonize method, just select the short lines with the Select by Expression tool, and the expression $length < L, where L is an appropriate length value. Then delete the selected lines.
    – csk
    Commented Apr 21, 2019 at 1:28
  • 1
    If the skeltonize tool suits you, blow up the line and then use the csk clause ... Commented Apr 21, 2019 at 11:58
  • OK, this seems to provide a solution. However, I' not sure which QGIS-tools to use: blowing up? csk clause?
    – Babel
    Commented Apr 21, 2019 at 14:10
  • 2
    To do this, QGIS in the Analysis Tools window you have the following tool Vector Geometry> Blow Up Lines ... Commented Apr 21, 2019 at 14:48

3 Answers 3

4

Take the result of the Skeletonize method and remove the short line segments.

  1. Since the output is a single feature, first split the segments into separate features. The tool Multipart to single parts should achieve this. If not, you may need to resort to Explode lines, which will split the line apart at the vertices.
  2. Select the short lines with the Select by Expression tool, and the expression $length < L, where L is an appropriate length value.
  3. Delete the selected lines.
  4. If you used Explode lines in step one, you now have midlines made up of many separate line segments. Merge them into individual lines using the dissolve tool, followed by multipart to single parts again.
3
  • The proposed solutions would work theoretically, I guess. Unfortunately, the problem is that the HCMGIS-plugin's function "Create Skeleton/Medial Axis" has not stopped calculating even after more than one and a half day (!) and I'm not sure how long it will still take. So it is not practicable in my case. Is there another way to get a central axis? Or a completely different approach, starting again from scratch?
    – Babel
    Commented Apr 23, 2019 at 8:05
  • 1
    I'm confused. You wrote in your question that you already succeeded at creating a skeleton. Is that not true? You should use the edit link under your question to update it with correct information.
    – csk
    Commented Apr 23, 2019 at 16:15
  • I was not able to create a skeleton for the whole railway-network, just for a small part of it for testing-purpose. So no, I was not able to create the skeleton, as the process to create it was going on even after more than one and a half day, so I had to cancel it. So I am still looking for a practicable solution.
    – Babel
    Commented Apr 24, 2019 at 7:55
2

Try this in QGIS Python Console:

from HCMGIS.hcmgis_library import *    
#Create Medial Axis/ Skeleton from Road in Polygon
input = "D:\\osm\\road.shp"
output = "D:\\osm\\skeleton.shp"
hcmgis_medialaxis(input, 'OBJECTID', 1,output,status_callback = None)
#hcmgis_medialaxis(layer, field, density,output,status_callback = None):
#field: unique field of inputlayer
#density (float value): densify geometries with given an interval (in this case the density is 1 meter). Smaller density value returns smoother centerline but slower

Full Reference: HCMGIS Plugin Library call in QGIS Python Console or Stand alone PyQGIS Application

2

Basic idea: use network tool

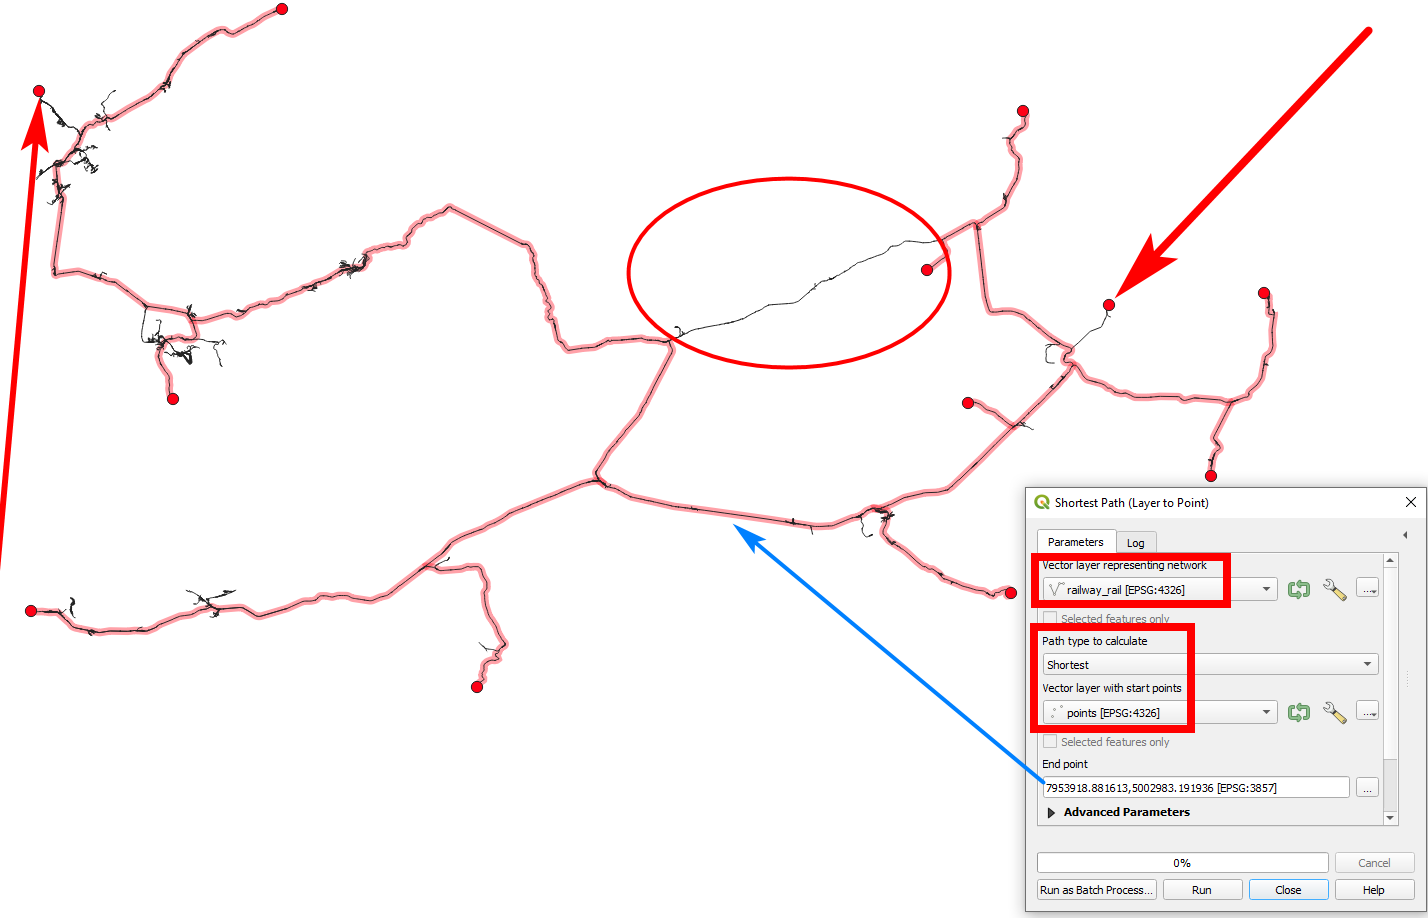
There is a quite simple way to do this generalization using network tools. The problem is to reduce (redundant) parallel tracks to one single line for cartographic generalization. The basic idea is to create the shortest path from a few points, well distributed all over the rail network, to one central point. The tool choses one (the "best", meaning shortest) path through the network, ignoring all side tracks.

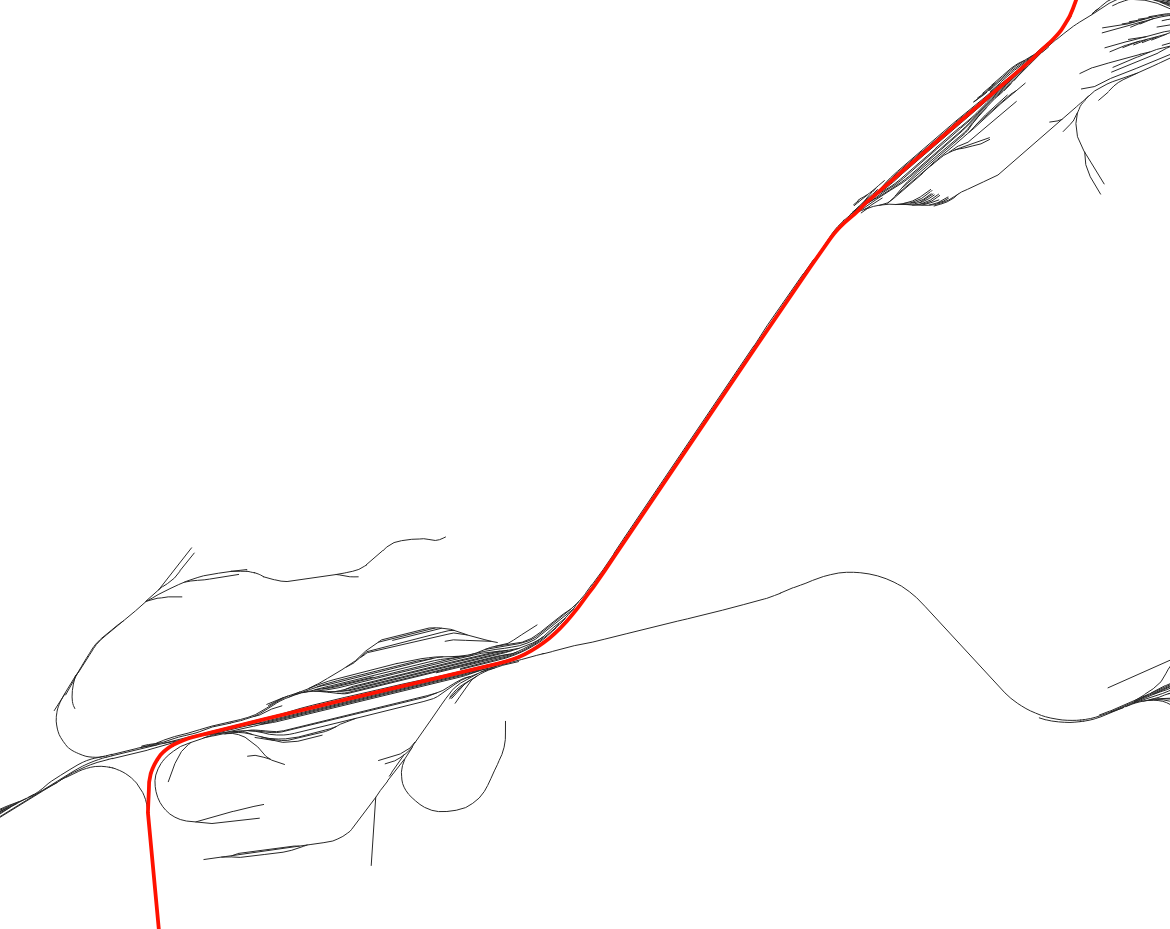
Initial railway tracks as downloaded from OSM (black) and generalized tracks in red: enter image description here

Workflow

  1. Create a new point layer and add points all over the network, especially wehre there are endpoints (dangles). Be aware that creating shortes network distance to a central point should cover all sections of the network. Be sure to snap the points to the network.

  2. Run Menu Procssing / Toolbox / Shortest path (layer to point), set the network layer as Vector layer representing network, Path type to calculate to Shortest and the point layer as Vector layer with start points. For the end point, click somewhere on the network: preferably a place somewhere in the middle, but depending on the kind of network, every point is fine. Be sure snapping is active to snap the point to the network. Run the tool.

  3. On the result, Explode lines and Delete duplicate geometries to get rid of duplicate sections. Select all features and merge them. You get a simple line without side tracks.

Black line: initial railway network; red: generalized network, ignoring side tracks: enter image description here

Complete the result and solve problems that can appear

Depending on the shape of the network, some sections might not be covered because they are not part of the shortest way to the destination. For this reason, in such cases run step 2 a second time - you might use the same start points, but another end point.

Initial network (black) and result (red). End point was defined where the blue arrow points to. On the upper part, a section was not included in the result (red circle). Run Shortest path again with end point in this section to cover it as well and add this part to the result. Two start points (red arrows) have no connection to the rest of the network (there might be a broken line or so): repair this to get a connection there as well: enter image description here

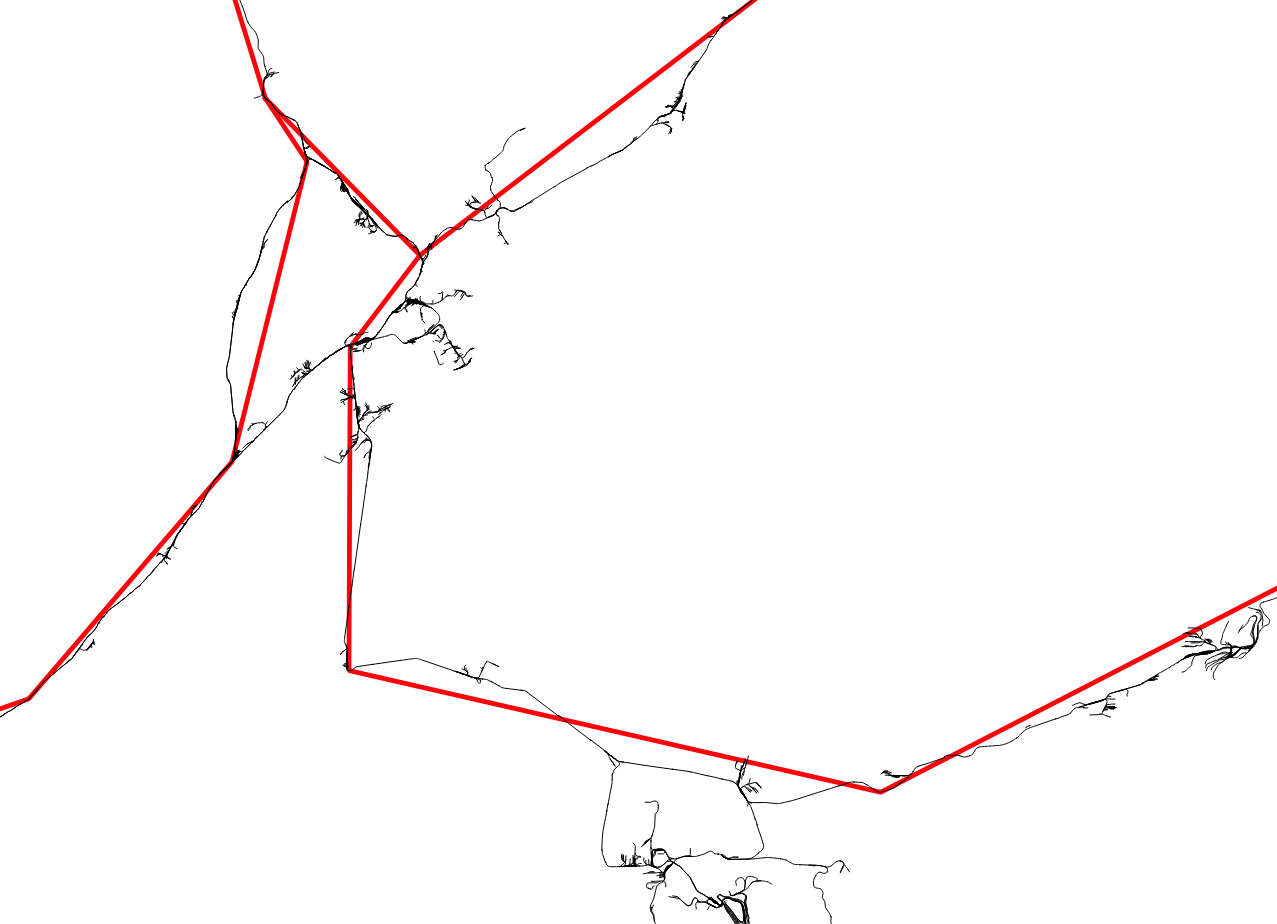
The line generalized with GRASS v.generalize (to keep topology of the network), with a tolerance value of 5000 (5 km): as can be seen, the initial black tracks are extremely generalized (simplified), however, the topology is preserved:

enter image description here

Your Answer

By clicking “Post Your Answer”, you agree to our terms of service and acknowledge you have read our privacy policy.

Not the answer you're looking for? Browse other questions tagged or ask your own question.