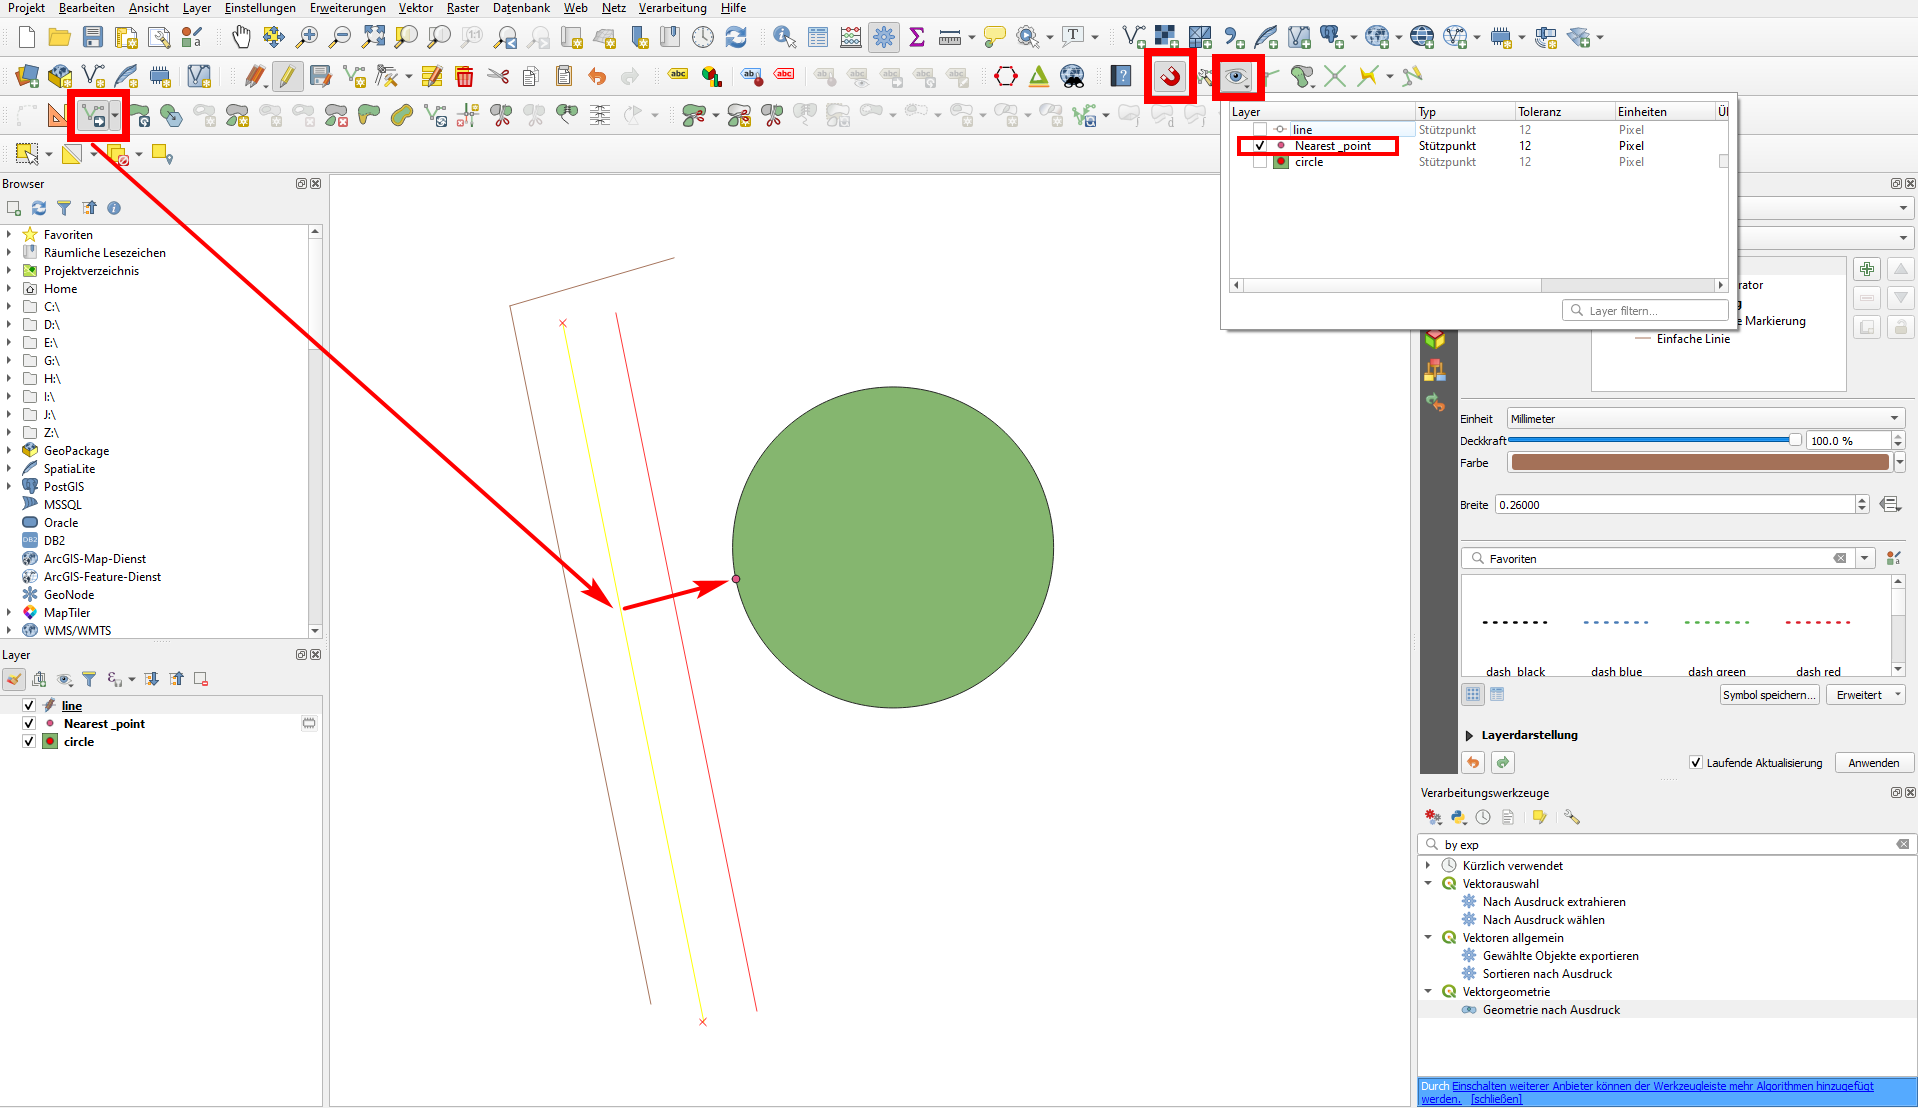
From the line X find the nearest point on the circle - see here how to do that: https://gis.stackexchange.com/a/381288/88814
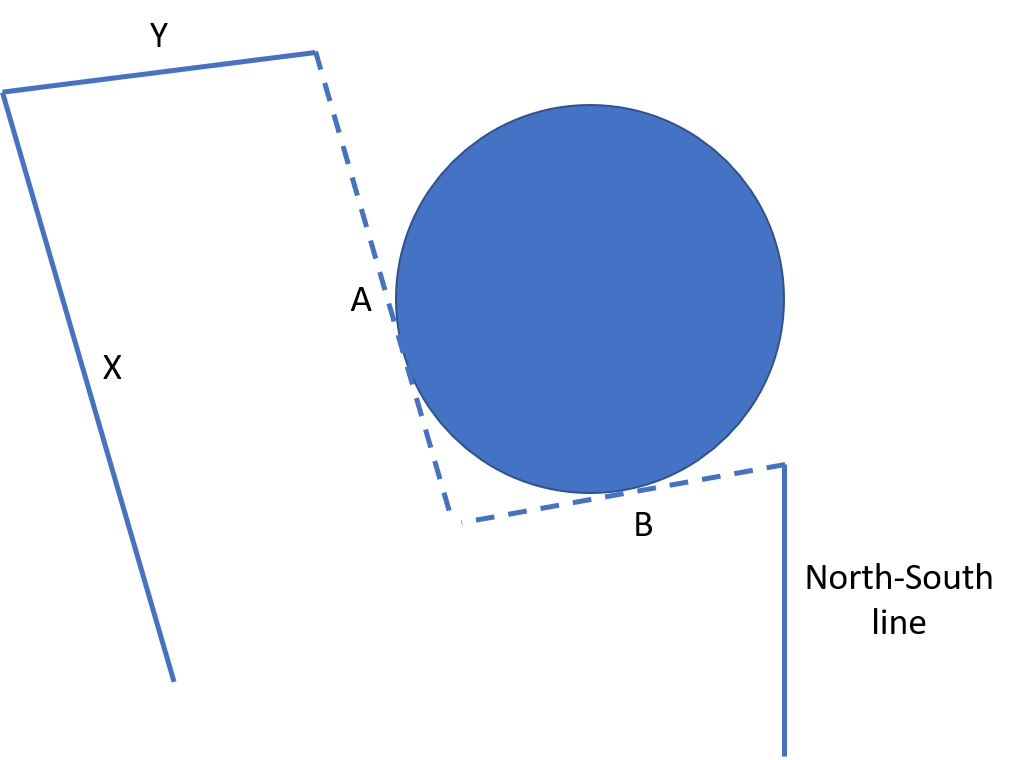
Than you can use snapping to this point when drawing line A parallel to X.
This was the short answer. But let's get a little bit more to the details, as geometry generator and QGIS expressions are a very powerful tool to create new geometries that fulfill such conditions. You can either just create a new symbol layer (for visualization purpose only) or create actual geometries using the Geometry by expression tool. In both cases, the expression remains the same - that gives you a lot of flexibility to first try your expression as symbol layer for the immediate visual control. When you're finished, you can convert it to a new geometry layer.
Thus, let's get to the details: suggest we have a polygon layer circle and a lines layer line. On the circle layer, create the point nearest to the line with this expression:
closest_point (
        $geometry ,geometry (
            get_feature_by_id (
                'line',
                array_to_string (
                    overlay_nearest (
                        'line',  "id" )
                    )
            )
        )
    )
Use this expression in the function geometry by expression from menu Processing / Toolbox, setting the circle layer as input and select point as output geometry type. This will create a new point layer, called Nearest_point here.
We can now continue manually (option 1) or go on with accomplishing the whole task using expressions/geometry generator (option 2, below).
Option 1:
Now you can copy/paste the line you want to shift (line X in your screenshot) to get line A that you want to place in parallel and as a tangent to the circle. Shift line A in parallel with Move feature from the toolbar. Before that, be sure to have activated snapping. Snapping should be active only for the points layer Nearest_point we created before, thus using the Edit advanced configuration of the snapping tool (not to snap on one of the vertices of the circle, in case your circle is defined by vertices).
For line Y, I would first copy/paste it to get line B, shift it in parallel near the circle where it should be eventually and than repeat the procedure - instead of "id", set the value of the id field in your lines layer of the line feature you want to find the nearest point on the circle.

Option 2:
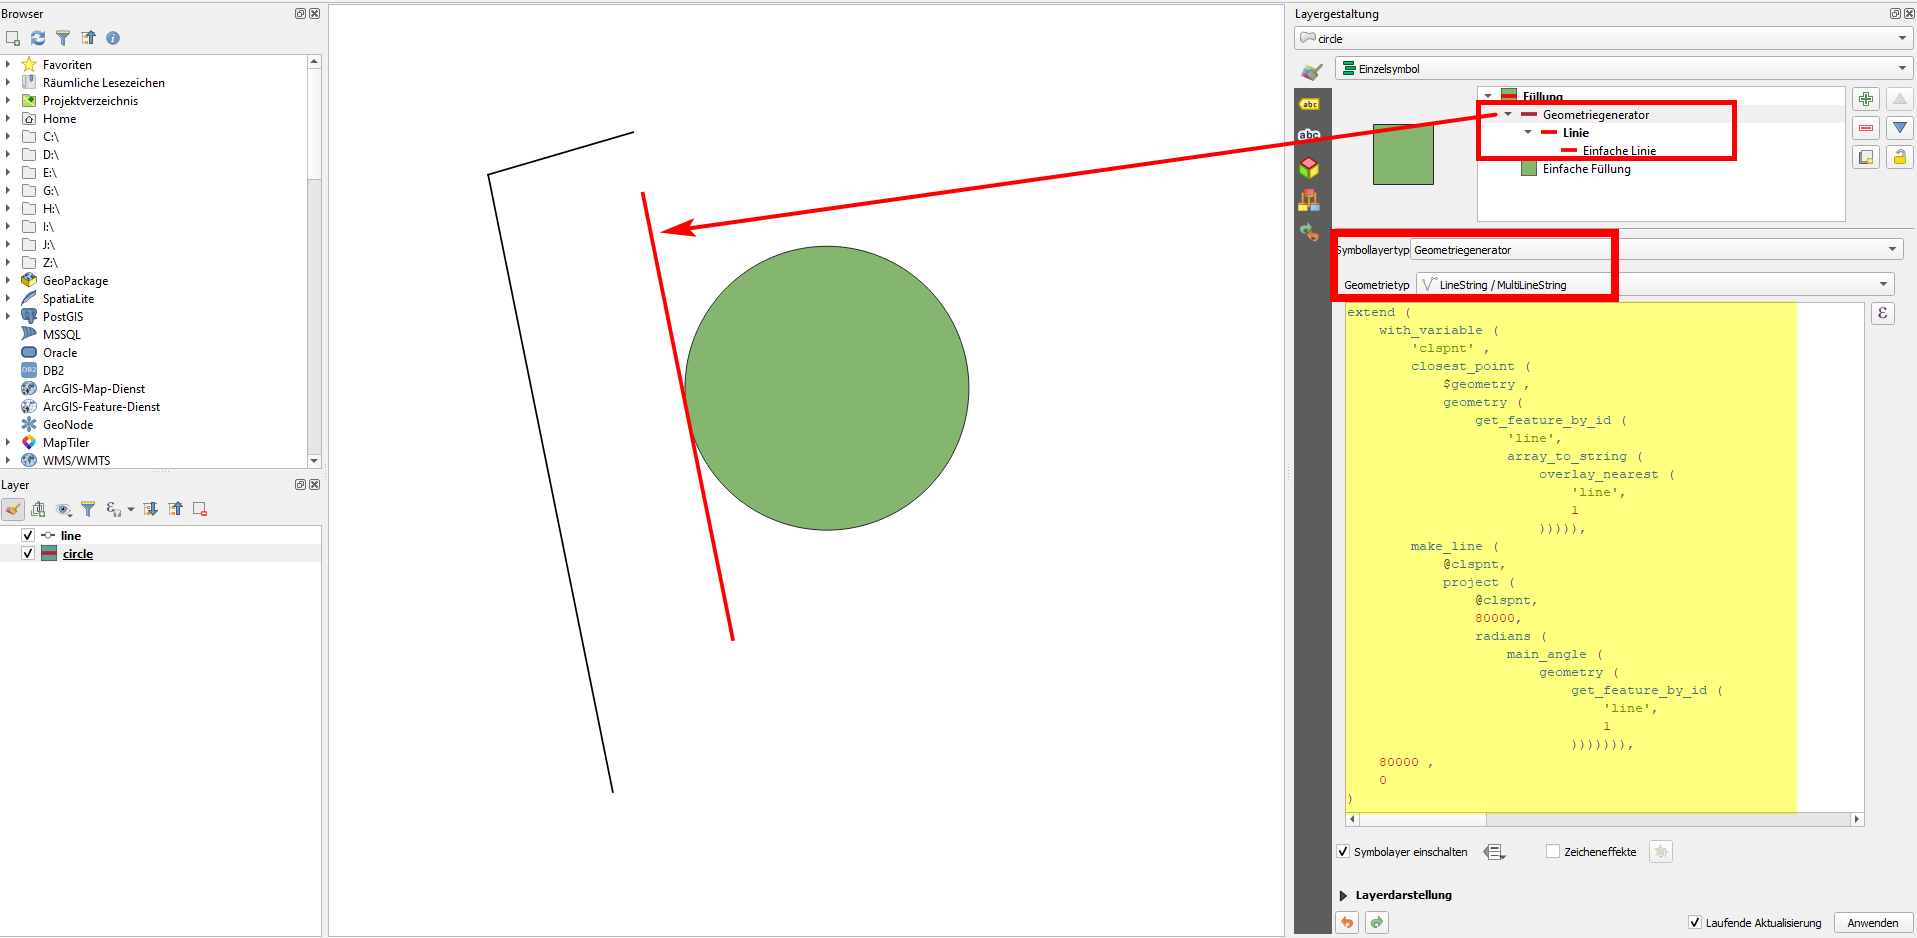
You can even automatically generate a parallel line touching the circle at one point by creating a geometry with the geometry generator. The idea is: 1) to create the nearest point to the line on the circle (what we did above), resulting Point 1, 2) generating another point by projecting (shifting) Point 1 with an arbitrary distance and an azimuth (angle) that we take from the original line, thus creating Point 2 3) make a line from Point 1 to point 2 - because we used the azimuth (main_angle expression) of the line, the created line runs parallel to the original line 4) extent the line at the beginning, so that it runs out from Point 1 in both directions. Where there is 1 in the expression, it is the id of the original line that you want to shift, change this accordingly.
Additional to that, I used the expression with_variable to define Point 1 as a variable becaus we need to insert it twice in the expression. So the final result looks like this - you can use this expression in the geometry generator or generate an actual line with geometry by expression. The length of the line can be adapted by changing the numer 100000 from the expression (or use a layer defined variable):
extend (
    with_variable (
        'clspnt' ,
        closest_point (
            $geometry ,
            geometry (
                get_feature_by_id (
                    'line',
                    array_to_string (
                        overlay_nearest (
                            'line',
                            1
                        )
                    )
               )
            )
        ),
        make_line (
            @clspnt,
            project (
                @clspnt,
                100000,
                radians (
                    main_angle (
                        geometry (
                            get_feature_by_id (
                                'line',
                                1
                            )
                        )
                    )
                )
            )
        )
    ),
    100000 ,
    0
)
Here how the result looks in the geometry generator:

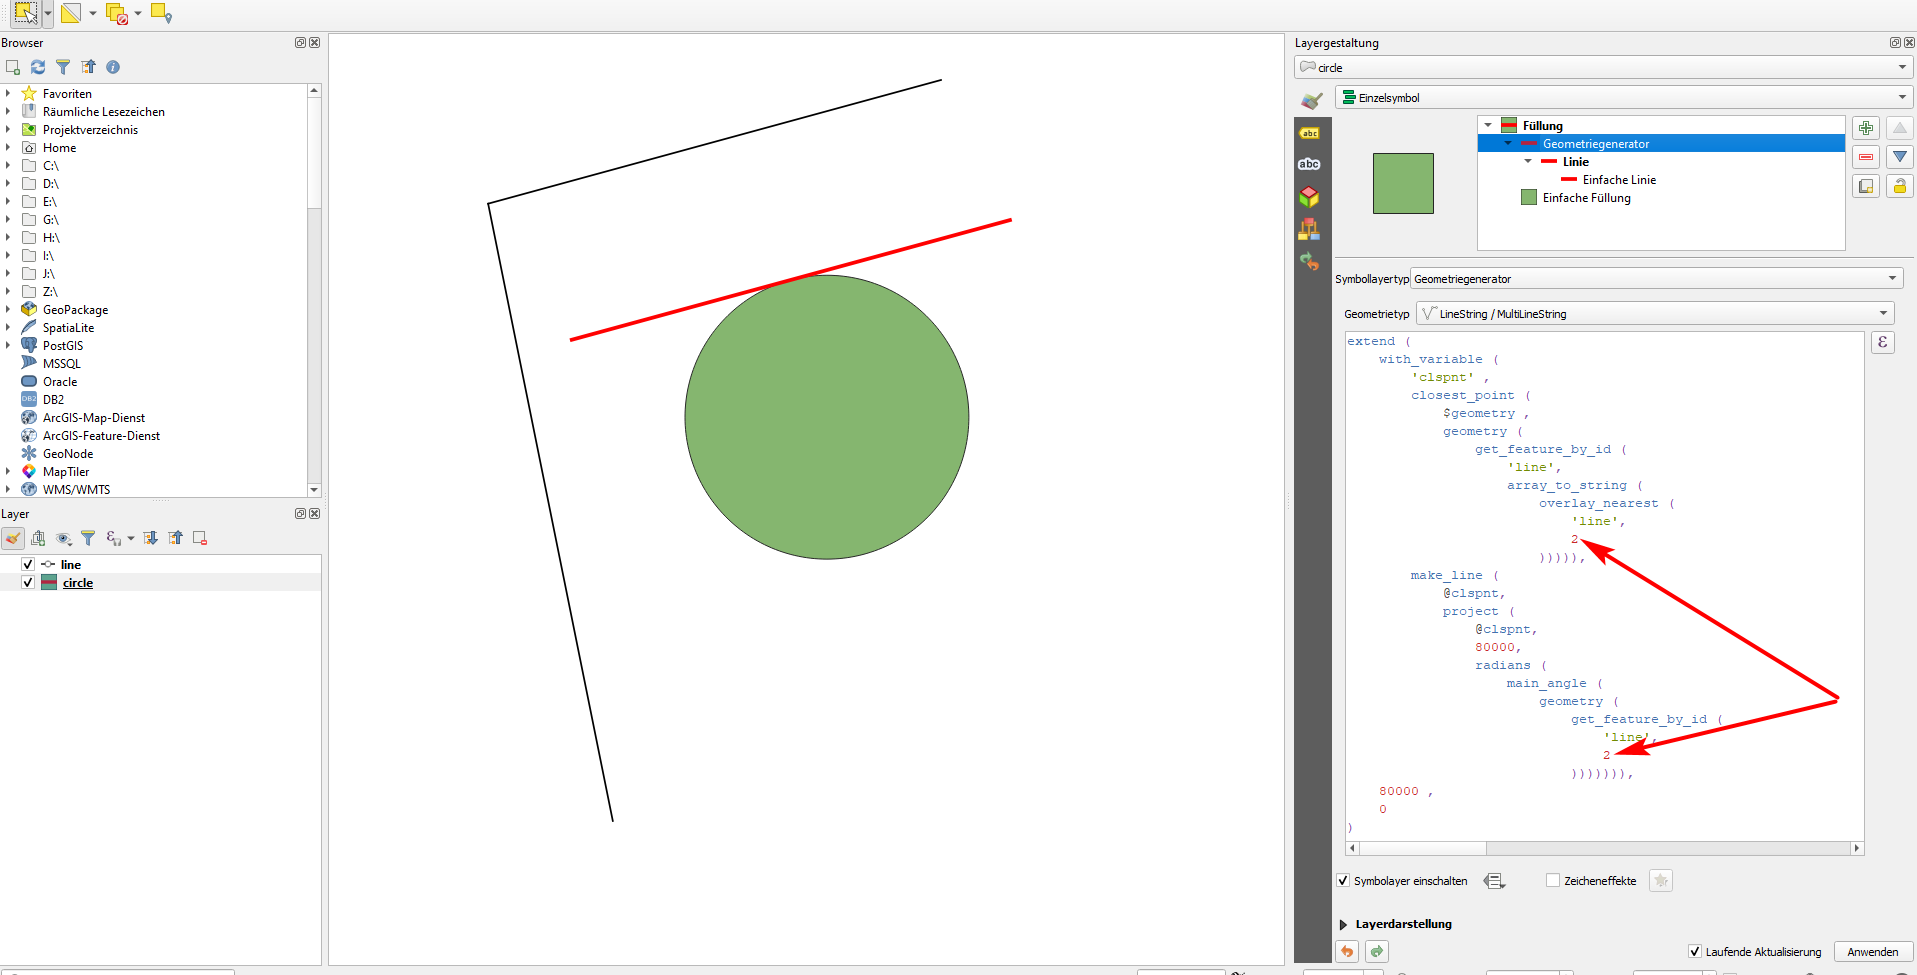
You can just change the id from 1 to 2 to get the parallel tangent of the second line:


