3

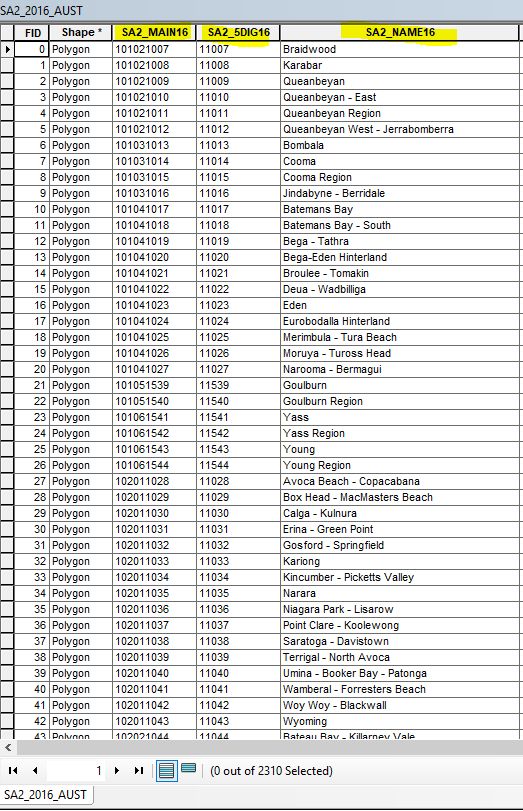
I need to split a raster file (DEM) by 2310 polygons (these are boundaries) using ArcGIS for Desktop. I used the Split Raster tool but I have no control over the naming of the output rasters. They automatically get numbers assigned and I don't know which one is which. The shapefile table contains unique names and codes for each individual boundary (see below) and this is how I need to name my resulting rasters.

How can I split the raster and use a name/code from the polygon layer to name the outputs?

Either of them would work as long as I can later identify them. My ArcPy knowledge is very limited but if there's a solution that is not too complicated it could work too.

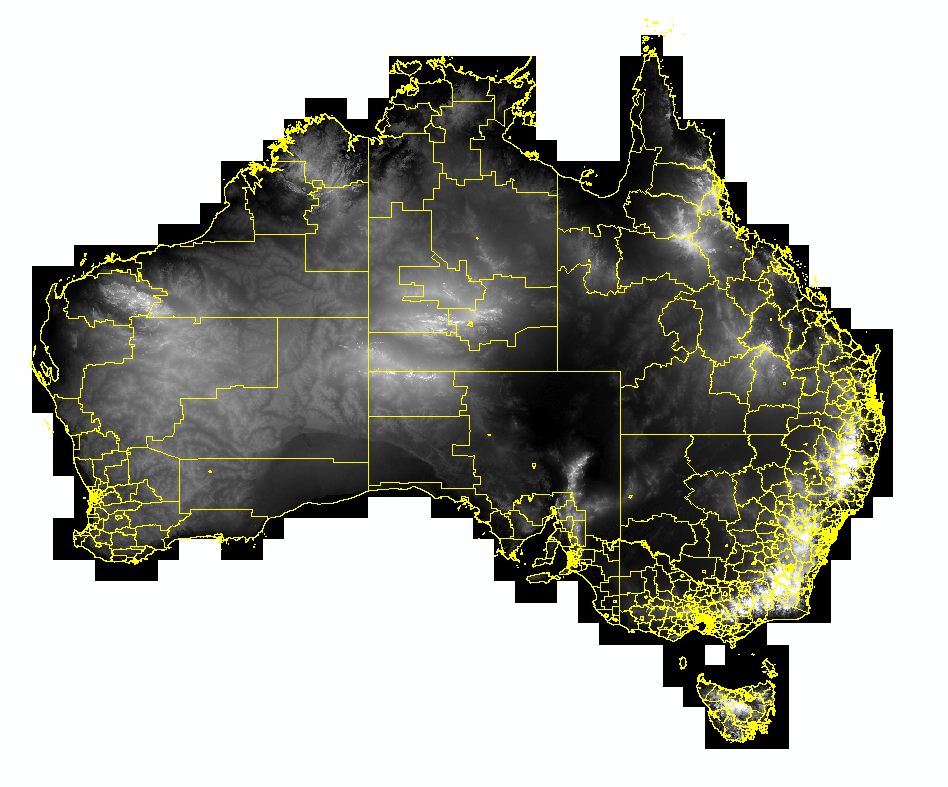
DEM and polygon areas

Attribute table with boundary names and codes

0

3 Answers 3

3

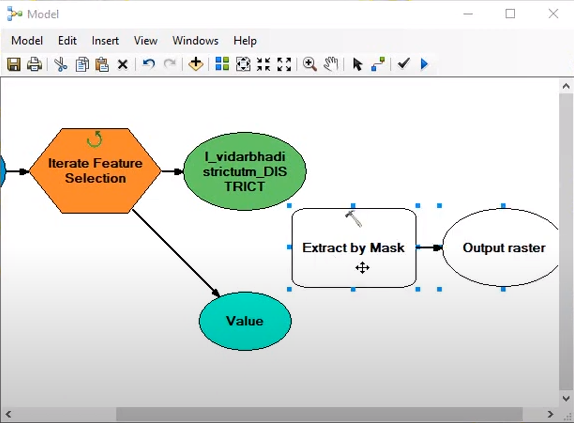
A fairly simple model will achieve this. Iterate over your featureclass using the extract by mask to "cookie cut" out your raster.

You need to be using inline variable substitution to pass the ID to the output raster name, don't know what that is then read the help file!

Also you'll need to set the snap raster environment setting to ensure consistent alignment and match the cell size of your DEM. The temporary copy of your catchment polygon is used to set the extent environment setting of the extract by mask.

Below is the model that will achieve what you want.

Model

2

The Split Raster tool allows you to only specify a prefix that will be applied to each of the raster datasets you will create. A number then will be appended to each prefix, starting with 0.

If you want to have control over the names of the rasters, instead of using Split Raster you can make a loop that uses the Extract by Mask tool to clip the raster by one polygon at a time by selecting that polygon before executing the tool.

Here is the documentation of the tool: https://desktop.arcgis.com/en/arcmap/10.3/tools/spatial-analyst-toolbox/extract-by-mask.htm

0

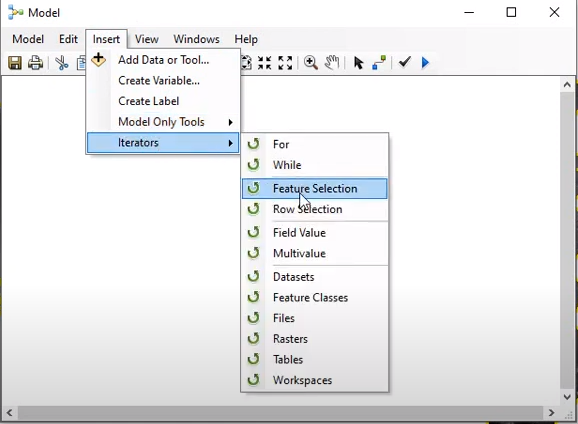
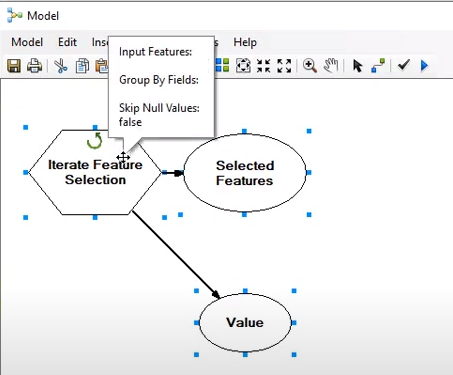
Use iterator tools. Go to model builder.

enter image description here enter image description here

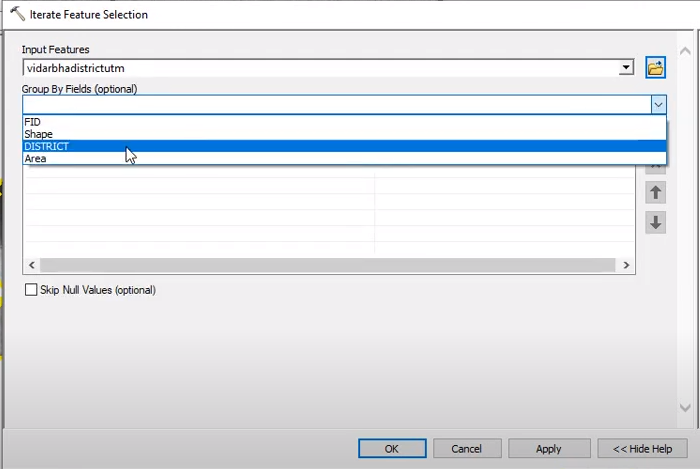
  1. Then provide the input shapefile and select the field by which you want to clip the raster.

enter image description here

  1. Now add the extract by mask tool or clip tool to the model.

enter image description here

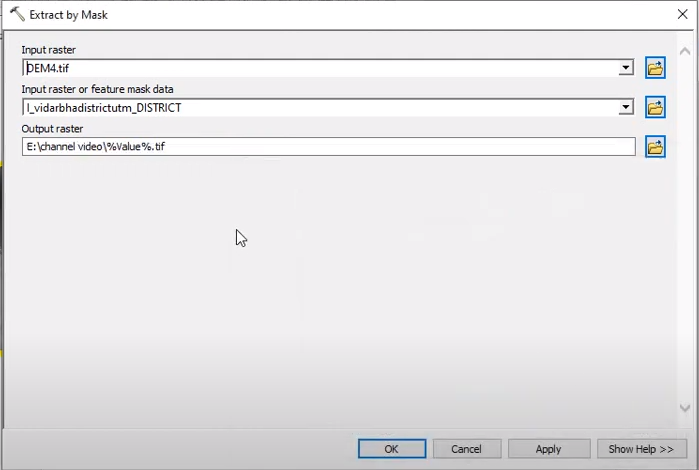
  1. There select the raster input. and in the feature input select the temporary file created in step 1. In the output, go to the desired folder and name as %Value%.tif. It will clip the raster with each polygon in the shaprfile and save them as names provided in the field you have selected. You can also have prefix and suffix before and after the %. For example, DEM%Value%.tif or %Value%DEM.tif

enter image description here

  1. Then Run the model.
1

Your Answer

By clicking “Post Your Answer”, you agree to our terms of service and acknowledge you have read our privacy policy.

Not the answer you're looking for? Browse other questions tagged or ask your own question.