For this task you could use a custom form with some Python/PyQt logic. If you are not at all familiar with this process, I would suggest having a look at this blog post from Nathan Woodrow.
It was written a while ago and is for older versions of QGIS and PyQt but the basic workflow is still very much the same.
I have created an example based on your question which should help you to implement what you are after.
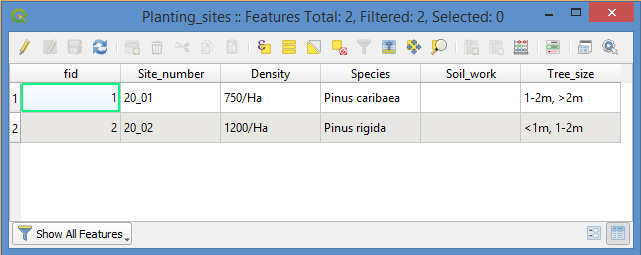
Firstly, I have a polygon layer called 'Planting_sites' whose attribute table looks like this:
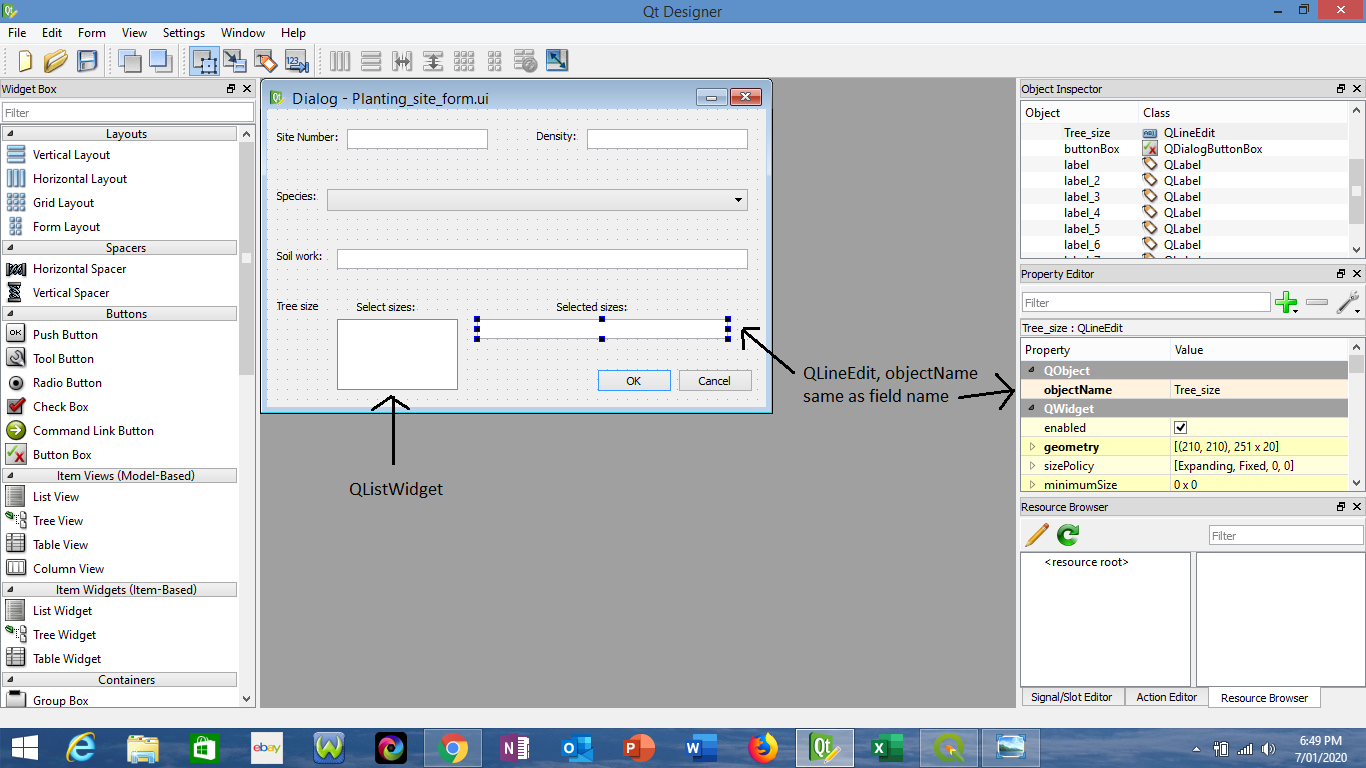
The first step is to create a form in Qt Designer (which should come with your QGIS installation- on Windows can be found in C:/OSGeo4W64/bin). Drag and drop labels and widgets for each attribute field, and change the object name of each widget to match the field name. For the tree size classes you will need a QListWidget, and a QLineEdit to hold the selected sizes. Make sure to change the object name of the line edit to match the associated field name, in this case 'Tree_size'.
Example:
Save this .ui file in the same directory as your project file. Mine is called 'Planting_site_form.ui'
Now you need to create a python file to handle the logic of populating the list widget with the size class items and filling the 'Tree_size' line edit widget from the selected items of the list widget. For this you can use your favorite text editor, IDE or the QGIS Python console.
My Python script contains the following code:
from PyQt5.QtCore import *
from PyQt5.QtWidgets import *

dlg = None
size_field = None
list_widget = None

def formOpen(dialog, layer, feature):
    global dlg
    dlg = dialog
    global size_field
    size_field = dlg.findChild(QLineEdit, 'Tree_size')
    size_field.setReadOnly(True)
    global list_widget
    list_widget = dlg.findChild(QListWidget, 'listWidget')
    list_widget.addItems(['<1m', '1-2m', '>2m'])
    list_widget.setSelectionMode(QListWidget.ExtendedSelection)
    list_widget.itemClicked.connect(selection_changed)

def selection_changed():
    items = [i.text() for i in list_widget.selectedItems()]
    size_field.setText(', '.join(items))
Save this as a python file in the same directory. I called mine 'Planting_sites_logic.py'.
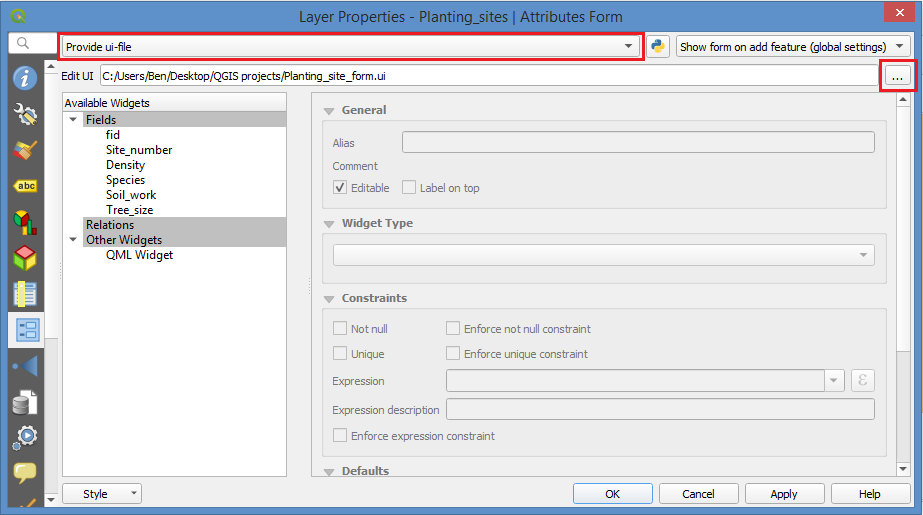
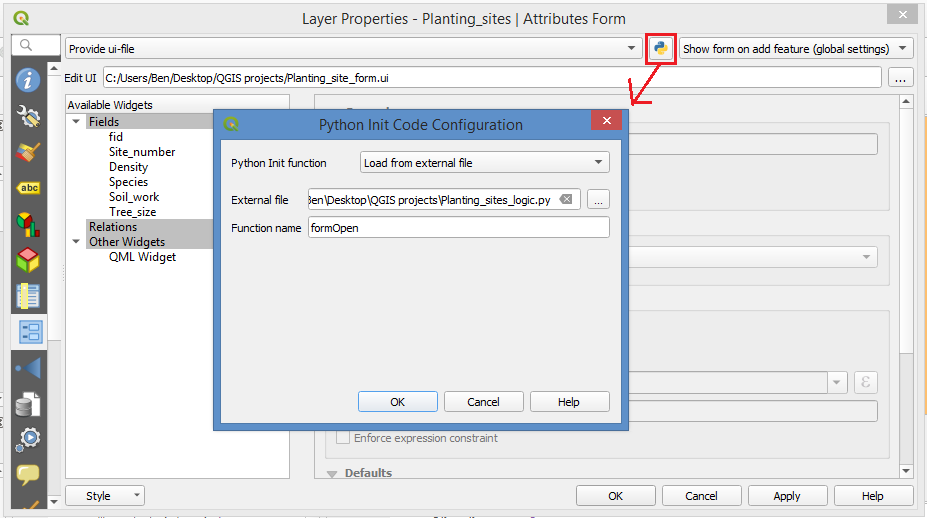
Now open the form tab of the layer properties dialog. Select 'provide ui-file' and, under 'Edit UI', load the .ui file you saved earlier. You also need to specify the Python file and the function name which provides the logic (see images below).
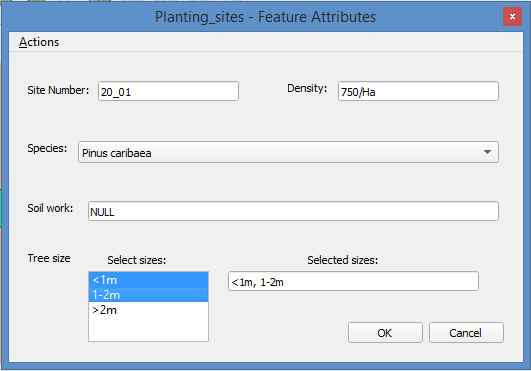
Now when adding new features or editing existing features, the form looks like below. You can use ctrl to select multiple size classes from the list widget and write these to your attribute table!
