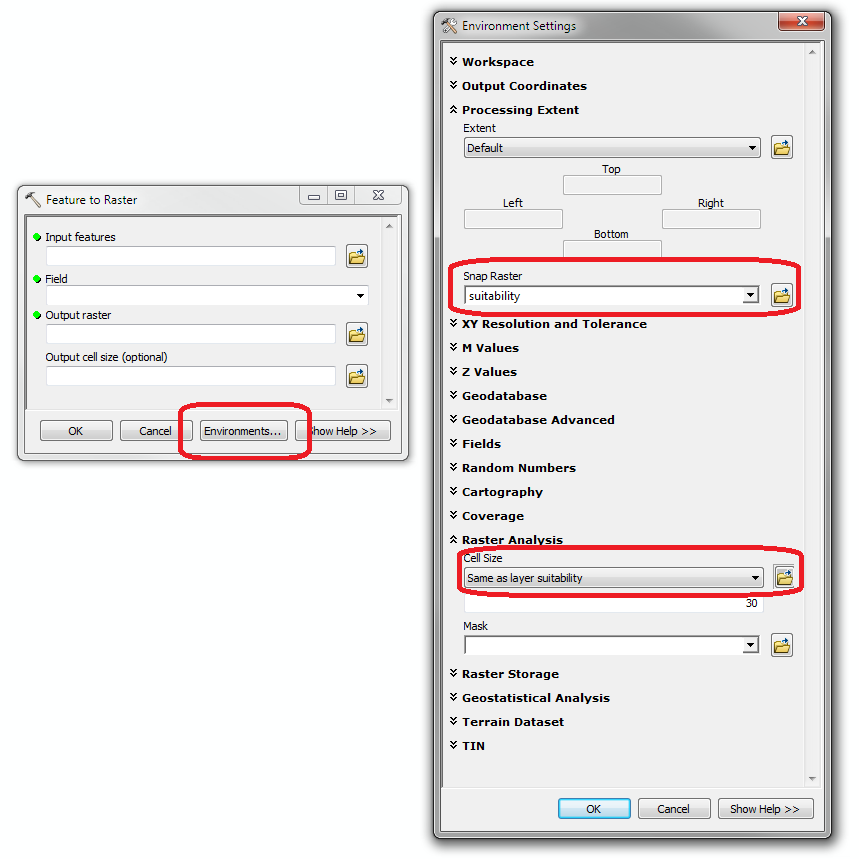
First, you should make sure your roads and hydrology feature classes are being rasterized appropriately. You should make sure that the cell size and snap raster (i.e. pixel registration) matches your suitability layer. If you don't, the rasterized roads and hydrology could have much larger cells than intended or be misaligned, leading to undesirable results. Set the snap raster and cell size environment variables in Feature to Raster, as shown below.

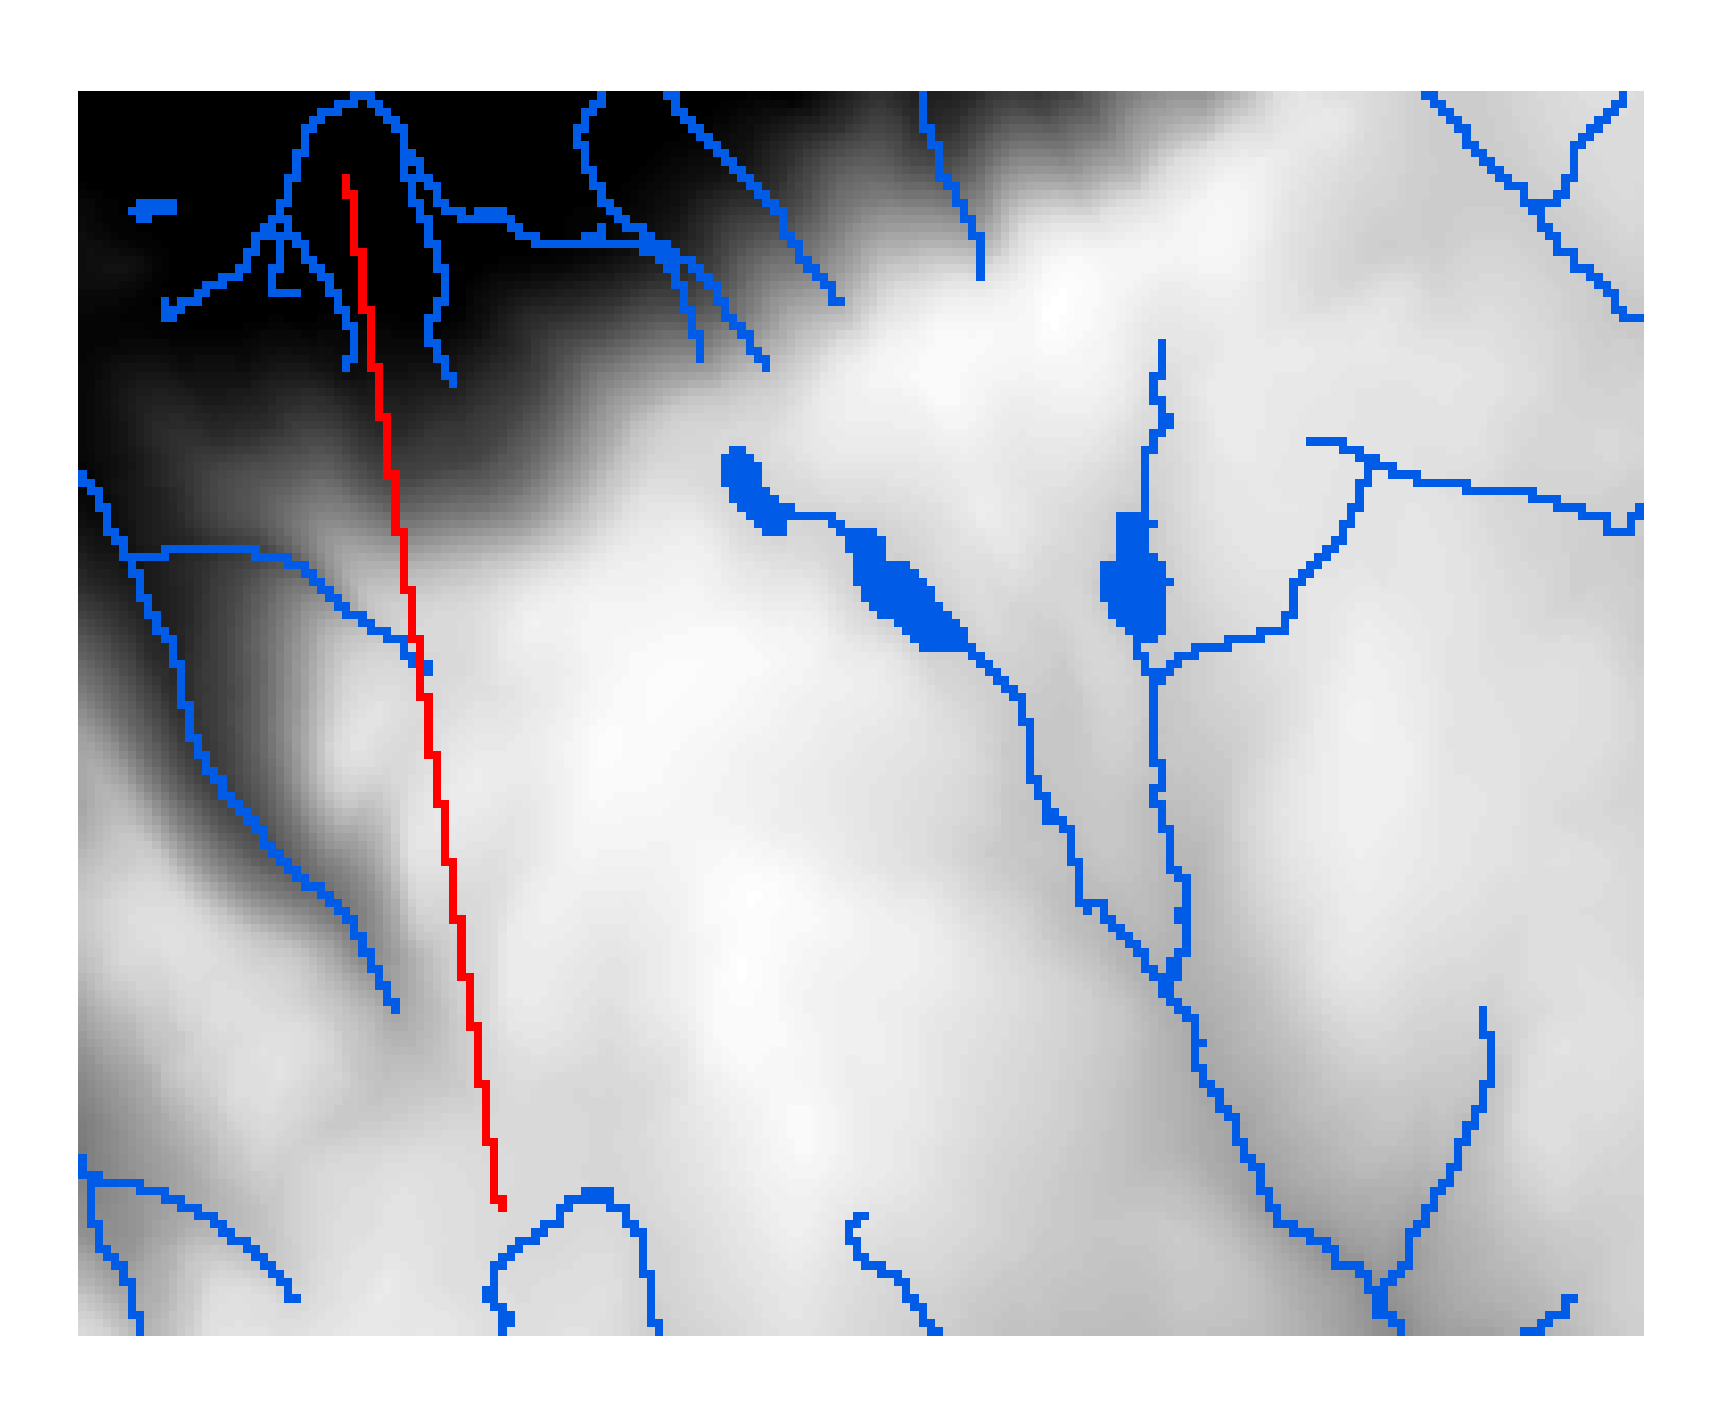
Second is the part you were asking about: setting cells in suitability layers as null where the rasterized road (red) and hydrology (blue) layers have non-null values, as shown below.

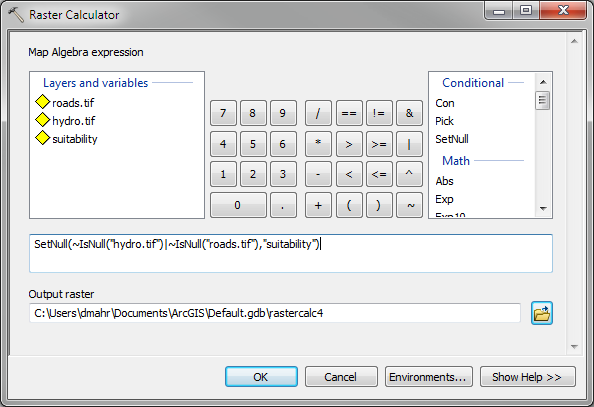
The easiest way to accomplish this is using Raster Calculator. The Map Algebra expression we want to use is SetNull(~IsNull("hydro.tif")|~IsNull("roads.tif"),"suitability"). Let's break this down step by step.
The SetNull tool requires two raster layers in the simplest usage. The first is a conditional raster, where cells not equal to zero (equivalent to boolean TRUE) should be set null. The second is the false raster, representing the desired output cell values where the conditional raster is equal to zero (equivalent to boolean FALSE).
We want the conditional raster (parameter 1) to be TRUE if either the roads or hydrology have non-null values and FALSE everywhere else. The OR operation is handled by a | (a vertical bar or pipe, the key right below backspace). To find non-null values, we can take the inverse (or boolean NOT) of the null values, which are found using the IsNull tool. To do the boolean NOT in raster calculator we use a tilde ~. Combining it all: ~IsNull("hydro.tif")|~IsNull("roads.tif").
We want the false raster to be our suitability layer, which you can pass in as-is.

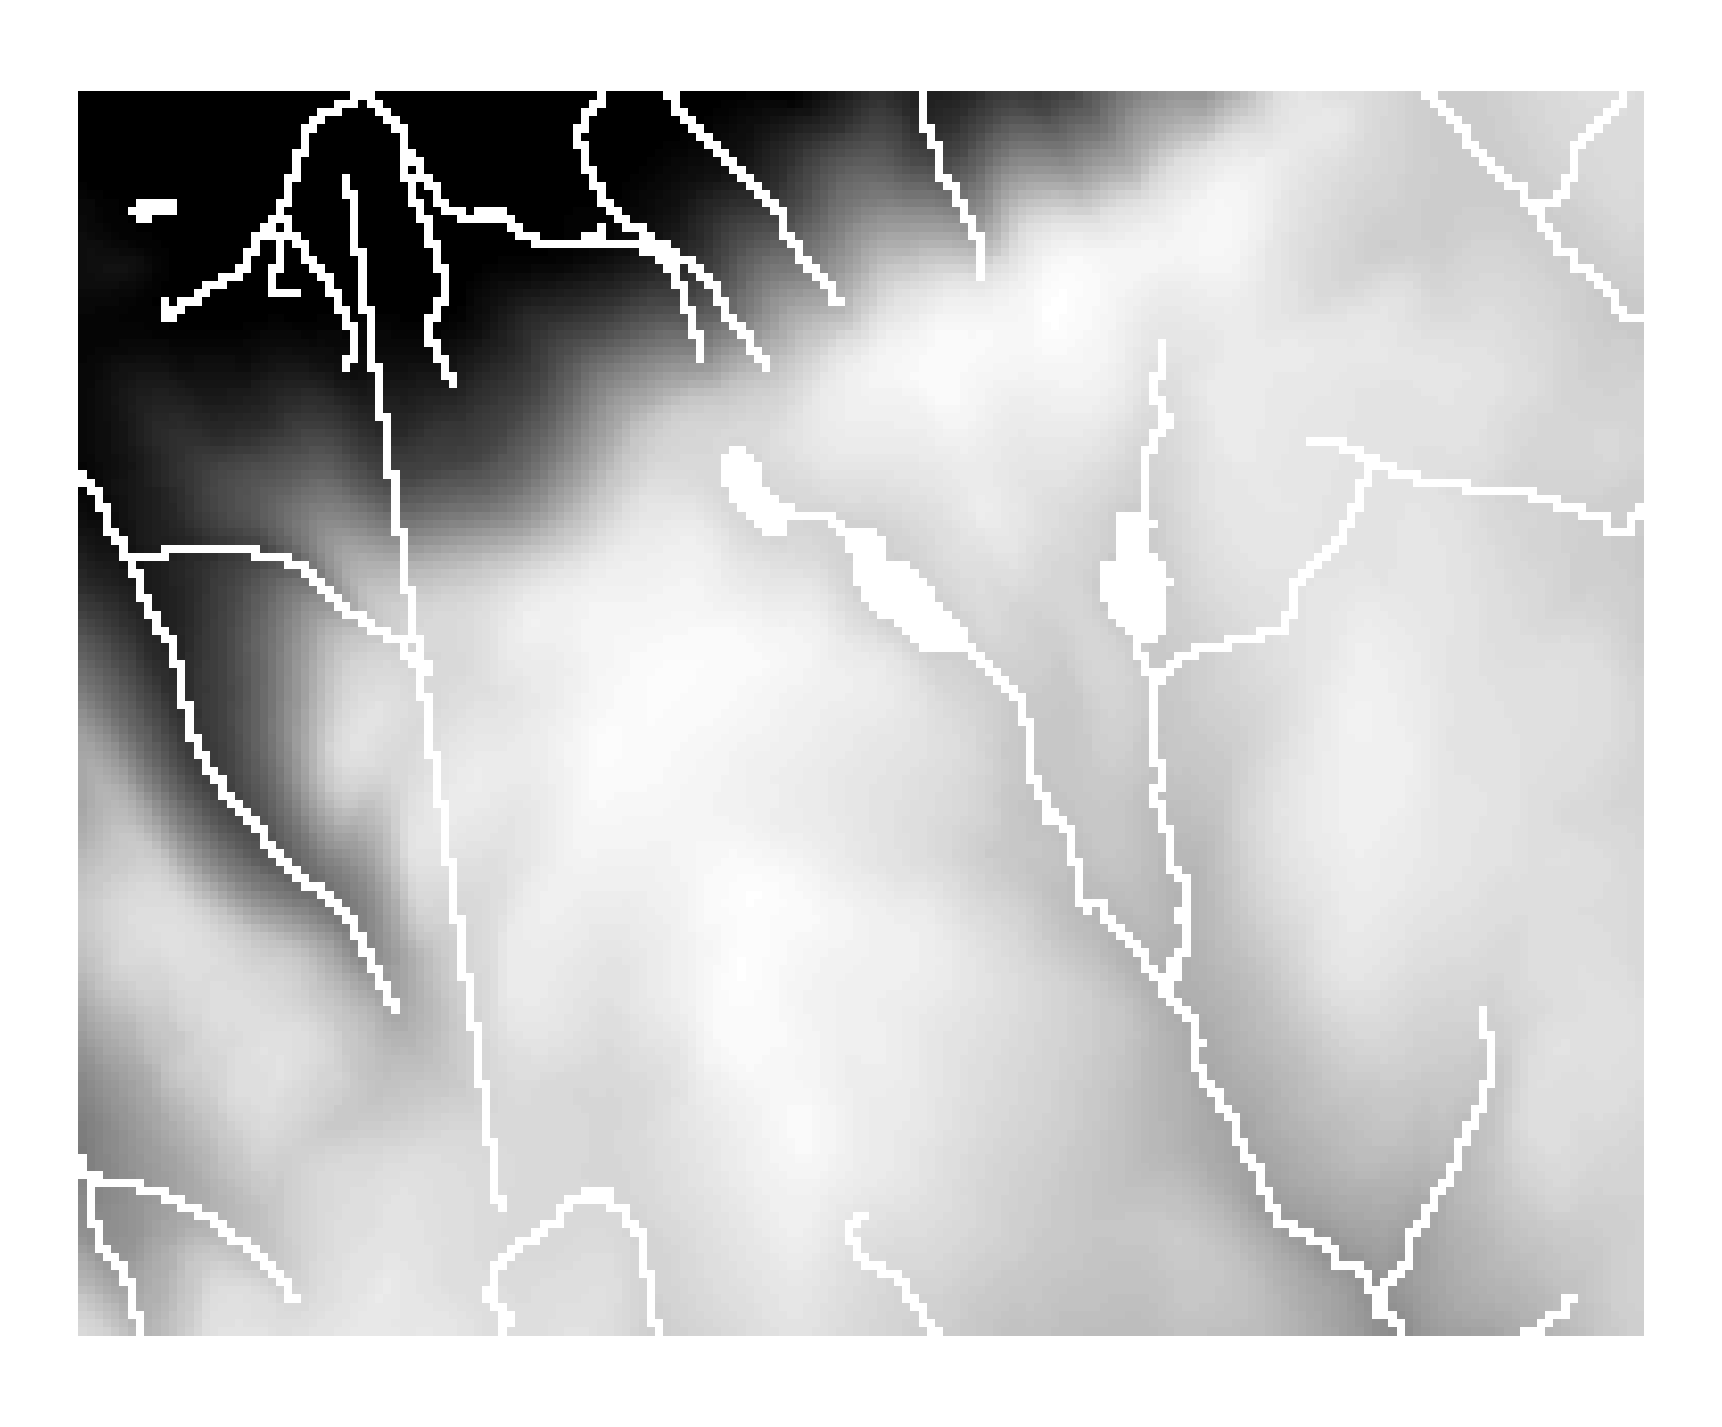
Here's the output, with the hydro and roads rasters correctly set null:


