1

When I use:

gdal_rasterize -b 1 -b 2 -b 3 -burn 255 -burn 255 -burn 255 polygon.shp tiff.tiff

I get a new tiff with a white hole in it with the shape of the polygon shp. However, when I use the reverse process:

gdal_rasterize -i -b 1 -b 2 -b 3 -burn 255 -burn 255 -burn 255 polygon.shp tiff.tiff

I get a blank tiff. I expect the old tiff shaped by the polygon (ie. raster values inside the polygon), instead.

Any ideas why this happens? is it possible to clip a raster with a shapefile in this way?

8
  • Are you possibly re-using the same tiff.tiff? First round burned white pixels inside the polygon and second round added white pixels outside the polygon. Burn is permanent, you can't get the original pixels back.
    – user30184
    Commented Sep 17, 2015 at 20:44
  • actually, I am using the same original tiff as input in both cases, so I should get in the 1st case get values outside the shp area (true), and the 2nd case, raster values inside the shp area (false). What would be wrong?
    – Gery
    Commented Sep 17, 2015 at 20:48
  • I tried your command with some random tiff and a polygon that I digitized and it worked as supposed. Make a zip that contains your tiff.tiff and you polygon.shp so others can have a try. Tell also your GDAL version.
    – user30184
    Commented Sep 17, 2015 at 21:21
  • that's weird then, if it works for you I think it should work here, I use GDAL 1.11.2 (released 2015/02/10). About sharing these data, these data come from a project that doesn't belong to me, for now I am not allowed to share a single minuscule byte of the data I'm working on. Don't get mad with me for this dude, just being responsible in order to avoid dealing with lawyers =D
    – Gery
    Commented Sep 17, 2015 at 22:47
  • That it works for me is just the beginning. I use GDAL 2.0, my tiff is not the same nor is my polygon which make 3 different things. Reason for the issue may be one of them, 2 of them together, or all three which makes 6 alternatives. Change one thing at a time and you will solve it.
    – user30184
    Commented Sep 18, 2015 at 4:53

1 Answer 1

1

I took one png file from the data_dir of GeoServer. Install GeoServer and you will have the same image to play with in directory:

\geoserver-2.7.1\data_dir\coverages\mosaic_sample\

Convert png into tiff and assign projection.

  gdal_translate -a_srs epsg:4326 global_mosaic_6.png  tiff.tiff
    Input file size is 50, 50
    0...10...20...30...40...50...60...70...80...90...100 - done.

Then burn:

gdal_rasterize -i -b 1 -b 2 -b 3 -burn 255 -burn 255 -burn 255 burn.shp tiff.tiff
Warning : the output raster dataset has a SRS, but the input vector layer SRS is  unknown. Ensure input vector has the same SRS, otherwise results might be incorrect.
0...10...20...30...40...50...60...70...80...90...100 - done.

Burn.shp contains one polygon:

POLYGON (( 10.375610236185853 39.384332051098106, 10.344426149120759 39.730475417520644, 10.87455562922735 39.92069834861771, 11.152094004106685 39.546489303836594, 10.92133175982499 39.16292503293594, 10.375610236185853 39.384332051098106 ))

And the result is this:
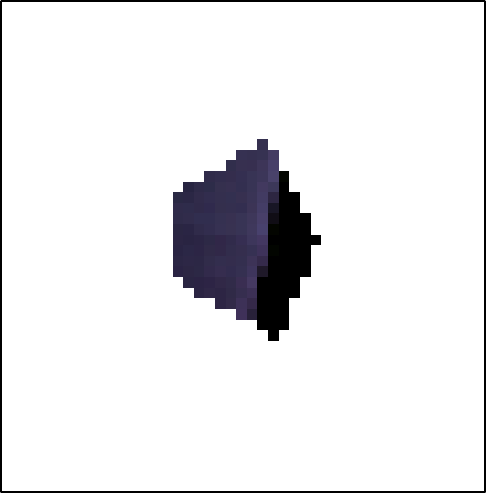
enter image description here

As a comparison the result without using the -i option
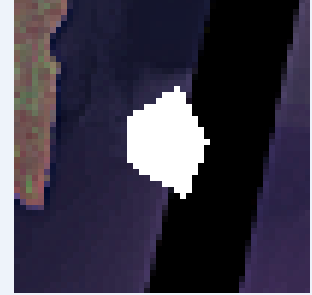
enter image description here

1
  • It is essential to note that gdalwarp and gdal_rasterize only accepts 1-feature polygon for this GeoTIFF editing, just to note that.
    – Gery
    Commented Sep 18, 2015 at 19:49

Your Answer

By clicking “Post Your Answer”, you agree to our terms of service and acknowledge you have read our privacy policy.

Not the answer you're looking for? Browse other questions tagged or ask your own question.