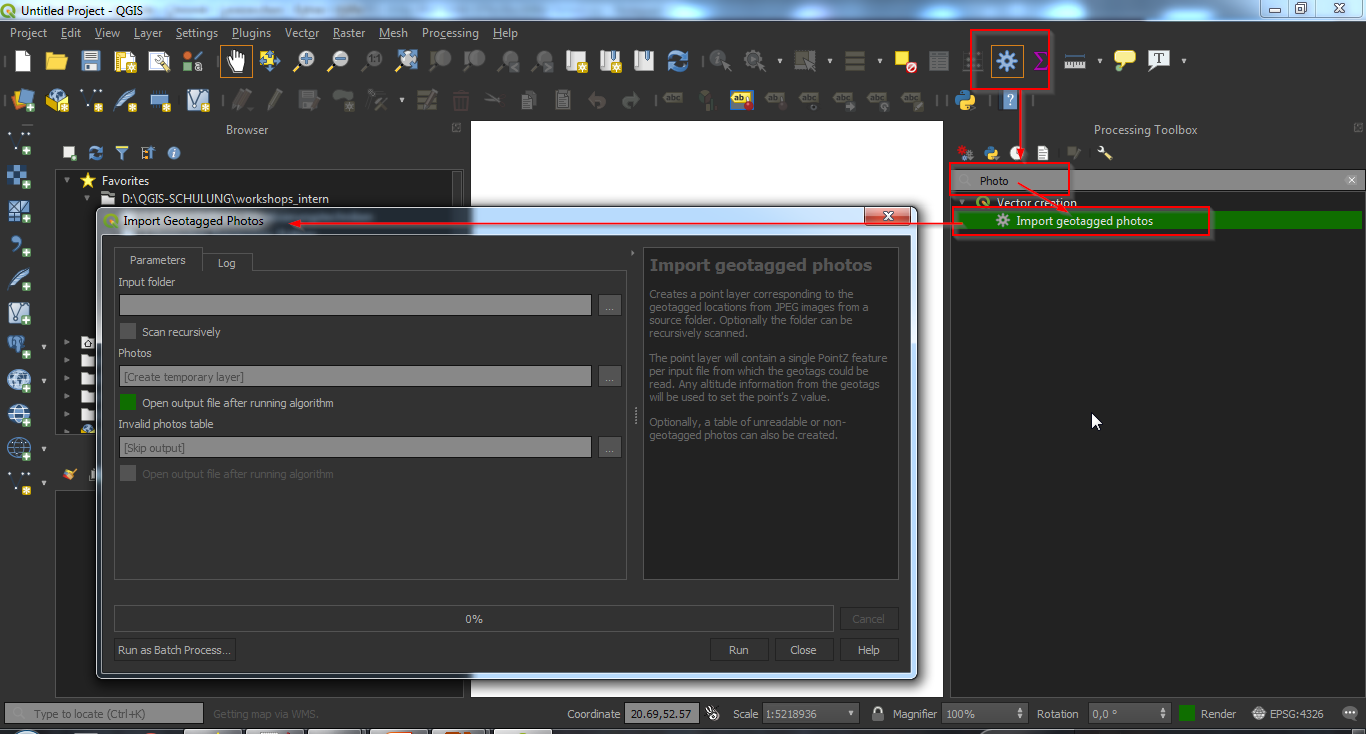
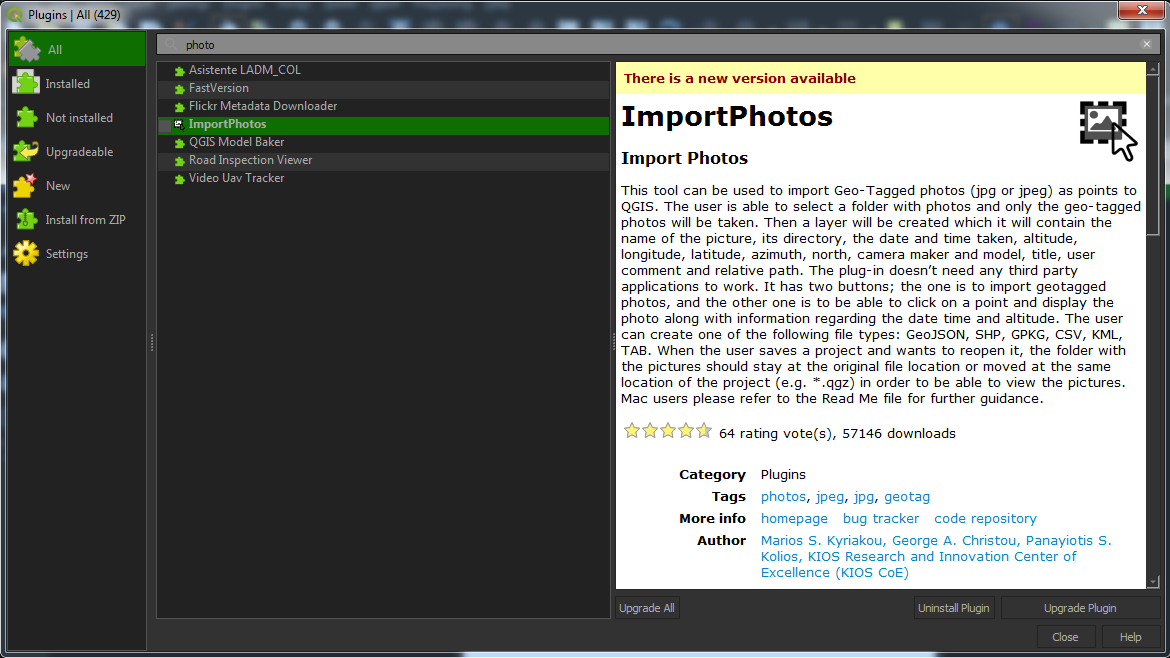
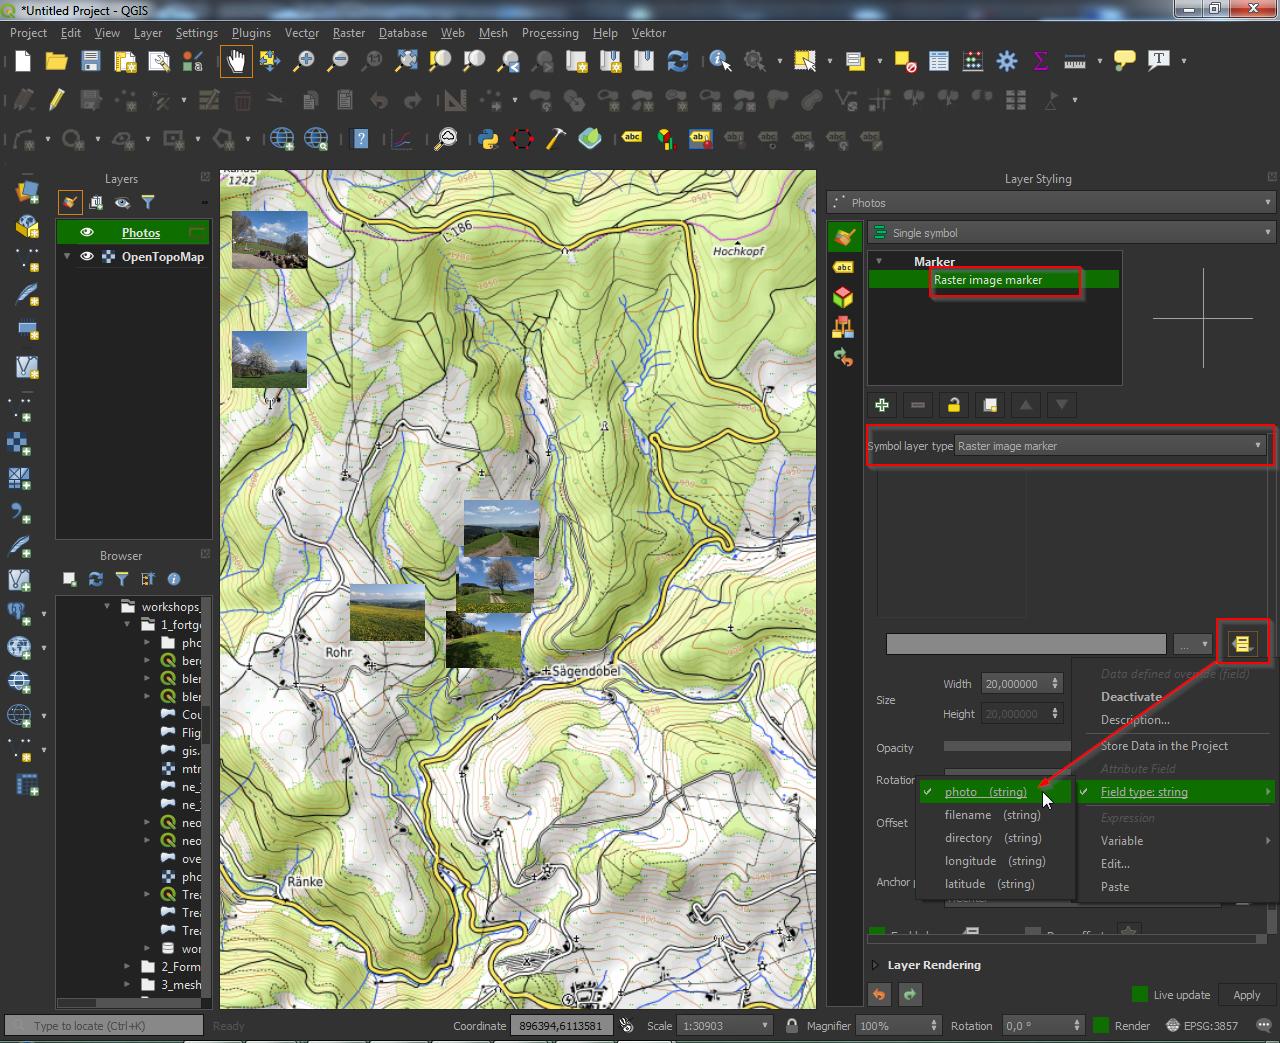
I have a few images from a DJI drone and I can get all of the information from the image exifread. I am trying to get an image to be displayed in the correct location on a QGIS map. Is there an example of how to use this data to get the image to show correctly on a QGIS map?
I have tried the GDAL and nothing happens yet.
https://www.gdal.org/gdal_tutorial.html
Elements
drone-dji:AbsoluteAltitude= 258.91
drone-dji:RelativeAltitude= 60.9
drone-dji:GimbalRollDegree= 0.0
drone-dji:GimbalYawDegree= -148.3
drone-dji:GimbalPitchDegree= -90.0
drone-dji:FlightRollDegree= -2.8
drone-dji:FlightYawDegree= 179.4
drone-dji:FlightPitchDegree= -7.3

Exif Data
Key: Image ImageDescription  value  DCIM\100MEDIA\DJI_0002.JPG
Key: Image Make  value  DJI
Key: Image Model  value  FC550
Key: Image Orientation  value  Horizontal (normal)
Key: Image XResolution  value  72
Key: Image YResolution  value  72
Key: Image ResolutionUnit  value  Pixels/Inch
Key: Image Software  value  v01.29.5379
Key: Image DateTime  value  2019:04:25 10:50:33
Key: Image YCbCrPositioning  value  Centered
Key: Image ExifOffset  value  182
Key: GPS GPSVersionID  value  [0, 0, 0, 0]
Key: GPS GPSLatitudeRef  value  N
Key: GPS GPSLatitude  value  [42, 31, 524857/10000]
Key: GPS GPSLongitudeRef  value  W
Key: GPS GPSLongitude  value  [83, 6, 552361/10000]
Key: GPS GPSAltitudeRef  value  0
Key: GPS GPSAltitude  value  258907/1000
Key: Image GPSInfo  value  710
Key: Image XPComment  value  [48, 0, 46, 0, 57, 0, 46, 0, 49, 0, 57, 0, 57, 0, 0, 0, 0, 0, 0, 0, ... ]
Key: Image XPKeywords  value  [78, 0, 45, 0, 65, 0, 83, 0, 0, 0, 0, 0, 0, 0, 0, 0]
Key: Thumbnail Compression  value  JPEG (old-style)
Key: Thumbnail XResolution  value  72
Key: Thumbnail YResolution  value  72
Key: Thumbnail ResolutionUnit  value  Pixels/Inch
Key: Thumbnail JPEGInterchangeFormat  value  41972
Key: Thumbnail JPEGInterchangeFormatLength  value  8148
Key: EXIF ExposureTime  value  521/500000
Key: EXIF FNumber  value  11/5
Key: EXIF ExposureProgram  value  Program Normal
Key: EXIF ISOSpeedRatings  value  110
Key: EXIF ExifVersion  value  0230
Key: EXIF DateTimeOriginal  value  2019:04:25 10:50:33
Key: EXIF DateTimeDigitized  value  2019:04:25 10:50:33
Key: EXIF ComponentsConfiguration  value  CrCbY
Key: EXIF CompressedBitsPerPixel  value  6343987/1990656
Key: EXIF ShutterSpeedValue  value  -9906/-1000
Key: EXIF ApertureValue  value  227/100
Key: EXIF ExposureBiasValue  value  0
Key: EXIF MaxApertureValue  value  17/10
Key: EXIF SubjectDistance  value  0
Key: EXIF MeteringMode  value  Spot
Key: EXIF LightSource  value  Unknown
Key: EXIF Flash  value  No flash function
Key: EXIF FocalLength  value  15
Key: EXIF FlashPixVersion  value  0010
Key: EXIF ColorSpace  value  sRGB
Key: EXIF ExifImageWidth  value  4608
Key: EXIF ExifImageLength  value  3456
Key: Interoperability InteroperabilityIndex  value  R98
Key: Interoperability InteroperabilityVersion  value  [48, 49, 48, 48]
Key: EXIF InteroperabilityOffset  value  680
Key: EXIF ExposureIndex  value  0/0
Key: EXIF FileSource  value  Digital Camera
Key: EXIF SceneType  value  0
Key: EXIF CustomRendered  value  Normal
Key: EXIF ExposureMode  value  Auto Exposure
Key: EXIF WhiteBalance  value  Auto
Key: EXIF DigitalZoomRatio  value  0/0
Key: EXIF FocalLengthIn35mmFilm  value  30
Key: EXIF SceneCaptureType  value  Standard
Key: EXIF GainControl  value  None
Key: EXIF Contrast  value  Normal
Key: EXIF Saturation  value  Normal
Key: EXIF Sharpness  value  Normal
Key: EXIF DeviceSettingDescription  value  [0, 0, 0, 0]
Key: EXIF SubjectDistanceRange  value  0
Key: EXIF LensMake  value  UnKnown
Key: EXIF LensModel  value  DJI MFT 15mm F1.7 ASPH
PS C:\Users\Cary\Documents\Programming\Python\RailProfile>


