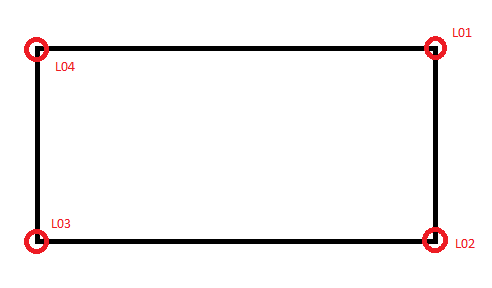
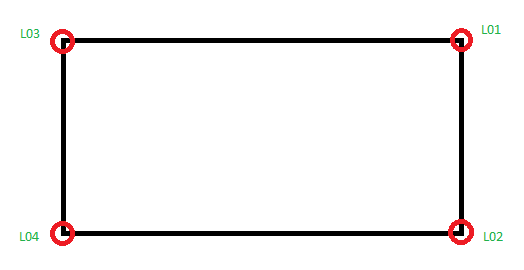
I propose the following way
- Add field 'type' to your point table.
- Fill values of this field with the values 0 (above left point), 2 (above right point), 8 (below right point), 6 (below left point).
- In dialog layers properties select Labels and Rule-Based labeling.
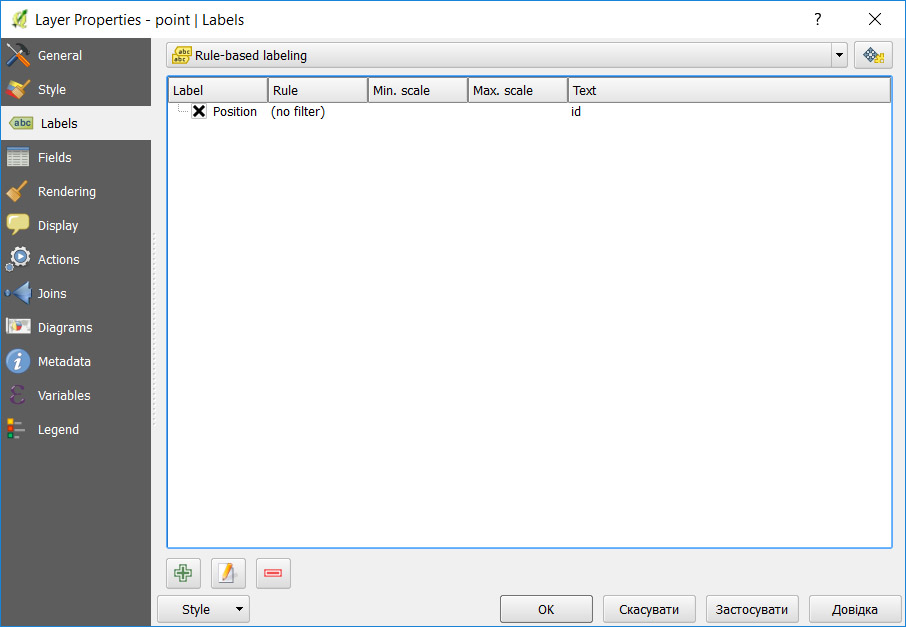
- Press Add rule (down part of the dialog in form of a plus sign).
- Fill the field 'Label with' with the name of your table field (id in my case).
- Press the item Placement -> Quadrant -> Field type...-> Type
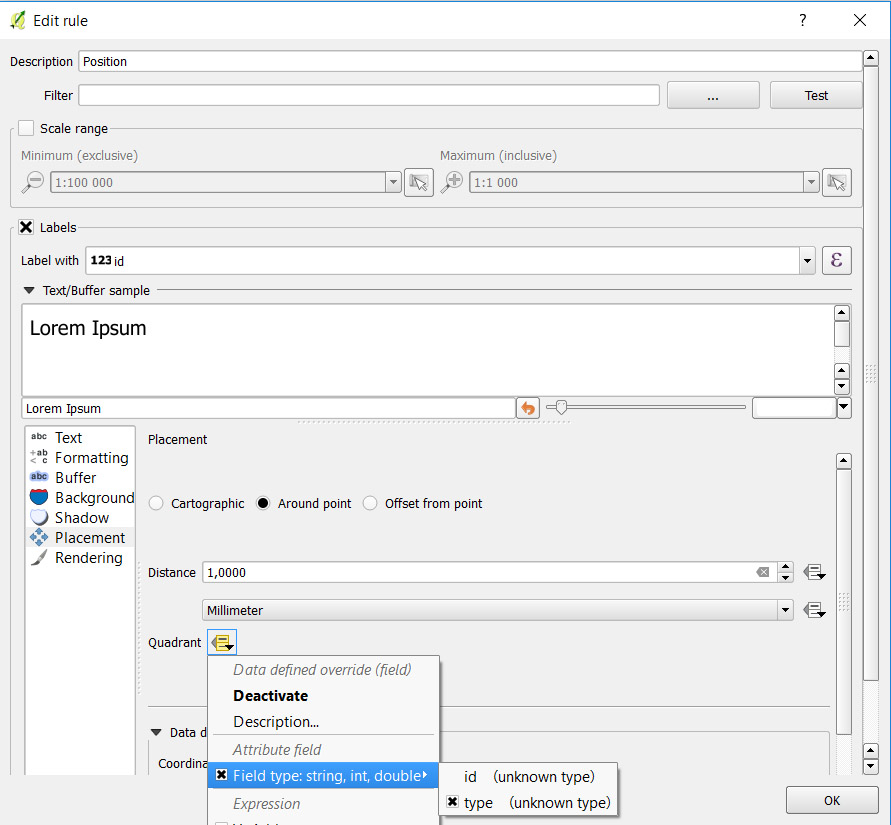
- Set Distance (1 in millimeter)
After applying those properties you get the following picture
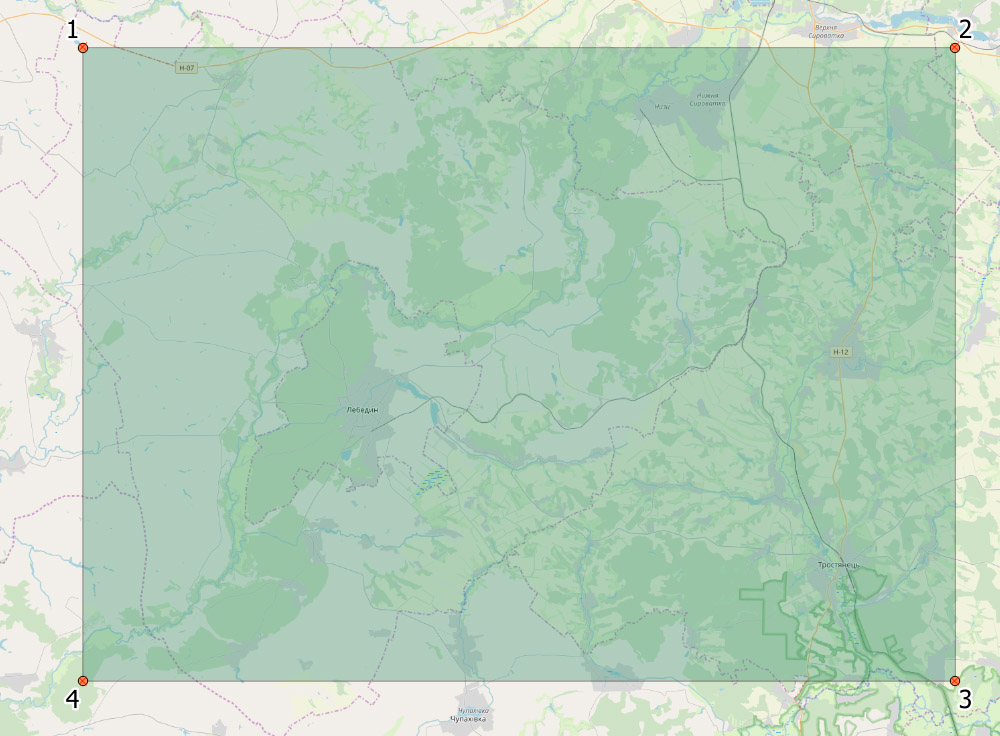
In order to make placement of your labels automatically, you should add an action to the layer that contains polygons. That can be done by choosing Actions item of Layer properties.
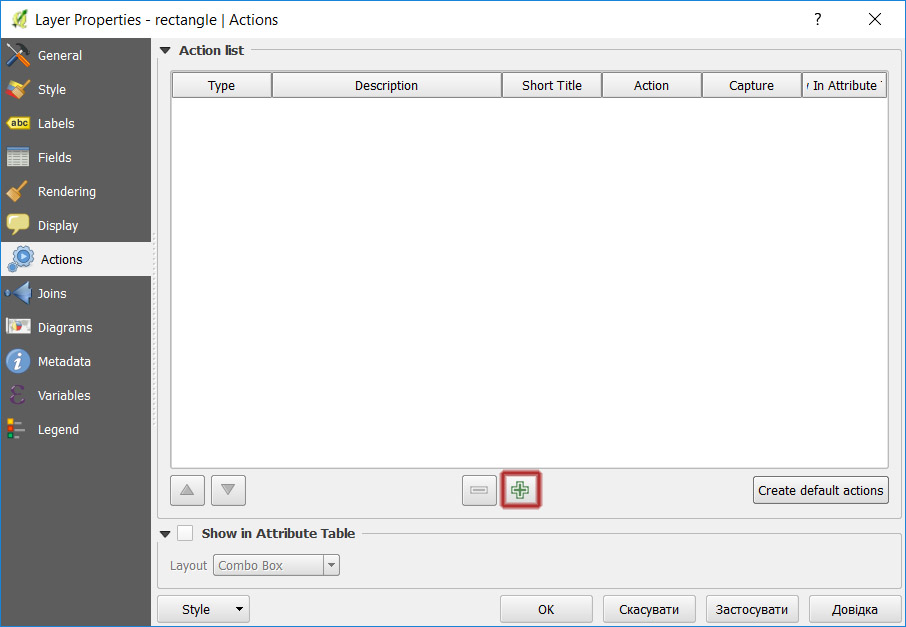
Press Plus button to evoke Edit action dialog.
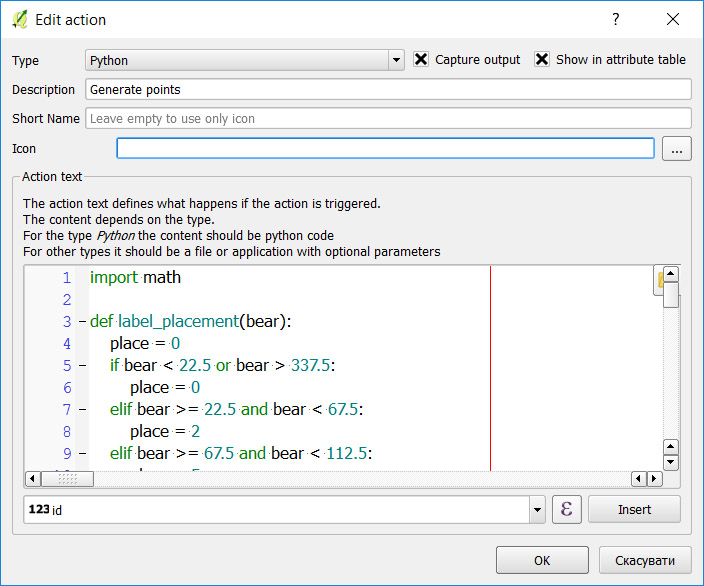
Fill the proposed elements as in the picture and place the following code in the action text box
import math
def label_placement(bear):
    place = 0
    if bear < 22.5 or bear > 337.5:
        place = 0
    elif bear >= 22.5 and bear < 67.5:
        place = 2
    elif bear >= 67.5 and bear < 112.5:
        place = 5
    elif bear >= 112.5 and bear < 157.5:
        place = 8
    elif bear >= 157.5 and bear < 202.5:
        place = 7
    elif bear >= 202.5 and bear < 247.5:
        place = 6
    elif bear >= 247.5 and bear < 292.5:
        place = 3
    elif bear >= 292.5 and bear <= 337.5:
        place = 0

    return place


def reverse_azimuth(az):
    if az < 180:
        az += 180
    else:
        az -= 180
    return az


def direct_geodetic_task(pnt, dist, bear):
    deg = bear * math.pi / 180
    dx = dist * math.sin(deg)
    dy = dist * math.cos(deg)
    x = pnt.x() + dx
    y = pnt.y() + dy
    return QgsPoint(x, y)


def point_in_poly(x, y, poly):
    n = len(poly)
    inside = False
    p1x = poly[0].x()
    p1y = poly[0].y()
    for i in range(n + 1):
        p2x = poly[i % n].x()
        p2y = poly[i % n].y()
        if y > min(p1y, p2y):
            if y <= max(p1y, p2y):
                if x <= max(p1x, p2x):
                    if p1y != p2y:
                        xints = (y - p1y) * (p2x - p1x) / (p2y - p1y) + p1x
                    if p1x == p2x or x <= xints:
                        inside = not inside
        p1x, p1y = p2x, p2y
    return inside


def clear_layer(layer):
    listOfIds = [feat.id() for feat in layer.getFeatures()]
    layer.dataProvider().deleteFeatures(listOfIds)


def bisextrix_bearing(H, A, T):
    x0 = (H.x() + T.x()) / 2
    y0 = (H.y() + T.y()) / 2

    azAH = A.azimuth(H)
    azAT = A.azimuth(T)
    return (azAH + azAT) / 2.0


print "Ok"
layer = None
rectLayer = None
layerList = QgsMapLayerRegistry.instance().mapLayersByName("as")
if len(layerList) > 0:
    layer = layerList[0]
else:
    print "Point table not found"

layerList = QgsMapLayerRegistry.instance().mapLayersByName("planilha")
if len(layerList) > 0:
    rectLayer = layerList[0]
else:
    print "Polygon table not found"

print layer.name()
print rectLayer.name()

# clear_layer(layer)

counter = 0
for feat in rectLayer.getFeatures():
    polys = feat.geometry().asPolygon()

    poly = polys[0]
    if len(poly) > 3:
        print counter, "Vertices=", len(poly)
        poly_len = len(poly)
        for i in range(0, poly_len - 1):
            first_ind = i - 1
            if first_ind < 0:
                first_ind = poly_len - 2
            cr0 = poly[first_ind]
            cr1 = poly[i]
            cr2 = poly[i + 1]

            counter += 1
            az = bisextrix_bearing(cr0, cr1, cr2)
            if az < 0:
                az = 360 + az

            pnt1 = direct_geodetic_task(cr1, 1, az)
            res = point_in_poly(pnt1.x(), pnt1.y(), poly)
            if res:
                az = reverse_azimuth(az)
            type = label_placement(az)

            tolerance = 10
            searchRect = QgsRectangle(pnt1.x() - tolerance,
                                      pnt1.y() - tolerance,
                                      pnt1.x() + tolerance,
                                      pnt1.y() + tolerance)
            request = QgsFeatureRequest()
            request.setFilterRect(searchRect)
            cnt = 0
            for ftr in layer.getFeatures(request):
                cnt += 1
                ftr.setAttribute("type", type)
                layer.updateFeature(ftr)

            # In case no features found in the vicinity of the vertex a point feature will be generated
            if cnt == 0:
                feat = QgsFeature(layer.pendingFields())
                feat.setAttribute("id", counter)
                feat.setAttribute("label", 'X-' + str(counter))
                feat.setAttribute("type", type)
                feat.setGeometry(QgsGeometry.fromPoint(QgsPoint(cr1.x(), cr1.y())))
                (res, outFeats) = layer.dataProvider().addFeatures([feat])

layer.triggerRepaint()
In fact, the python code is included as part of the project that can be found by the GitHub link https://github.com/ulabnit07/12
You can find a Qgis project example.qgs and all the rest files.
- After opening example.qgs you can try to launch the action Generate points on the layer rectangle that performs the desired function.
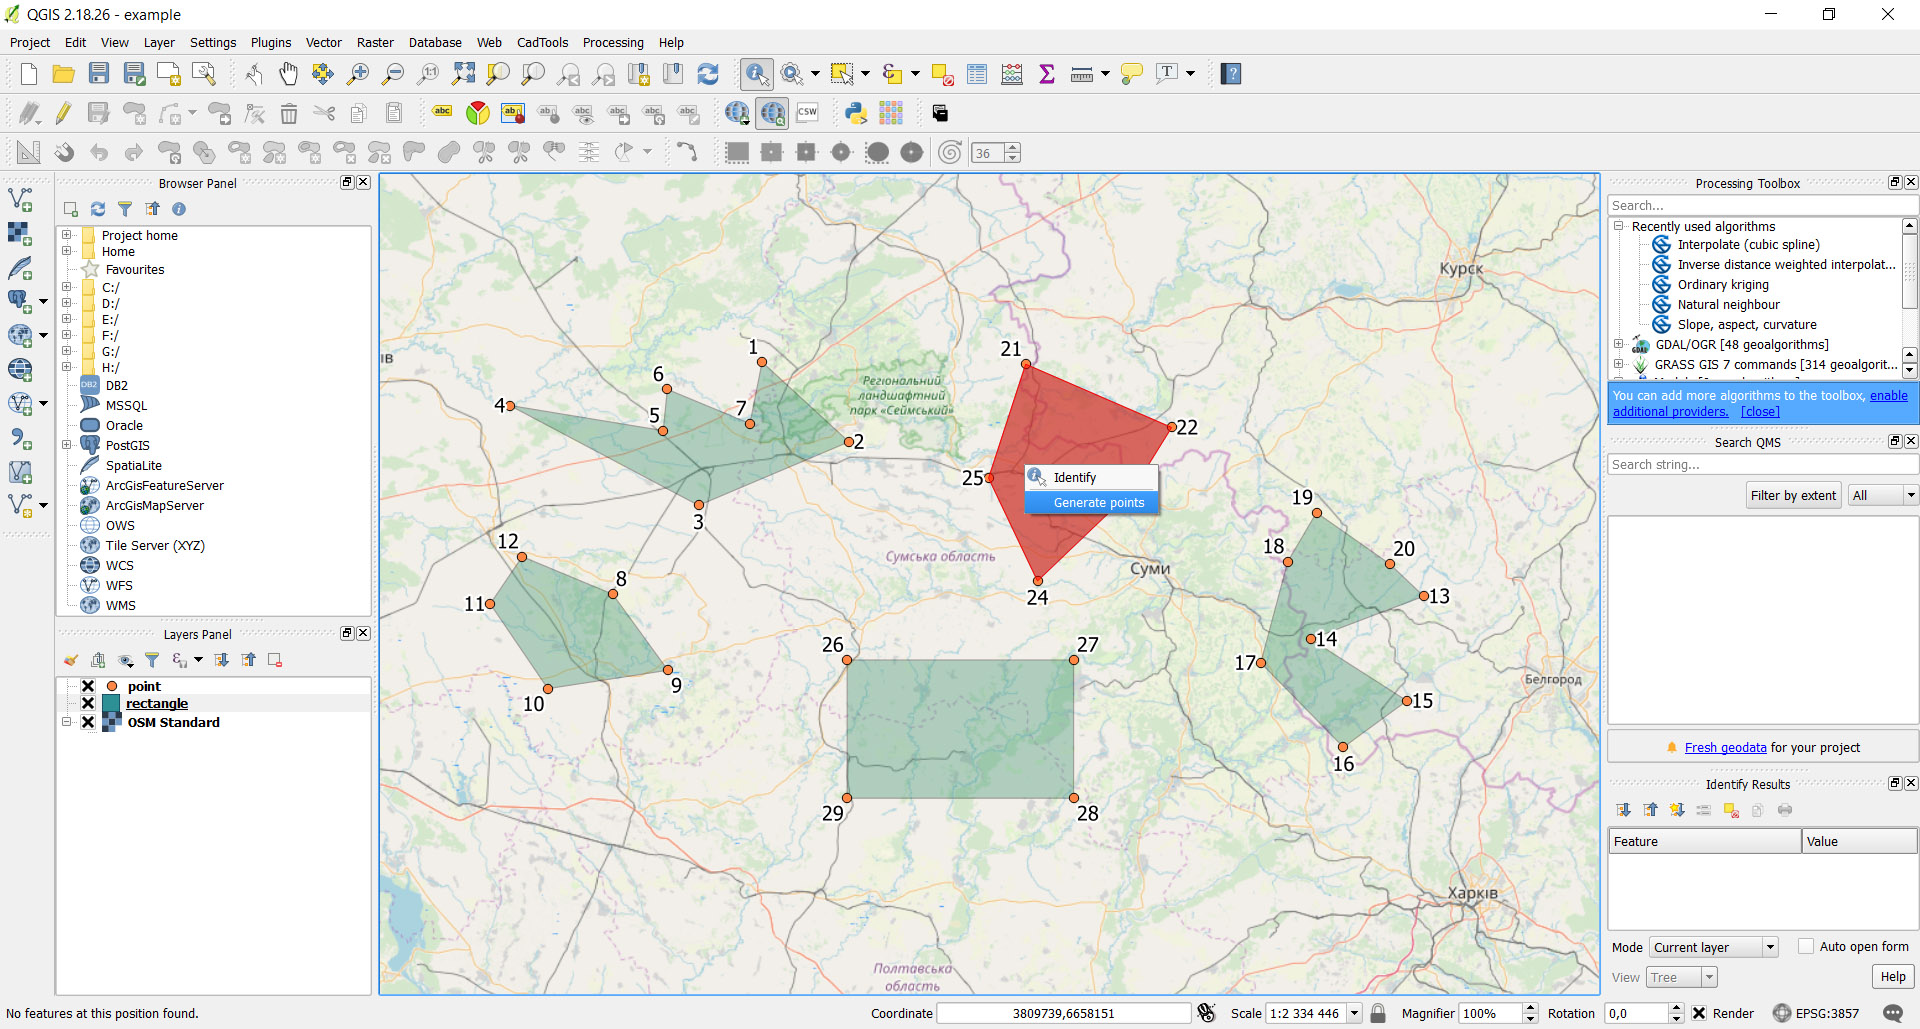
Do not hesitate to ask if anything unclear from what I explained.

