I have created a buffer out of point values with a fixed buffer zone of 150m. I would like to make the buffer look more naturally.
I would accept an error margin of +/- 20 meters to flatten the curves into a more "natural" look. How do I do that?
I have created a buffer out of point values with a fixed buffer zone of 150m. I would like to make the buffer look more naturally.
I would accept an error margin of +/- 20 meters to flatten the curves into a more "natural" look. How do I do that?
This is a case for a convex or concave hull - depending how much additional space you want to include.
Concave hull gives you more flexibility: there is just one single convex hull per geometry, but different possible concave hulls (depending on input paramenters).
In QGIS, there are several options to create such hull, including QGIS expressions (concave hull, however, requires GEOS 3.11 or later, which is not the case in my installation).
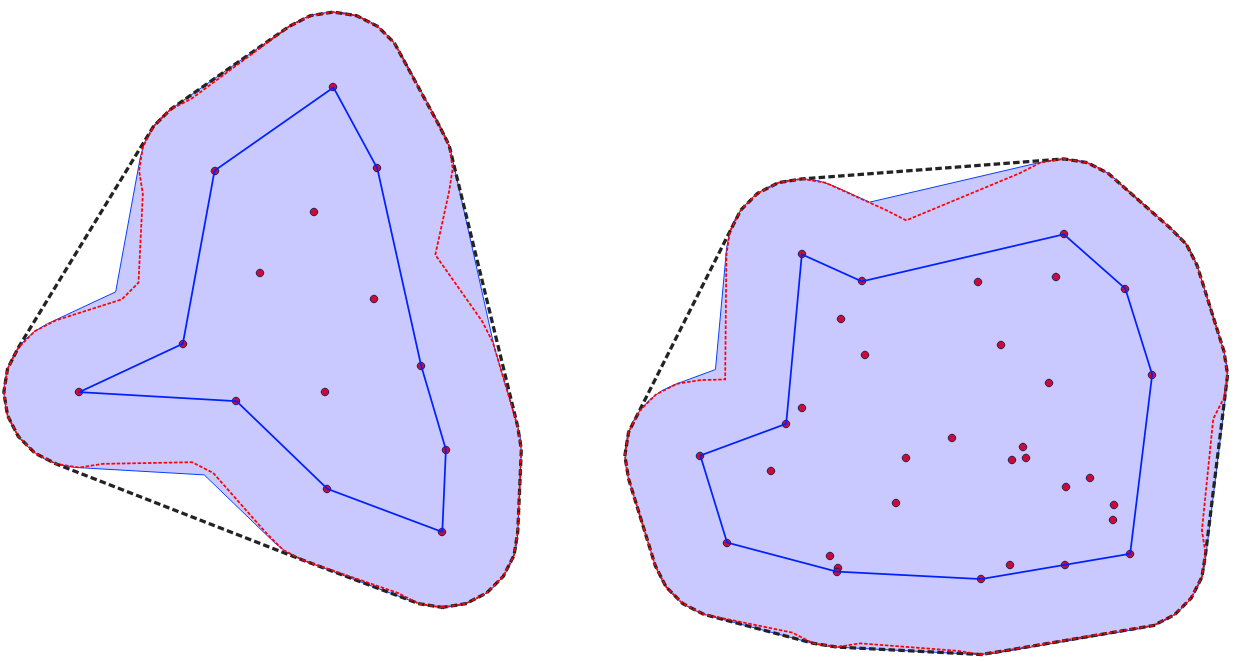
Another option is to use the tools under Menu Processing > Toolbox - type "hull" to find the relevant algorithms. See the screenshot for results: black line corresponds to convex hull, red line to Concave Hull (K-Nearest Neighbor) with the settings as you can see on the screenshot. Change these values to adapt results: a small value is close to the input geometry, a large value will result in a convex hull.
An alternative would be creating a Concave hull (Alpha shapes) based on your input points first and only then buffer the result:
Same data as before: red dots=input points; blue line=Concave hull (Alpha shapes); blue polygon=buffered alpha shapes; dotted lines in black and red: result from the first solution (see screenshot above):

You can increase the number of segments used to approximate a curve using the "Segments" parameter of the QGIS's Buffer tool:
150m buffer created using the default 5 segments on top of a buffer created with 100 segments:
Another option is first to apply another buffer at a relativele larger distance and then apply once again a buffer with the negative value of this distance. This keeps the result more or less at the initial buffer you have, but flattens it, eliminating "bays". The advantage is that depending on the (additional) buffer distance, you can have heavier or lesser flattening effects.
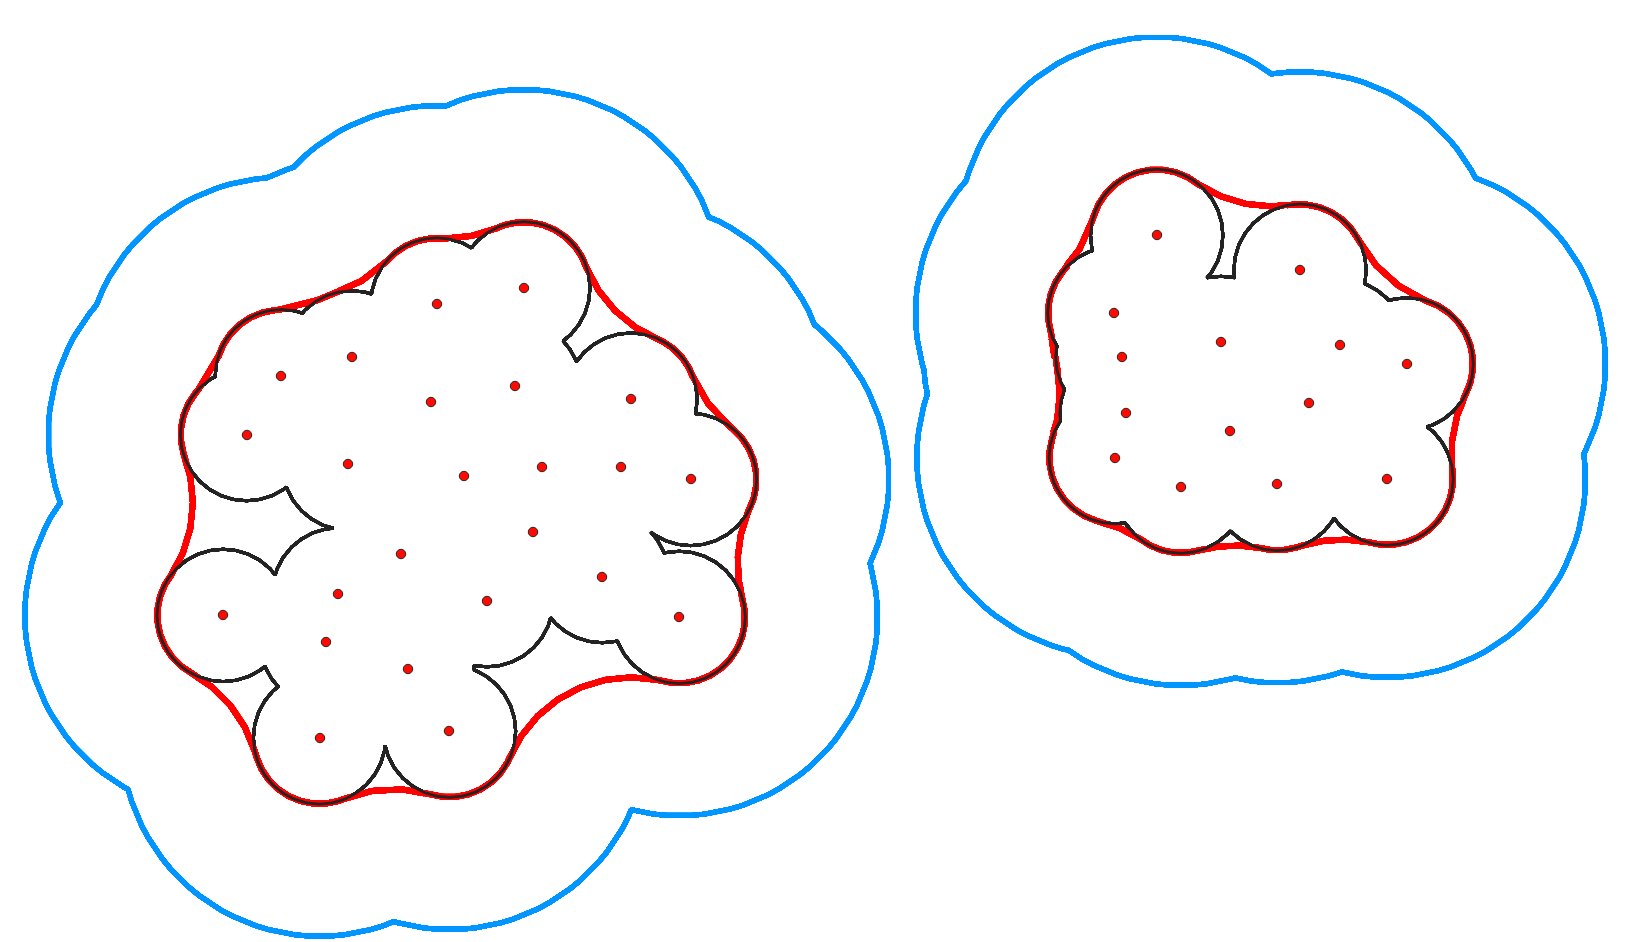
Red points with initial buffer (150 m) = black line, 300 m distance buffer (blue line) and final buffer (red line), a -300 m buffer from the blue one:

A good and easy way to test differint buffer distances and see in realtime the "flattening" effects is to use geometry generator with the following expression (change the value of 300 to see different flattening effects):
with_variable ('dist', 300, -- change value here
    buffer (buffer ($geometry,@dist),-@dist)
)
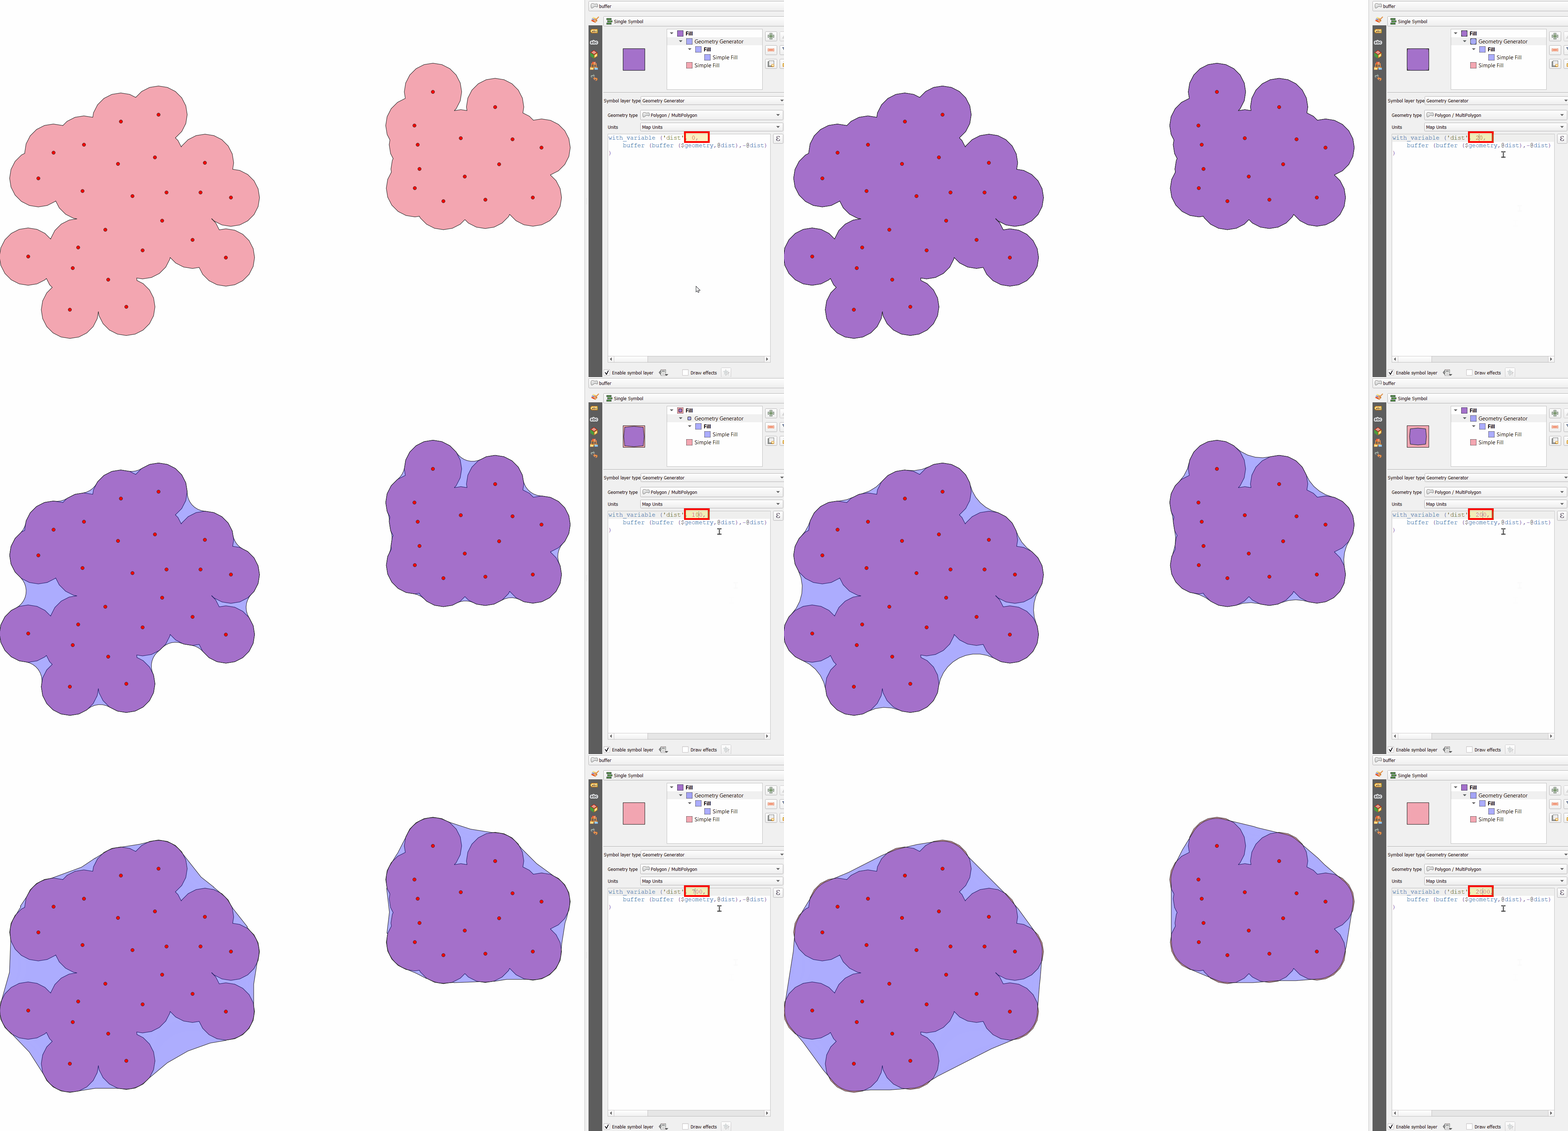
"Preview" with geometry generator and different distances to test which one fits best your needs:

When satisfied with the result, run the regular buffer tool (Menu Vector > Geoprocessing tools) twice with the distance and its negative value or run Menu Processing > Toolbox > Geometry by Expression with the same expression to get the result as actual polygon.
In such cases, I usually use the following expression, which allows you to configure the final vector result very flexibly:
smooth(
    simplify(
        buffer($geometry, distance:=150, segments:=30),
    tolerance:=10),
iterations:=5)
This particular construction of the expression assumes that all your points are combined into one multipoint object (i.e. there will be one row in the attribute table of the layer). If all your points are separate objects, then I think it will not be difficult for you to create a derived layer in which all the points will be combined into one multipoint.
There are two functions involved in this expression that allow flatten the curves into a more "natural" ("organic") look:
simplify - simplifies a geometry by removing nodes using a distance-based threshold (the algorithm preserves large deviations in geometries and reduces the number of vertices in nearly straight segments).
In our case, in my opinion, a value of 10 m for argument "tolerance" gives a good result.
smooth - smooths a geometry by adding extra nodes which round off corners in the geometry.
This algorithm has a rich set of arguments that allow you to flexibly control the smoothing process and, accordingly, adjust the geometry features of the resulting result.
In our case, to get an excellent result, in my opinion, it is quite enough to use only one argument "iterations", setting the value "5" for it.
If you just need to visualize the result, then use the geometry generator with the above expression.
If you do not need to create an actual polygon layer (when you just need a beautiful visualization), and all the points are separate objects and it is not convenient or you do not want to combine them into one multipoint, just use the following expression for the geometry generator:
smooth(
    simplify(
        buffer(collect($geometry), distance:=150, segments:=30),
    tolerance:=10),
iterations:=5)
I hope this method will be useful in your projects.