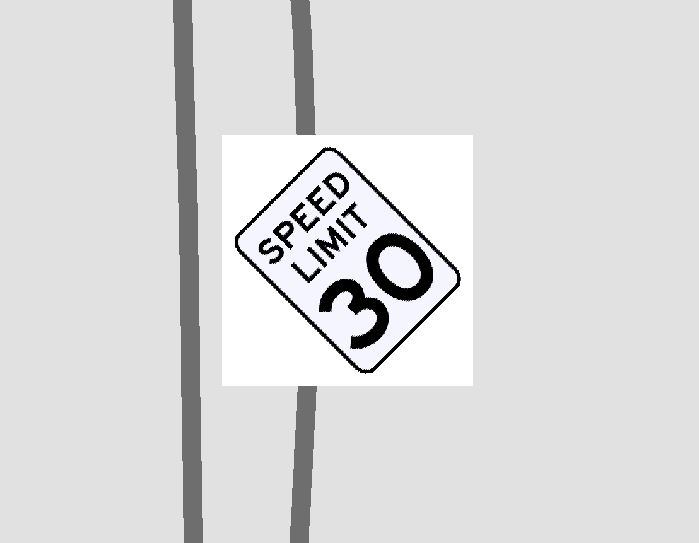
How can I insert this image into an mxd so the white background doesn't show up? I've tried using photoshop to delete the background and save it as a format that supports transparent backgrounds (gif and png) to no apparent effect. Creating clipping masks in photoshop and inserting resulting images also doesn't seem to do anything. I need to fit a bunch of similar rotated signs next to each other, with a bunch of base features in behind them (such as the dark grey lines in the attached image) than need to be visible, so I can't have the backgrounds of each image blocking each other and the base features out.
4 Answers
This is a known issue with ESRI.
Their Page suggests these following workarounds (quoted from ESRI):
Use one of the following two solutions to solve this issue.
It is highly recommended to download and use ArcGIS Pro to perform all printing and exporting functions.
ArcGIS Pro is not limited by the graphical device interface (GDI) limitations which exist in ArcMap. Transparency is no longer converted to raster formats, and thus ArcGIS Pro supports transparency in layout elements.
Additionally, Web Open Font Format (WOFF) support in SVG allows for better text embedding. Use a pure vector EMF graphic instead. See the links in the Related Information section below for more information.
http://support.esri.com/EN/knowledgebase/techarticles/detail/34286
http://support.esri.com/fr/knowledgebase/techarticles/detail/36621
-
2Suggest you edit "This is a known issue with ESRI" to, "This is a known issue with ESRI for well over a decade" so that people won't get their hopes up of this ever being fixed. --- Unless and until you sign your rights away and use ArcGIS "Pro". Commented Apr 28, 2016 at 20:32
-
Use vector EMF. Works fine but EMF is the only vector format supported by ArcGIS Desktop (I am not even mentioning Pro as it is not a fully fleshed out and production ready GIS). You can create and then convert vector graphics in most graphic design software. For example, open a vector graphic in Adobe Illustrator and export as EMF. I won't discuss tracing but it is possible to convert image to vector fairly simply using tracing.
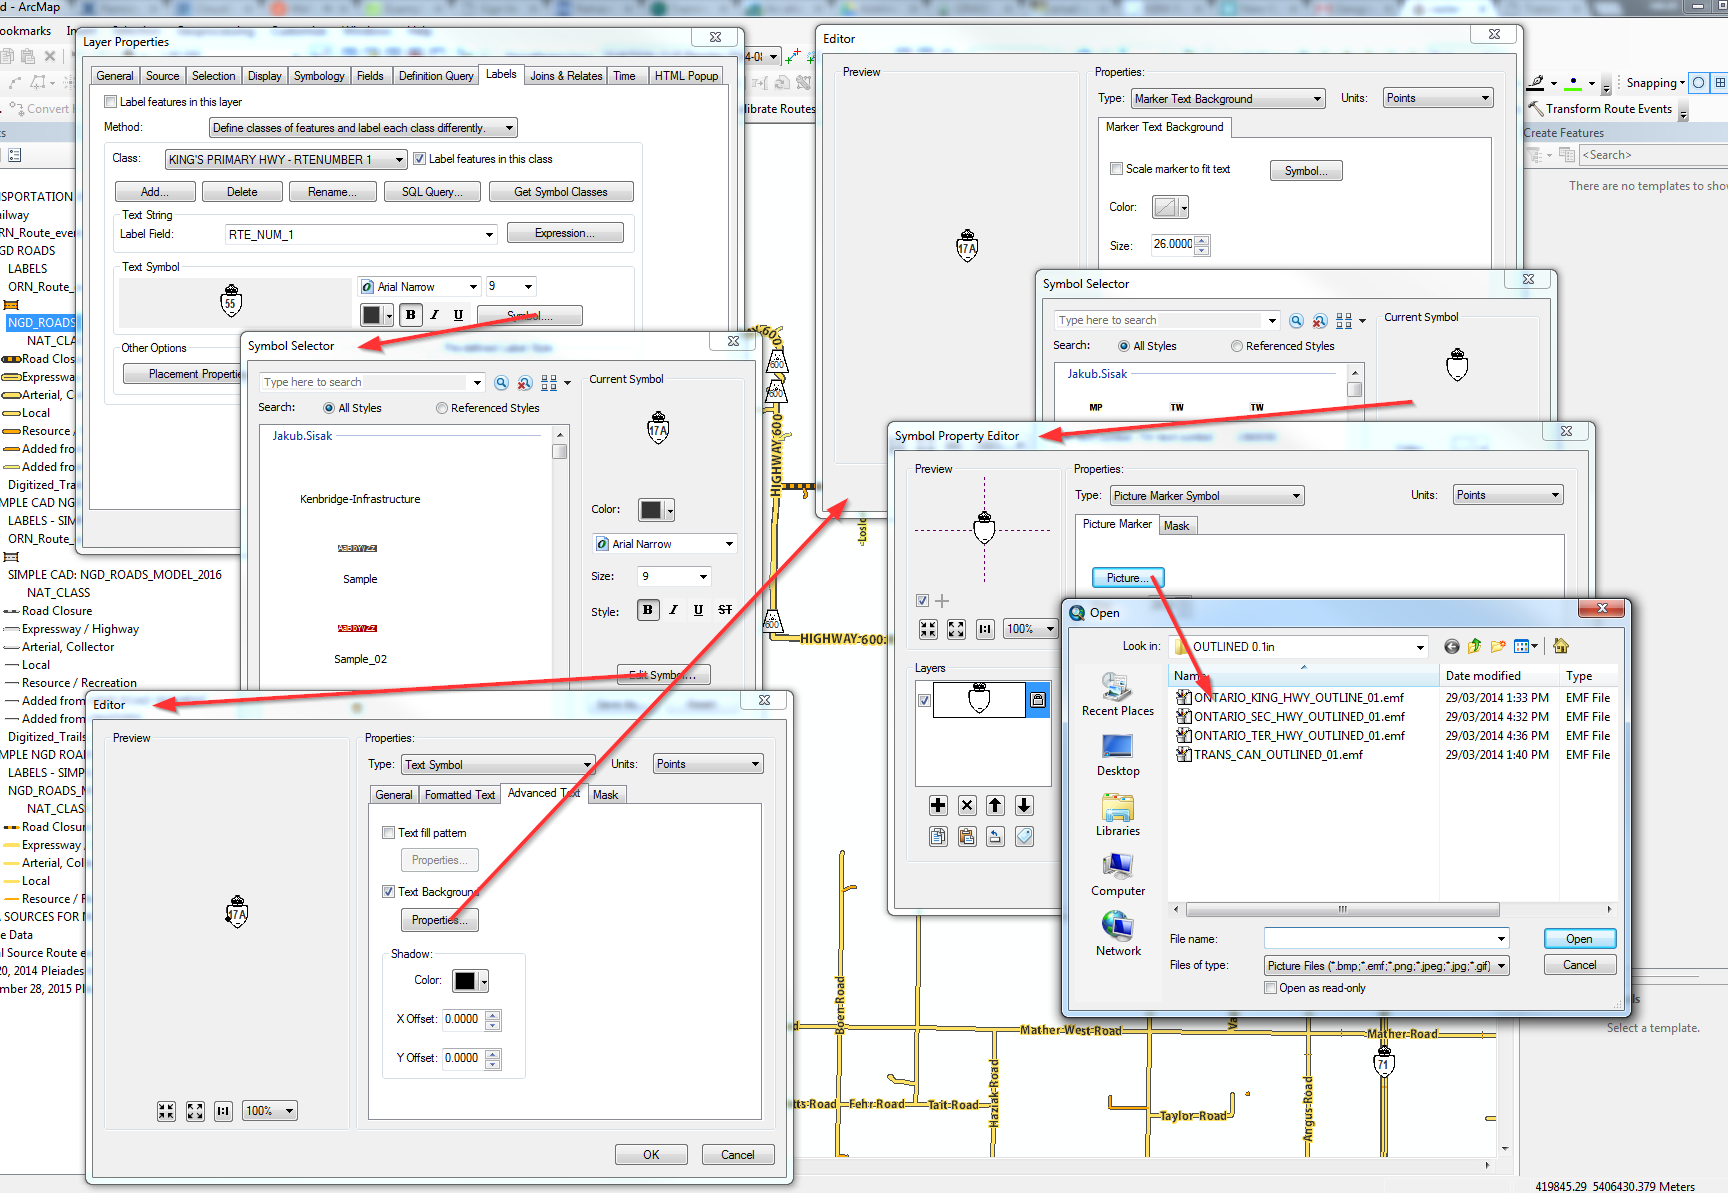
Add picture marker symbol, or use it from within layer Labels properties and choose the EMF for as a picture Marker symbol source. You may need to adjust size of the graphic.
You can add Vector EMF graphic to your layout as images as well but only 100% transparency is supported; background will be fully transparent or not at all, there is no way to make the graphic 50% transparent but this approach still works well for logos displayed over map or custom north arrows, etc. where you need to see content behind the graphic.
If those lines are vector lines (and not graphic lines as well) and you want to places those pictures onto them you can just add a point layer and put points where you need the symbol.
Then you use your picture as a picture-marker-symbol where you can set the background or transparent-color to no-color.
If you need special rotations you can put the angle into a column in your point layer and use this column for rotation in the symbology options.
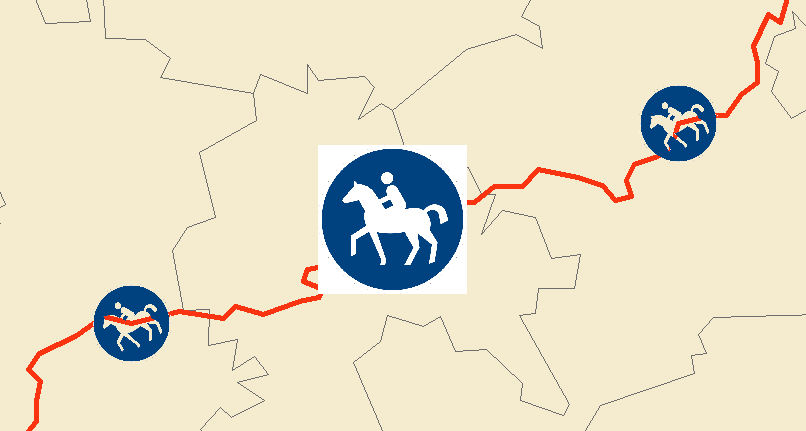
It will look similar to the following picture (graphic symbol in the middle, markers left and right). If this is not the outcome you need to specify your questions.
If you edit the image in Photoshop you can use the magic eraser tool to remove the white background. Any white space will become transparent so make sure you use the paint bucket tool in photoshop to color any white space you want to show as white as a slightly off-white color that won't be noticeable. Save the Image as a BMP.
Insert the image as a marker. You can change the marker type to picture fill symbol and select the image you have saved.
You can also right click the point you would like to symbolize in the table of contents, go to properties and the labels tab. Click symbol, edit symbol, advanced text, balloon callout, hit the symbol button, edit symbol, then in the drop down menu select picture fill symbol. From there you can select the BMP you created and use it to symbolize you points with the picture you created in photoshop.


