3

I am using ArcMap 10.0 and am confused by my Extract by Mask output rasters.

I hope to eliminate the black background from three Landsat ER Mapper images so that I can mosaic them. Originally I attempted to do this using the Clip function in the Raster Processing submenu, but saw via the Pixel Inspector that it was changing the raster pixel values. I then decided to use the Extract by Mask feature in Spatial Analyst, using rasters created from the original images themselves as the masks, and changing the Environment settings beforehand to use the mask raster as the Snap Raster and the output extent, and the original raster as the cell size.

When the Extract to Mask is completed and the extracted raster is added to the map, I see in the TOC on the left that the minimum value is changed. Further inspection reveals that the raster histogram is in fact altered. However, when I compare the original and extracted rasters using the Pixel Inspector I see absolutely no difference, which Raster Calculator confirms when I subtract the original from the extracted raster. Furthermore, in the Attribute Table when I select the rows of the extracted raster that are below the minimum in the original raster (have no count) and find them in the map, I see that their values in the identical original and extracted raster are indeed below the minimum (see image).
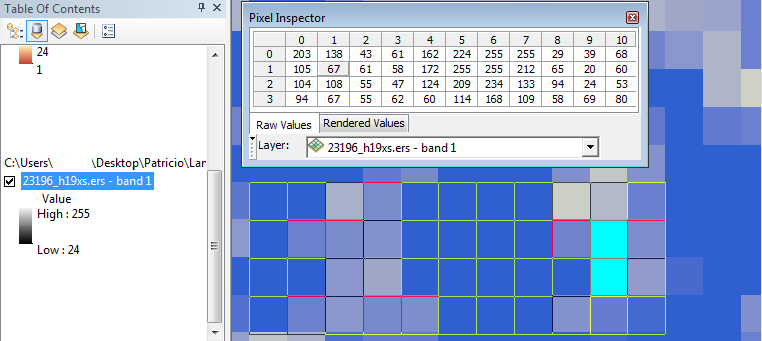
Example

I am stumped. I feel as if I am fundamentally misunderstanding something. Would anyone be so kind as to explain to me what is going on?

2
  • 1
    How was the clip tool changing the values? You sure it wasn't the symbology that was changing (since it is recalculated for the newly clipped raster)?
    – Taylor H.
    Commented Apr 15, 2013 at 15:31
  • It wasn't just the symbology, the values were distinct in the Pixel Inspector. This was the reason I started changing the Geoprocessing Environment settings.
    – GotsMahBox
    Commented Apr 16, 2013 at 17:22

4 Answers 4

1

Well, I am not an expert but I do use ArcGIS 10 to visualize my data. The scale on the left (min-max) is the scaling of the colorbar. You can manually edit it. (Right click and see options). As long as your value of pixels in the extracted image remains unchanged, you need not worry about the colorbar.

2
  • I was sort of figuring that "all's well that ends well". What has given me pause however is the fact that the attribute table is altered. As you can see in the picture I included above, the selected (highlighted) cells for both the original and extracted raster have values equal to or less than the original minimum. As this is just the symbology this wouldn't bother me normally, but in the attribute table for the original raster there are no values (i.e. the count is zero) for values 0-23. In the extracted raster this is not the case. Thoughts?
    – GotsMahBox
    Commented Apr 16, 2013 at 17:28
  • Did you fix it? What you say is weird. To sum up, your pixels values got changed when you extracted by mask? Is there any data conversion being done too?
    – Naresh
    Commented Apr 18, 2013 at 8:52
1

I'm not sure I'm understanding your question correctly, but here's a shot anyway. When using Extract by Mask to eliminate the "black background" in the images, you are most likely removing the only 0 values in the images. Is the change you're noticing a move from a Low of 0 to a Low of 24 as pictured in the image you posted? If that's the case, then the only change is the removal of the not-actual-data 0 values in the background. This seems most likely especially since you've looked at the actual data and have seen no difference. Hope that's on target ;)

0
0

You do not need to remove the black background to mosaic images. Are you using ENVI or ERDAS or ArcGIS to mosaic the images? you can simply find out the value of the black area, check if the no data value is the same for all your images, and specify that as your no data value when you mosaic your images. However, you might need to do histogram balancing so that you get a seamless mosaic.

0

I'll go out on a limb here and link this page: ESRI FAQ

Question

Why does the data bit depth increase when a raster is projected, rotated, or >clipped?

Answer

Pixel depth is increased to provide the space to store 'nodata' values. This allows changes, such as a shift or a mask, to be applied to the raster. Pixels within the new raster's bounding extent may need to be assigned as nodata to preserve data values and also keep a proper extent.

For example, values range from 0-255 in an 8-bit raster. If a nodata value is introduced, the bit depth must increased to 16-bit to store the nodata value, which would be the 257th value.

There are four other links on this FAQ page to three related FAQs and a relevant help topic page, as follows:

Your Answer

By clicking “Post Your Answer”, you agree to our terms of service and acknowledge you have read our privacy policy.

Not the answer you're looking for? Browse other questions tagged or ask your own question.